17 secrets to make your home look expensive
This post may contain affiliate links. If you make a purchase through one of my links, I may make a small profit at no expense to you. For further information, please view my policies.
If you’re on a mission to improve the overall look of your home in a BIG WAY but don’t have a pile of money available to do so, then definitely KEEP READING!
(OR … WATCH THE VIDEO!)
Today we are going to look at 17 WAYS to stylishly upgrade your space without having to spend a lot of money to get a huge bang for your buck.
Best of all, you can follow these tips and they will work with literally any interior design style that you want to take to the next level.
BUT WAIT! WHAT DOES AN EXPENSIVE INTERIOR EVEN LOOK LIKE?!

If you’re not really sure what “expensive” is supposed to look like, you can absolutely teach yourself simply by being observant: visit high-end store showrooms (think Restoration Hardware, McGee & Co, Crate and Barrel, etc). You can also just look at their websites, catalogs and Instagram accounts.
Other excellent sources of inspiration come from luxury hotels. Imagine your favorite one, or think about one you’ve stayed at in the past. What were some aspects that made an impression on you, that felt special? These are some of the things we want to tap into.
Look at the color schemes they use, the materials, the shapes of the furniture, the room layouts. Try to find common denominators, and also make note of what resonates with you on a personal level. These are the things you should be shopping for and the looks you should be trying to recreate in your own space.
Lastly, you can also look at how your favorite interior designers style their spaces. Look at all the same things mentioned above.
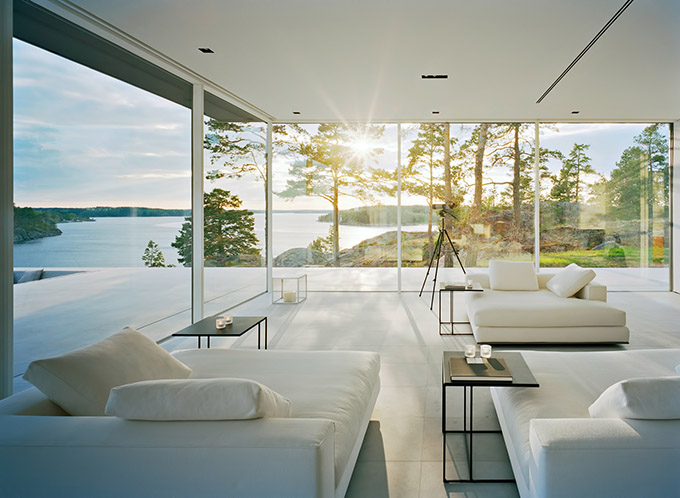
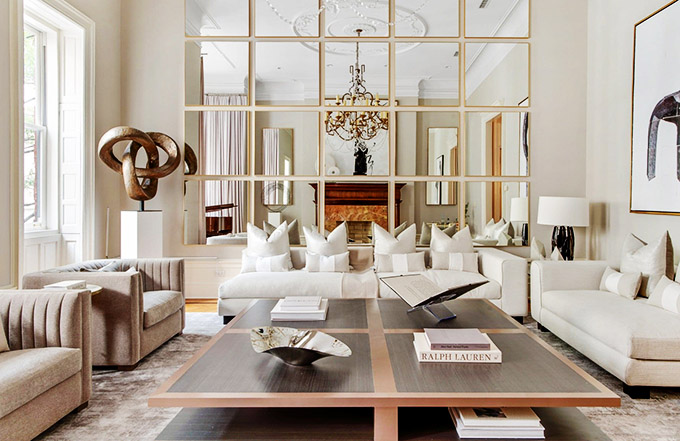
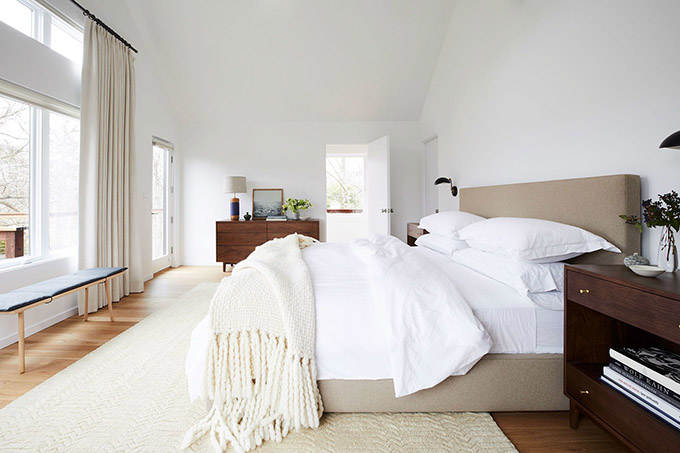
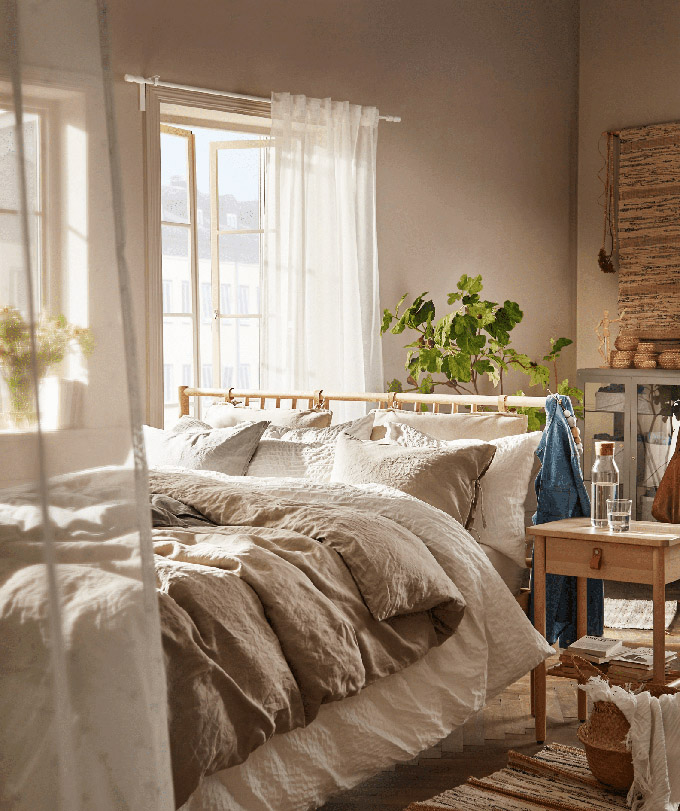
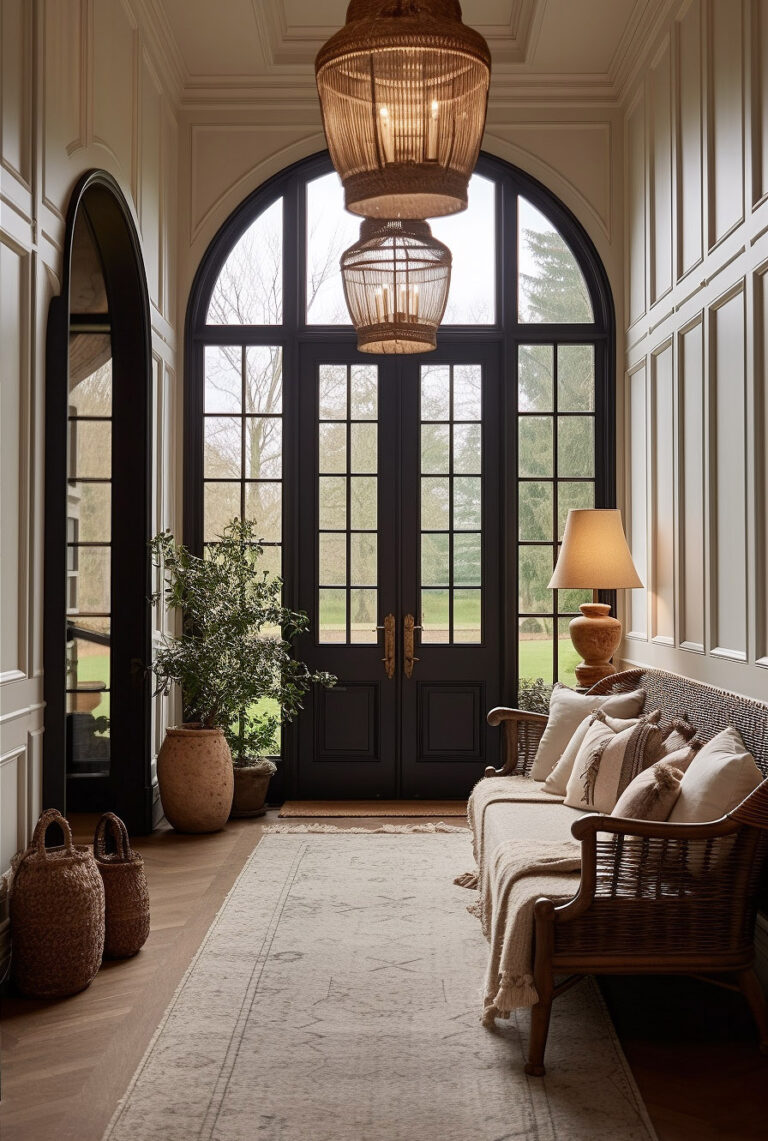
1. Perfect your window treatments
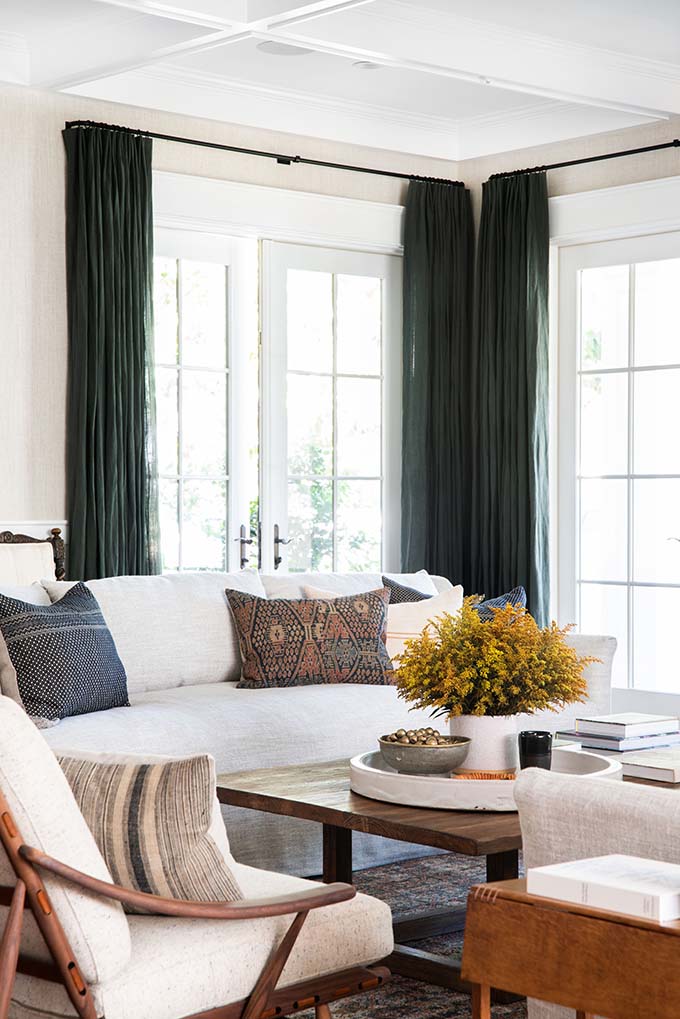
Full-length curtains make a space feel much more custom and luxurious. But more importantly, hanging your curtain rod high will make your ceilings look higher, and high ceilings are definitely associated with luxurious interiors.
If you are using curtains, make sure you hang them full length and hang the rod wide and high. Also, make sure your curtain panels are wide and have a good amount of fabric so they create lots of folds: this will make them look more luxe.
I’ve talked about curtains extensively here, and in these videos here and here, so be sure to click on those links if you want more juicy details on how to nail your curtain game!
Short curtains are a big no-no, so if for whatever reason you can’t go long, then opt for roman shades or beautiful woven blinds instead (no plastic or flimsy metal blinds, please!). If you’ve got those cheap metal blinds with kinks in them, those have got to go.
2. Add mouldings

There is no denying that adding mouldings to a home is a relatively easy and affordable way to make your home look much more custom and expensive. It’s on every list out there.
But one thing that people tend to forget to mention with this tip is that before you start slapping up a bunch of mouldings, you should take into account:
a) the style of your home
b) what furniture and items you already have in your home.
A more ornate, intricate moulding stylistically looks great in an older builds, but it probably won’t fit in well in a contemporary build, which tend to be sleeker and more streamlined. You’d probably want to opt for a clean, modern moulding that is more appropriate to the age of the home.
If you’re looking for guidance on what kind of moulding would work well in your own home, one tip is to look at what kind of casings are being used around the doors and windows. Are they very simple, or ornate? It’s a good indication of what style moulding will work with the rest of your home.
If you are still having problems deciding, just go with a traditional moulding if you prefer traditional furniture and decor styles, and go with modern (cleaner) mouldings if you’re more into contemporary or minimalist furniture and decor styles.
Good trim work is supposed to blend into the room to the untrained eye. If it’s too in your face, it probably means it’s not well proportioned to the size and shape of the rest of the elements in your home (such as windows, doors and height of the ceiling).
3. Add wall treatments
Similar to adding mouldings, adding some architectural interest to your walls can make a huge difference to the look and feel of a room. Something as simple as adding shiplap, beadboard, or a wood slat wall, can elevate a space from being plain boring to being dimensional and intriguing.
If you don’t want to build in architectural interest, then you could also just use wallpaper.
Boldly patterned walls can definitely create an upscale look, so if you’re looking to give a room a major facelift, wallpaper could be a great place to start.
Use peel and stick if you’re renting or don’t feel like putting up with the hassle of using glue (or if the permanence of real wallpaper scares you – I don’t blame ya!).
I always like to suggest trying this out in smaller spaces like powder rooms as it feels less intimidating and gives you a lot of bang for your buck.
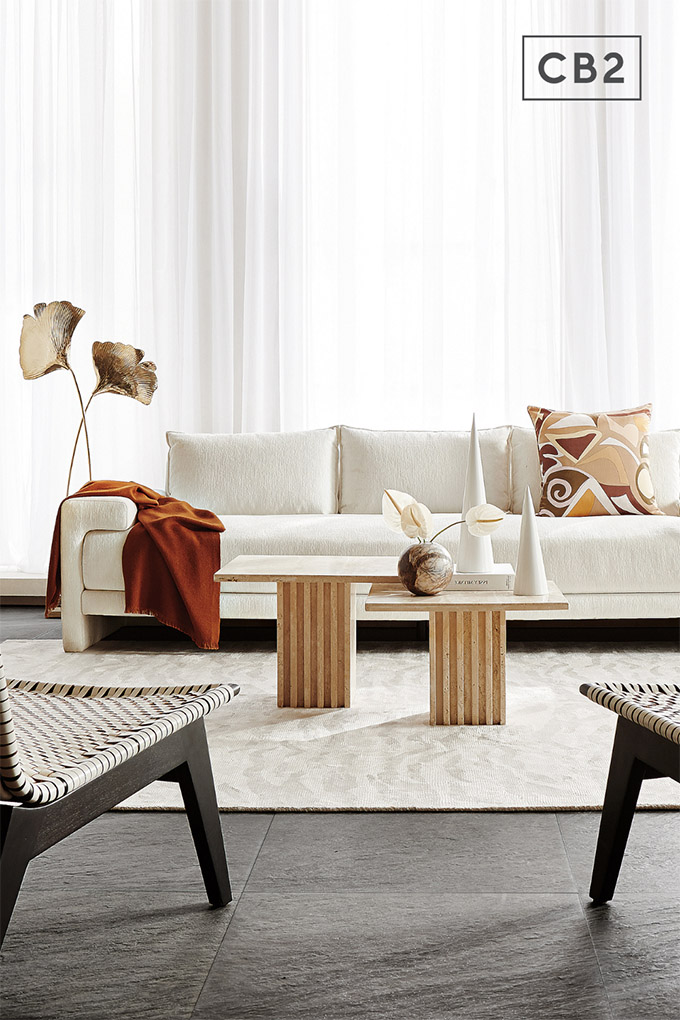
4. Use a neutral base
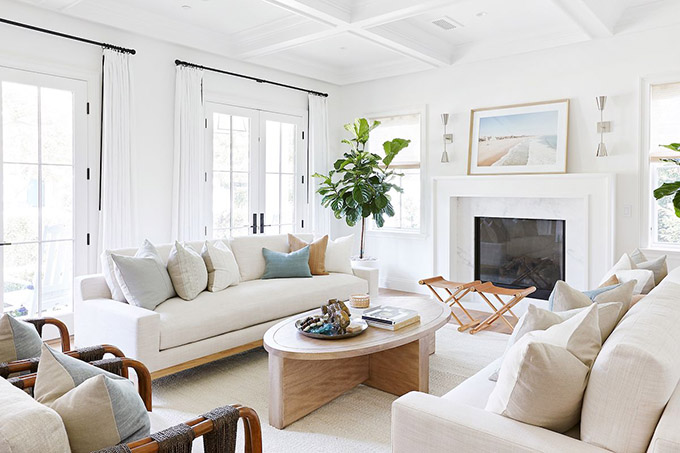
A great way to ensure you’re in keeping with the luxury look is to make sure your large, base pieces are neutral-toned – so think white, off-white, cream, taupe, beige, grey. A lot of high-end spaces will use neutral furniture and then will bring in accessories and textiles for pattern and color.
This will even save you money in the long run – it’s much more cost-effective to swap out throw pillows, blankets, prints and even rugs, rather than buy new sofas and furniture every couple of years.
If you are stuck with an ugly or outdated sofa in a color that isn’t exactly what you would consider high-end, but you don’t have the budget for a new one, there are options…
You can a) look at getting it reupholstered b) get a slipcover c) just try to cover it with solid blankets and throws – not ideal but will work if you’re in a pinch.
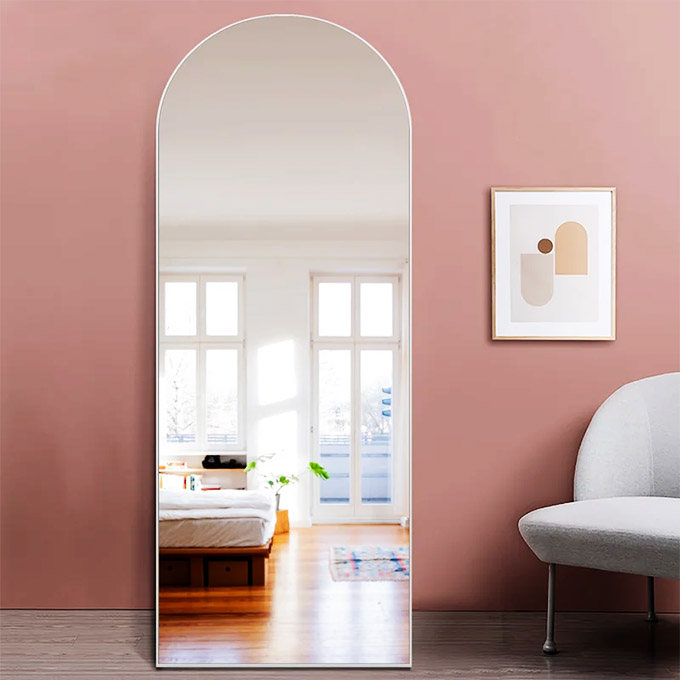
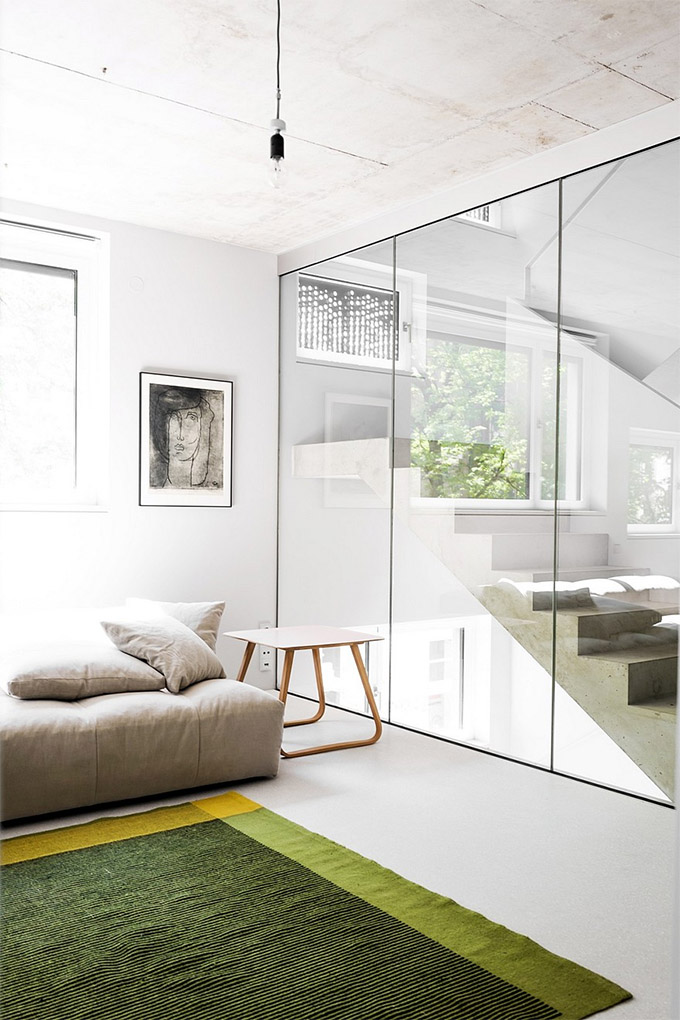
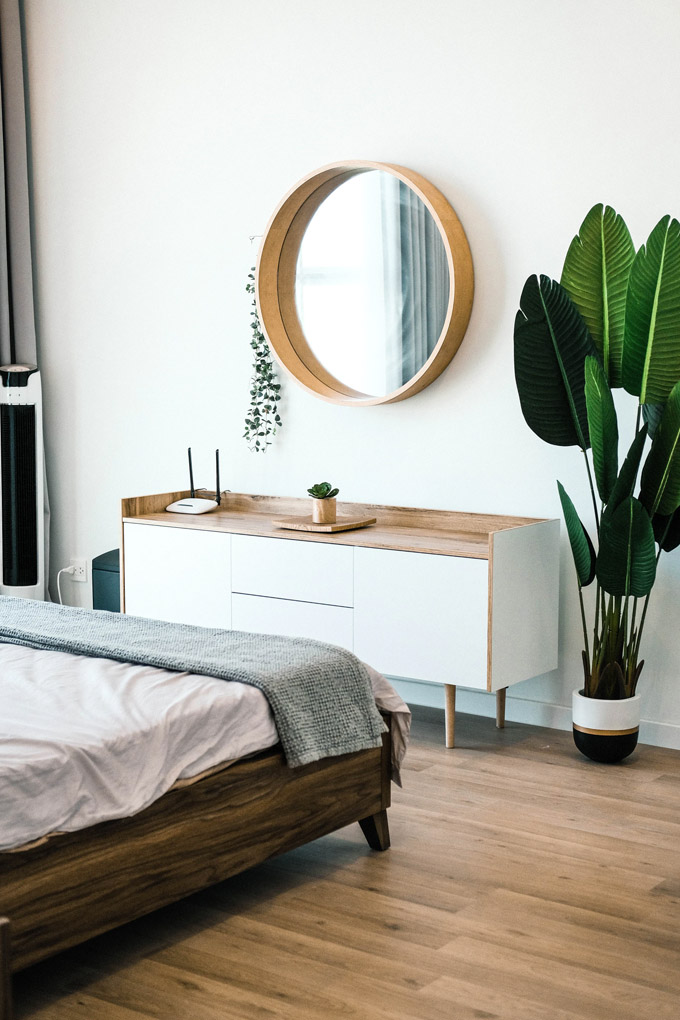
5. Maximize space and light
Want to increase your square footage without renovating? Hang a mirror! Of course, the increased space will only be an optical illusion, but hanging a well-placed mirror can truly make a room feel not only bigger but also brighter, since it will reflect any light that hits it.
Ideally you’d be hanging your mirror across from or near to a window in order to bounce as much light around as possible.
TIP: In general, I would recommend always going as large as you can with a mirror. I’m particularly fond of large, full length mirrors that you can just lean against the wall (no need to hang, woohoo!). I just bought the one pictured below and put it in my hallway – it was a steal at only $199!
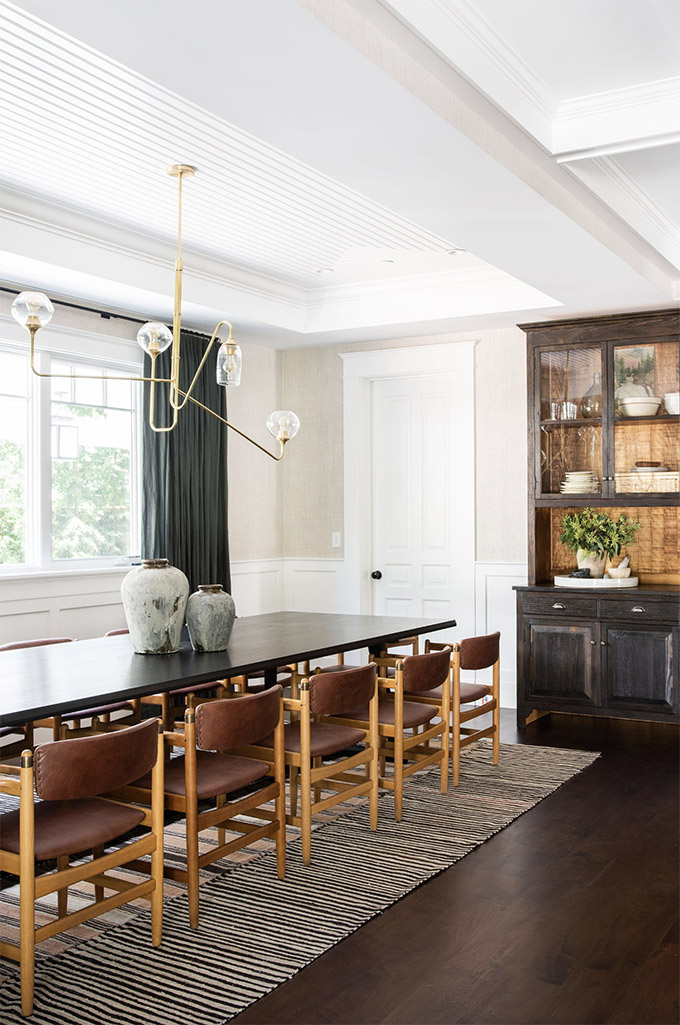
6. Add a vintage rug
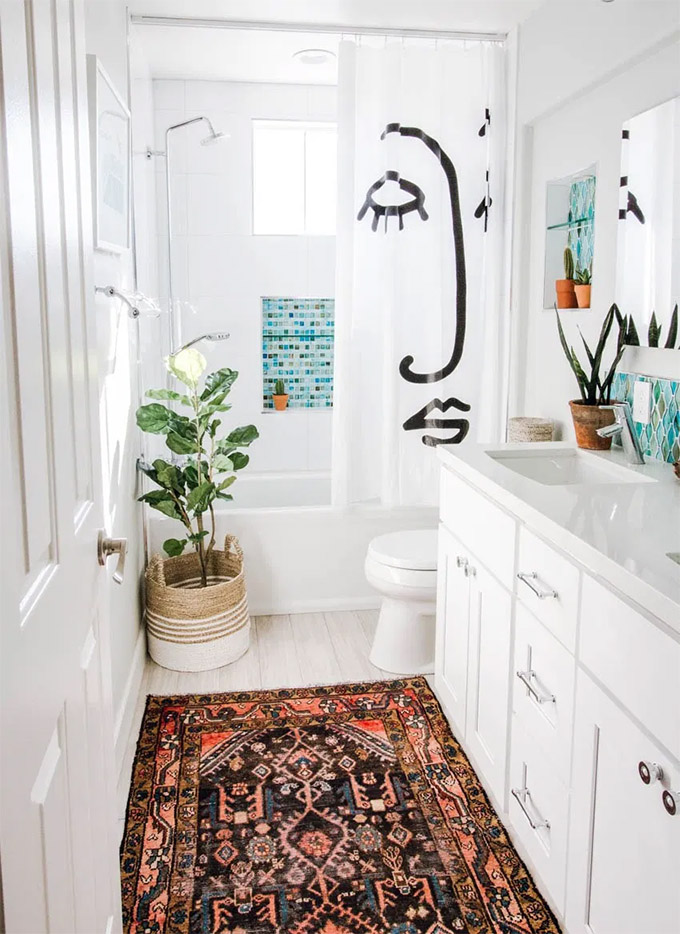
The addition of a vintage rug is literally an instant upgrade wherever you put it. Contrary to what you may think, vintage rugs are *not* always super expensive, you just have to shop around.
If you can find a vintage rug that you truly love, they are 100% worth every penny and they will elevate your space in a way that not a lot of other items can. I’ll be doing a round up very soon of all the best places to buy vintage rugs, so be sure to check back soon!
If you can’t swing a vintage rug, or maybe you can’t find one that you like, you can always look at getting a vintage “style” rug (aka new). Brands to look out for that do vintage style rugs are called NuLoom, Loloi, etc. I’m sure you’ve seen them.
As with artwork and mirrors, generally with rugs, the bigger the better – you really want to make sure you are getting the size of your rug right. You’re better off not using a rug if it’s going to be too small, as it will completely throw off the look and feel of your room!
Standard rug sizes are:
- Bedroom king bed: 9 x 12
- Bedroom queen bed: 8 x 10
- Living room: 8 x 10, 9 x 12, 10 x 14
- Dining room: 6 x 9, 8 x 10, 9 x 12
If your rooms are smaller, and you need to go for smaller scale rugs, just make sure that the front legs of your furniture are on the rug.
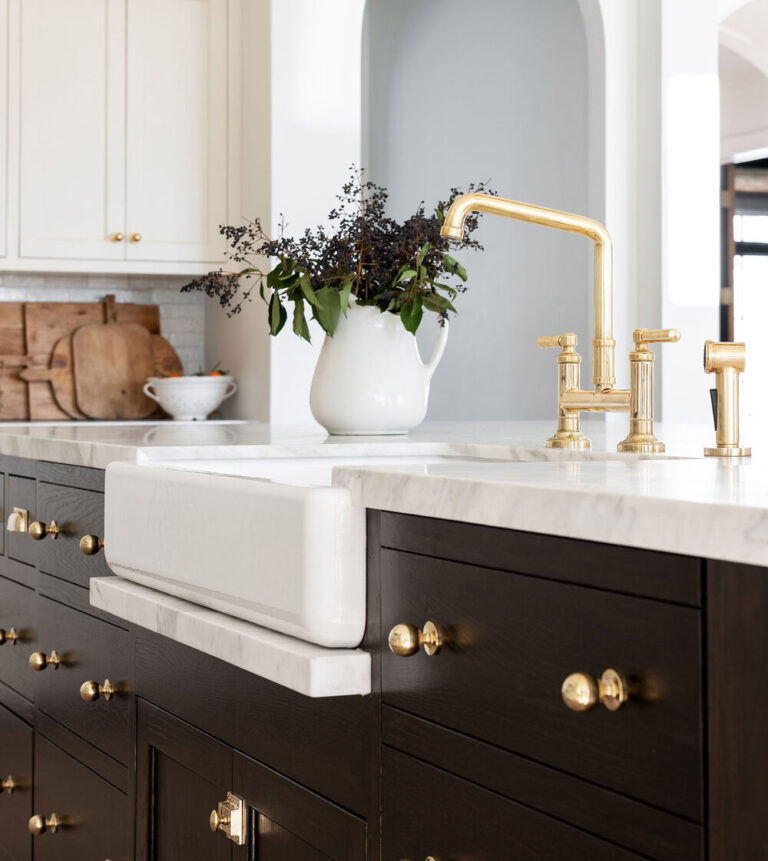
7. Update your hardware
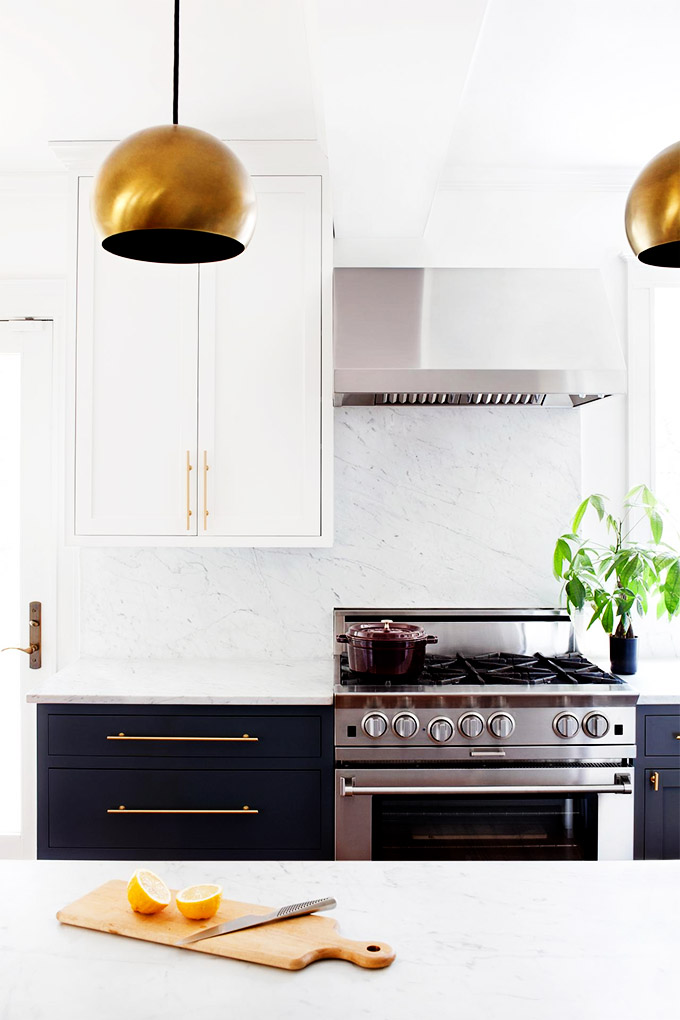
This tip may seem obvious, but it’s one of the most effective upgrades you can make to a space, especially when a full reno is off the table.
The rooms this will have the most impact in are definitely the kitchen and bathroom, where you could upgrade the faucets and cabinet hardware to give your space a completely fresh and new feel.
But upgrading your hardware can also mean swapping out doorknobs, light plates, plug covers, curtain rods and furniture knobs.
You don’t even necessarily need to buy new fixtures – let’s say you are dreaming of a matte black finish – you could easily buy a can of matte black spray paint (this one is my favorite) and just spray your fixtures. Brand new look for about $5? Yes please.
These small details can make an enormous difference to a room and are not at all expensive, especially if you shop around.
The bonus with this tip? It’s FAST. It doesn’t take more than an afternoon to upgrade most hardware in a room.
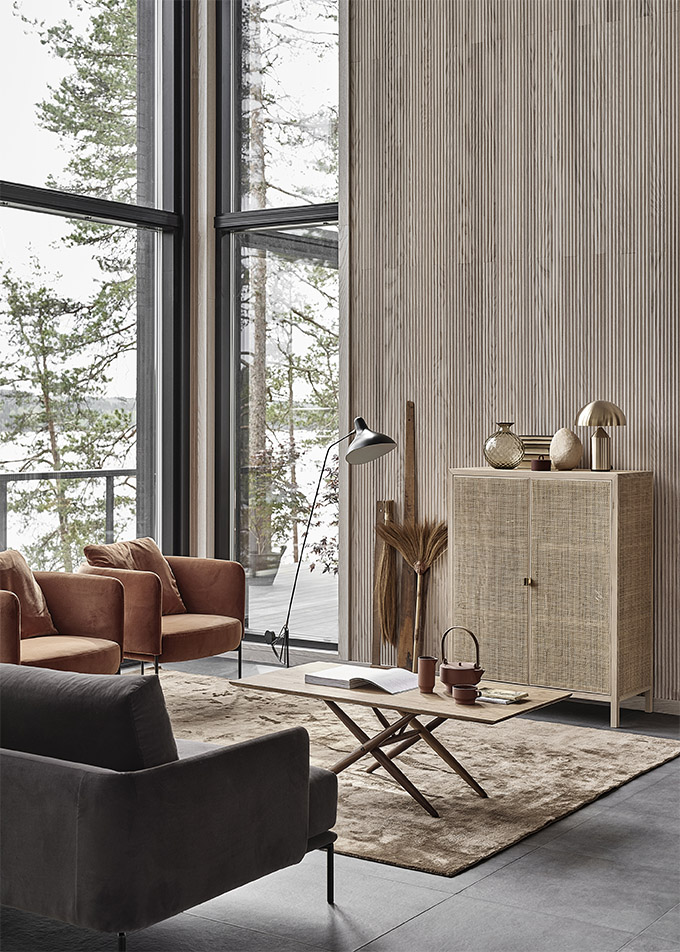
8. Use fresh flowers, plants and greenery
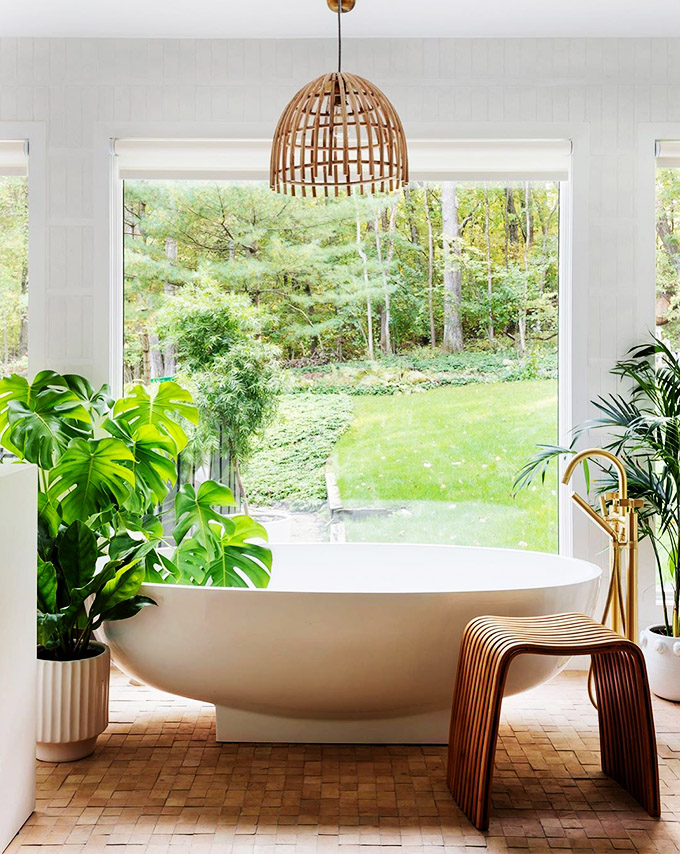
Another classic tip: use house plants to fill out empty corners and bring life to your home. Just make sure your plants are large enough to fill the space they are in. A large plant in a statement planter can look very high end, but if the plant and pot are not scaled proportionately, the look will not have the effect you want.
If you don’t have the greenest of thumbs, or you don’t like to keep a lot of house plants, you can buy bouquets from the florist or even the grocery store and display them around your home.
A good trick to stretch one bouquet is to separate it into a few smaller ones and sprinkle the arrangements throughout your home. It makes it feel more naturally placed within the home, and not like you bought a bouquet as a special occasion to put on display.
If flowers feel too over the top or are pricey where you live, then just go outside with a pair of scissors and clip some fresh greenery from a bush or a tree outside. Display it with intention in a statement vase and it will look absolutely stunning. This is one of my favorite ways to bring greenery indoors. Not only is it super affordable (aka free) but I love the simple, pared back look.
9. Keep things clean
I think we’ve all had the experience at least once of walking into a hotel room and finding a smudge or a hair, or some dust, and being irritated, annoyed or downright disgusted by it. It doesn’t feel good. So why would that be ok in your own home? Just because it’s your hair in the bathtub, it doesn’t make it more pleasant to look at, ha. 😅
There is no point in having furniture worth thousands of dollars, or spending piles of money on expensive home renovations, if you’re not going to keep your home clean.
Doing chores sucks, I know! But there are small ways to make it easier on yourself. For example, I use a robot vacuum because I hate vacuuming. I put it on a schedule and it takes care of the rest.
Also, last year I finally moved to an electric mop. ** I think I was late to jump on this, but it just never occurred to me to upgrade until my friend made fun of me for using an old school mop and bucket, lol!
**Update 2023 – my new robot vacuum that I LOVE, actually has mopping built in so I don’t even need to use my electric mop anymore – it’s been LIFE CHANGING!
I also try to wipe down the kitchen every night before going to bed, that way it never gets crazy dirty because you stay on top of it. It only takes a few minutes. My husband and I take care of the dishwasher on rotation, and I always take care of washing all the clothes and he always folds. Divide and conquer if you can!
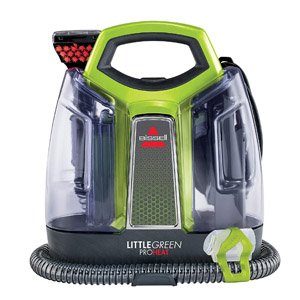
One example of a life saving item that I invested in is a Bissell spot cleaner for carpet and rugs. While I may not use it every day, or even every month for that matter, every time I *do* need it, I thank my past self for buying it.
If you have kids and pets, you’ll know that accidents happen. Now, every time something spills or a pet has an accident, I just use my carpet stain remover. And within moments all the anxiety about stains vanishes. For me personally this makes it 100% worth it.
CLEANING STUFF I CAN’T LIVE WITHOUT


10. Declutter
Here’s the thing: it’s going to be a LOT easier to keep everything clean if you declutter first. The fewer things you have, the easier it is to stay on top of things.
I know it’s hard to part with things you’ve spent your hard-earned cash on. Or maybe sometimes it’s items that have sentimental value. But take a hard look at what you own and ask yourself whether you really need that item. Does it really serve a purpose in your life right now? Does it make you happy? Going through this process will hopefully also make you become more intentional about what you buy in the future.
There are many different looks when it comes to “luxury” interiors, but one common theme between them all is that luxury spaces are never cluttered. So regardless of what kind of luxury style you’re going for (whether it’s glam, minimal, mid century etc), make sure you strip back what is unnecessary and strive for that same feeling in your own home.
If you’re feeling overwhelmed and need a little guidance with which items to declutter, check out this post. I even made a checklist that you can download, which you might find helpful!
11. Maintain and take care of your belongings
Besides general cleanliness, it’s also important to actually take care of the things you already own!
Generally, anything that is well maintained will automatically feel more premium, which is why new stuff always feels so nice. It’s also why you feel better about yourself when you get your hair or nails done. It’s the same thing with your home. It needs care and when it gets it, it makes everyone feel better!
So: make sure you are keeping your rugs and carpets clean, your furniture polished, mending any dents or scratches if you can, replacing cracked tiles, cleaning your grout, patching holes in the wall, repainting if you need to. There is more but you get the idea.
Sometimes this means going out and buying a special product. For example, for YEARS, I stressed about the stains on my glass cooktop. I thought I had ruined it permanently until I finally just sat down and did some research. “Specialized” products feel a little gimmicky to me a lot of the time, but this time it paid off. I found a special product made especially for glass and ceramic stovetops that I decided to try out, and it makes my glass cooktop look like new every time.
For me, that is PRICELESS.
Yes I had to go out of my way to research what to use and maybe I even spent a little more for the product, but it’s 100% worth it. There’s nothing that irks me more than stubborn drips and stains that make a surface look dirty (even if I know it isn’t!!). It’s those little things that make a huge difference to me.
Maintenance can feel like a lot of work, but if you make sure to stay on top of these little tasks so that they don’t add up, it will never be overwhelming. And you will get to benefit from living in a home that has a much fresher, put-together feel to it, which consequently, makes it feel more expensive.
12. Lighting is everything
I know, it’s been said so much that it’s basically a design cliche’. But if there is one thing you *must* look at with a critical eye in your space when trying to make it look expensive, it’s your lighting.
Of course, lighting has a lot more to it than being just about seeing – it’s also about establishing a mood in a space.
RELATED POST: 16 GORGEOUS & BUDGET MINIMALIST STYLE FLOOR LAMPS!
The goal with your lighting is to create focal points, pools of light and areas of interest in your home.
Here are some tips to consider when you’re assessing your lighting:
- adding an oversized pendant light is usually always a good idea, especially over a kitchen island, dining area, in a hallway or in the bedroom
- bedside table sconces hung on the wall above the night tables pretty much always look chic – make sure the sconces match
- use warm lightbulbs and dimmers whenever possible
- if you use smart lights, try connecting motion sensors to your lights
Another tip when lighting luxury spaces is that there is usually a mix of different types of lighting: recessed, hidden strip lights, ambient and general lighting, task lighting, uplights, downlights, etc, etc, etc.
Moral of the story: do not skimp on your lighting, as this can instantly undo a lot of your hard decorating work!
13. Go big with wall art
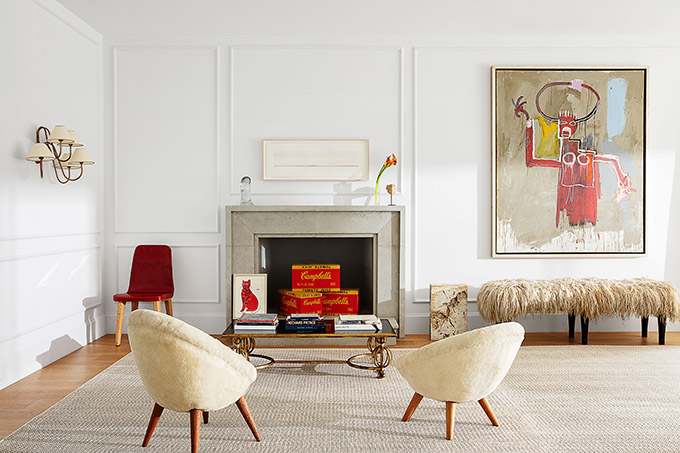
Large art pieces command attention, become a focal point and look more like what you would see in an actual art gallery.
For a luxury look, always opt for large scale art pieces rather than small ones. The same applies to the size of your gallery wall if you’re creating one. No itty bitty gallery walls, go big!
There’s no question about it – artwork can get expensive, but there are definitely ways to find affordable artwork for your home.
- you can DIY your own art (watch how I paint my own abstract art!)
- check places like Homegoods (Homesense in Canada)
- buy printables (digital files) and have them printed on the cheap at places like Staples and frame them with inexpensive IKEA frames
14. Use down-filled pillows
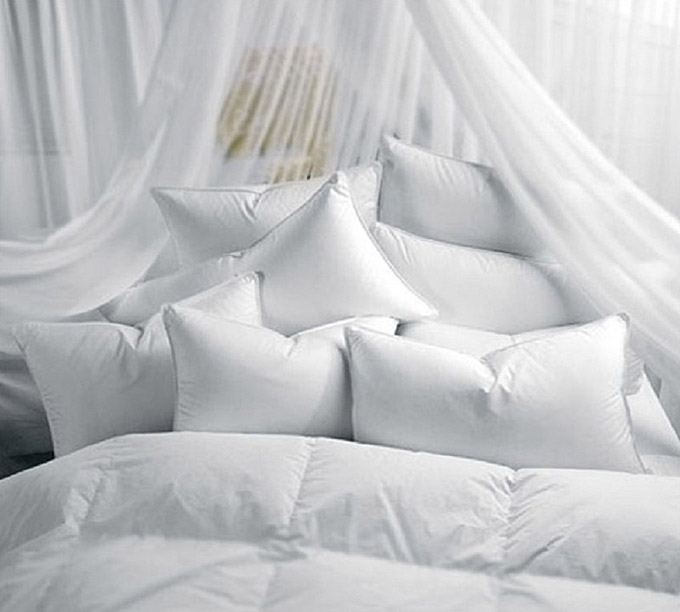
Flat, shapeless pillows are NOT luxe. But luckily, this is an easy fix.
A relatively inexpensive upgrade you can make to your room is to switch out any poly filled pillows to down pilled pillows.
I know down is not for everyone – some people have allergies and there is concern about animal welfare. Down is my personal preference because I think it looks and feels much nicer than synthetic fillers.
My go to place for down filled pillows is hands down IKEA. IKEA is very good about sourcing cruelty-free down – all their duck down comes from sources where there is no live-plucking or force-feeding, plus they set additional animal welfare requirements based on the Responsible Down Standard.
I own multiple IKEA down throw pillows, down bed pillows and their big euro pillows. I also have a couple of their down duvets. Besides being incredibly well-priced, they’re all fantastic quality, they keep their nice plump shape and are super comfortable.
15. Keep your linen looking fresh
Ratty towels are a no. Stained sheets are a no. Torn sheets are a no. Do yourself a favor and get yourself new linens if yours are looking tired. You deserve it!
Another tip is buying white sheets and towels, it’s just easier to keep them clean because you can bleach them. White linens also generally looks more high end.
Removable white sofa covers are another life saver because they can be bleached and come out looking like new after every wash.
Check out my favorite places to buy luxurious linen bedding right here!
16. Use two duvets
There is a lot to be said about how to make a bedroom look and feel luxurious, and a lot of it revolves around the styling of the bed. Makes sense, since it’s the focal point of the bedroom.
So, if you want your bed to look extra luxurious, try layering 2 duvets. You can either put them both in the same duvet cover, and it will look like you have an extra fluffy, puffy duvet, or you can use two separate coordinating duvet covers. Pair this with nice plump king sized pillows and a few throw pillows and your bed will look like it came straight out of a luxury hotel!
And here’s another bedding tip: make sure you cover your whole mattress with your bedspread/duvets/whatever is on top of your bed. There is nothing that looks less luxurious than too small or ill-fitted bedding.
17. Scent
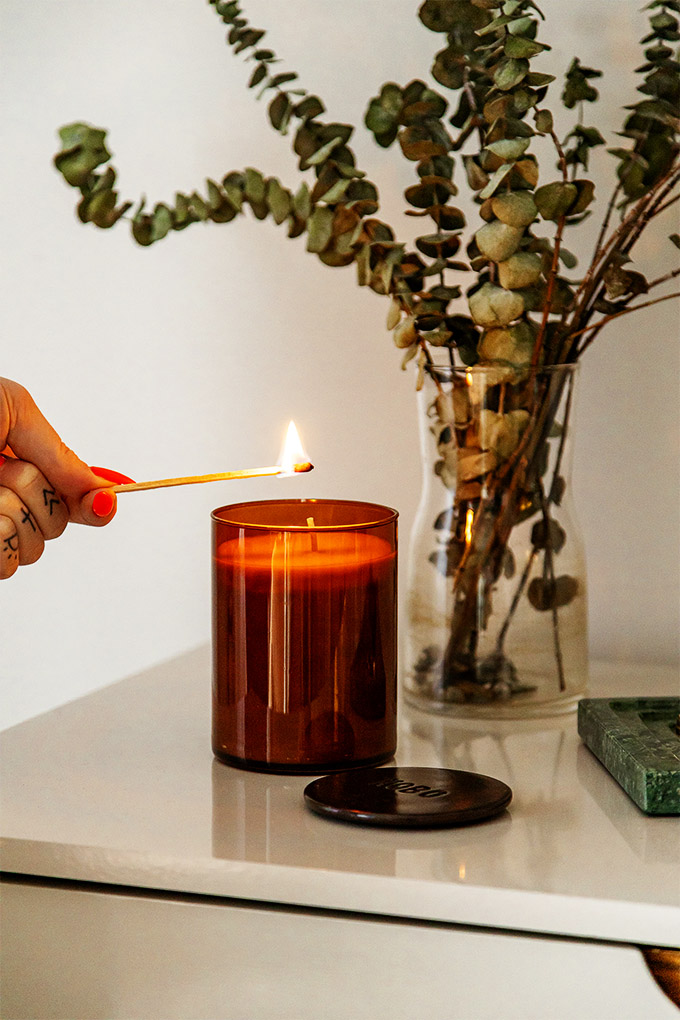
One extra way to really elevate your home that goes beyond just the look and feel of it, is by making it smell good.
If you’ve ever been to a really fancy luxury resort, you may have noticed that a lot of them use beautiful, subtle, expensive smelling fragrances in the rooms and in areas like the common restrooms.
Not all hotels and resorts opt to do this because a lot of people are fussy or sensitive to smells. If you are concerned about scent sensitivities you can skip this tip.
However, I am a firm believer that appealing to ALL the senses will help create a more luxurious, integral, and overall more memorable experience.
There are several ways you can integrate scent into your home:
- scented candles (my favorite method)
- wax melts
- incense
- wall diffusers
- simmering delicious ingredients on a stovetop
Have you tried any of these tips? Which ones do you swear by? I hope you found something useful in today’s post and that you can get one step closer to creating the home of your dreams!


So helpful