9 IKEA IVAR Hacks to Make Your Cabinets Look Expensive
This post may contain affiliate links. If you make a purchase through one of my links, I may make a small profit at no expense to you. For further information, please view my policies.
The Best IKEA IVAR Hacks for Every Decorating Style
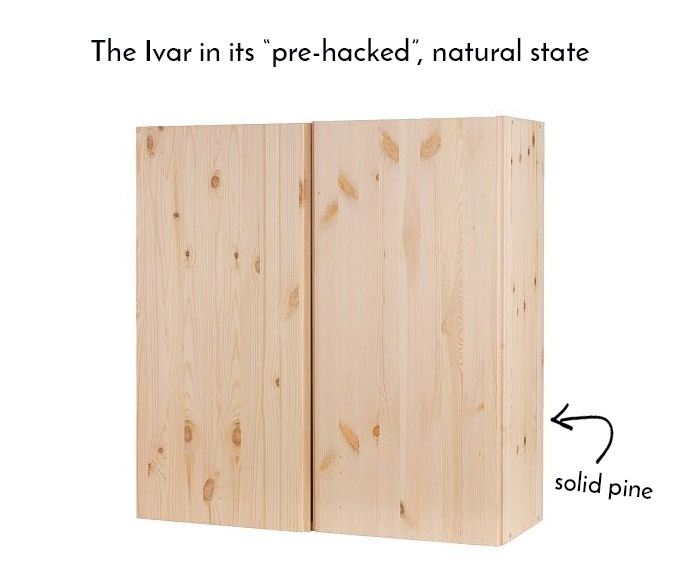
The IKEA IVAR cabinet has become one of the most popular pieces of IKEA furniture to hack, and it’s easy to see why. Made from unfinished solid pine, it’s affordable, incredibly versatile, and can be transformed into furniture that looks completely custom!
From sleek Scandinavian sideboards to fluted statement cabinets and built-in storage, IVAR has become a favorite among DIYers and interior designers alike.

In this roundup, I’ve gathered my favourite IKEA IVAR hacks to inspire your own project, along with practical ideas you can borrow to recreate the look in your own home.
Why the IKEA Ivar Cabinet is perfect for hacking

There’s a reason the IKEA IVAR cabinet has become a favourite among DIYers and interior designers. Unlike many IKEA pieces made from laminate, the IVAR cabinet is crafted from unfinished solid pine, making it one of the easiest pieces of furniture to customize. Whether you want to paint it, stain it, add trim, or completely transform its appearance, the unfinished wood provides the perfect blank canvas.
Another reason the IVAR is so popular is its simple, timeless design. With clean lines and a sturdy construction, it can be adapted to suit almost any decorating style, from Scandinavian and Japandi to traditional, coastal, and modern farmhouse. A few thoughtful upgrades can make it look like a much more expensive custom cabinet.
If you’re planning your own IKEA IVAR makeover, the ideas below showcase just how versatile this affordable cabinet can be. Whether you’re looking for a quick weekend project or a more ambitious transformation, these hacks prove that a little creativity can completely change the look of this IKEA classic.
10 IKEA IVAR Hacks You’ll Want to Copy
One of the things I love most about the IKEA IVAR cabinet is how incredibly versatile it is. Its simple design makes it the perfect blank canvas, whether you prefer modern, Scandinavian, coastal, farmhouse, or even traditional interiors. Some of these ideas take just a few hours to complete, while others require a little more DIY effort, but every one of them transforms the basic IVAR cabinet into something that looks far more custom than its price tag suggests.
From painted finishes and cane doors to clever storage solutions and designer-inspired details, these are some of the most beautiful IKEA IVAR hacks I’ve come across.
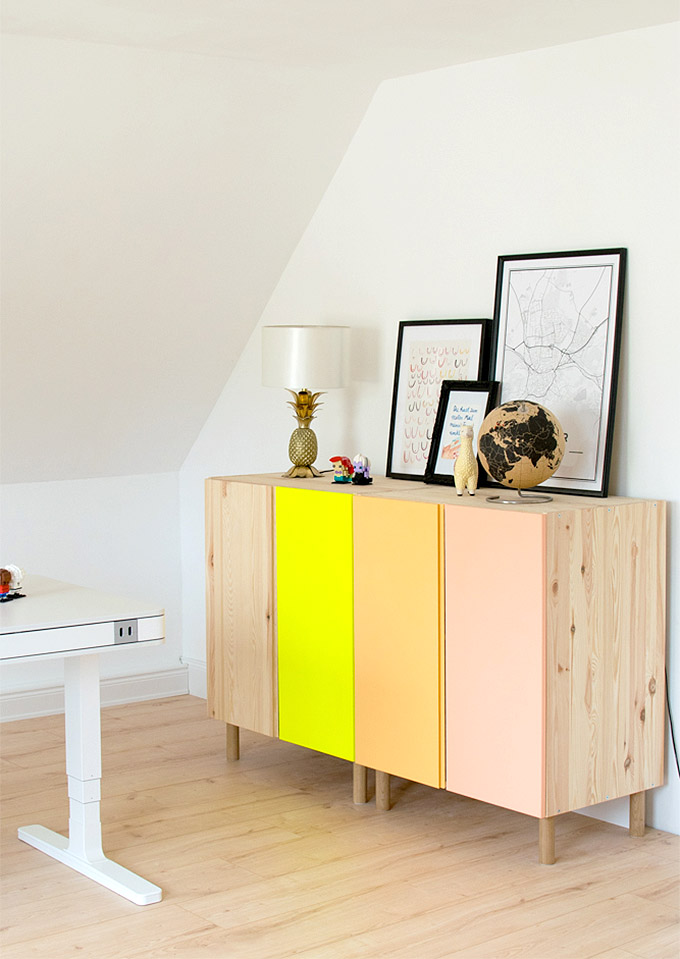
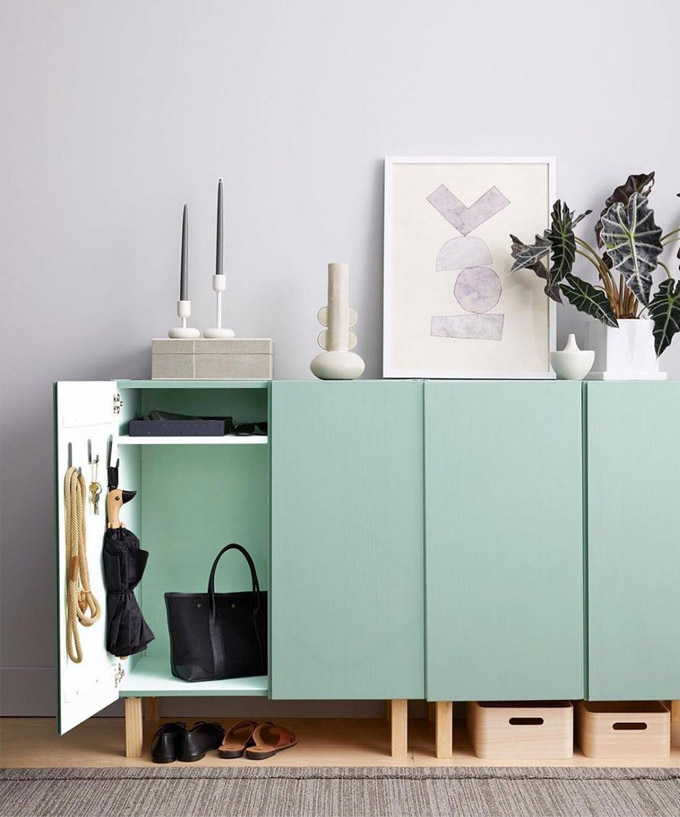
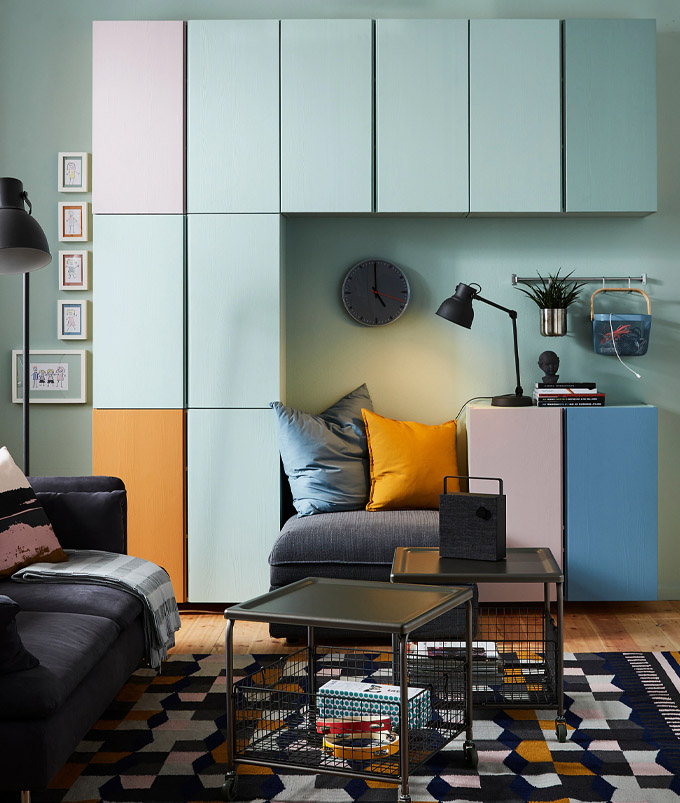
1. Paint Your IKEA IVAR Cabinets
If there’s one IKEA IVAR hack that delivers the biggest transformation for the least amount of effort, it’s painting it. Unlike many other IKEA cabinets that are made from laminate, the IVAR cabinet is crafted from unfinished solid pine. That means it accepts primer and paint beautifully, making it one of the easiest IKEA pieces to customize.
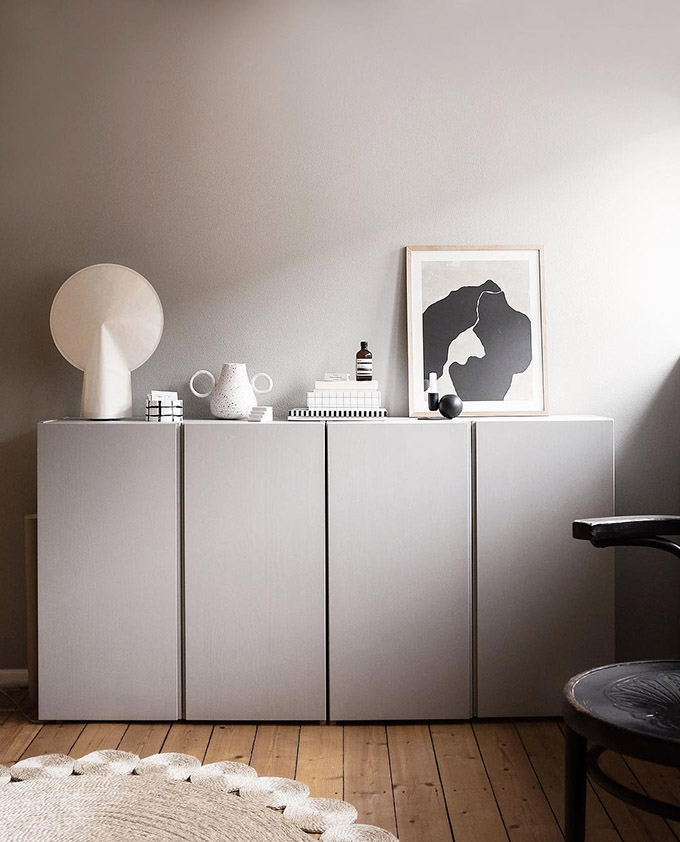
Whether you’re after a sleek modern sideboard, a soft Scandinavian look, or a bold statement piece, paint gives you complete freedom to match your cabinet to your home. Earthy greens, warm creams, charcoal, deep navy, and even color-drenched finishes where the cabinet matches the wall color are all popular choices that can make an inexpensive IKEA cabinet look surprisingly high-end.
The beauty of this hack is that it doesn’t require advanced DIY skills. With the right primer, cabinet paint, and a little patience, you can completely transform the look of your IVAR over a weekend. If you’re new to painting IKEA furniture, I recommend reading my guide on How to Paint IKEA Furniture before you get started, where I walk through the process step by step.
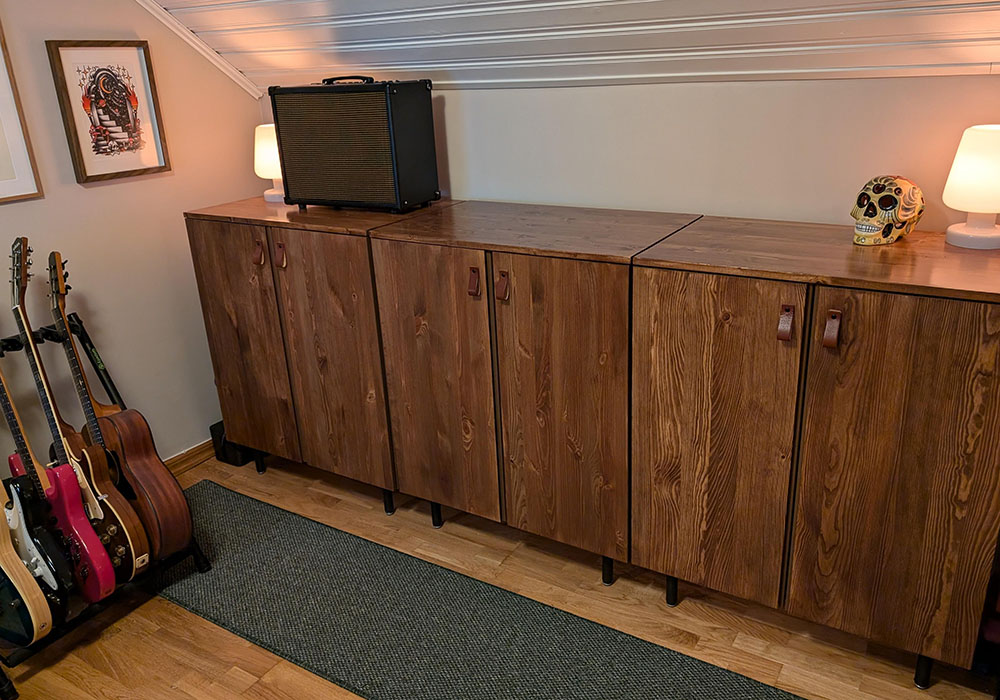
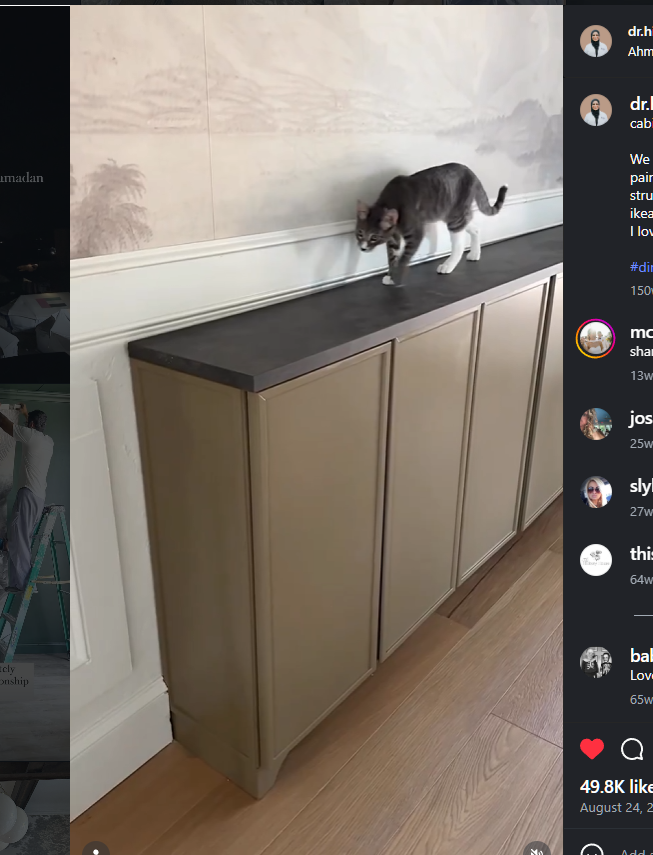
2. Add Legs to Your IKEA IVAR Cabinet
There are no legs included with the IVAR, but the good news is that you can easily add some. Adding legs is one of the easiest ways to make the IKEA IVAR cabinet look less like a basic wooden box and more like a finished piece of furniture. Lifting it off the floor also gives the cabinet a lighter, more polished appearance and makes it much easier to clean underneath.
The style of legs you choose can completely change the overall look. Tapered wooden legs work beautifully with Scandinavian and mid-century interiors, while slim metal legs create a more modern, streamlined feel. Rounded or decorative legs can take the IVAR in a softer or more traditional direction.
You can buy legs designed specifically for IKEA furniture from retailers such as Pretty Pegs, or use another set of furniture legs with suitable mounting plates.
If you’re combining two or more IVAR cabinets to create a longer sideboard, make sure the legs are positioned carefully so the weight is properly supported. No matter which style you choose, the cabinet should also be securely anchored to the wall to help prevent it from tipping.
Make sure to test the stability of your IVAR if you add legs – you may want to consider fixing the cabinet to the wall for extra precaution. You wouldn’t want it tipping over and hurting any kiddos!
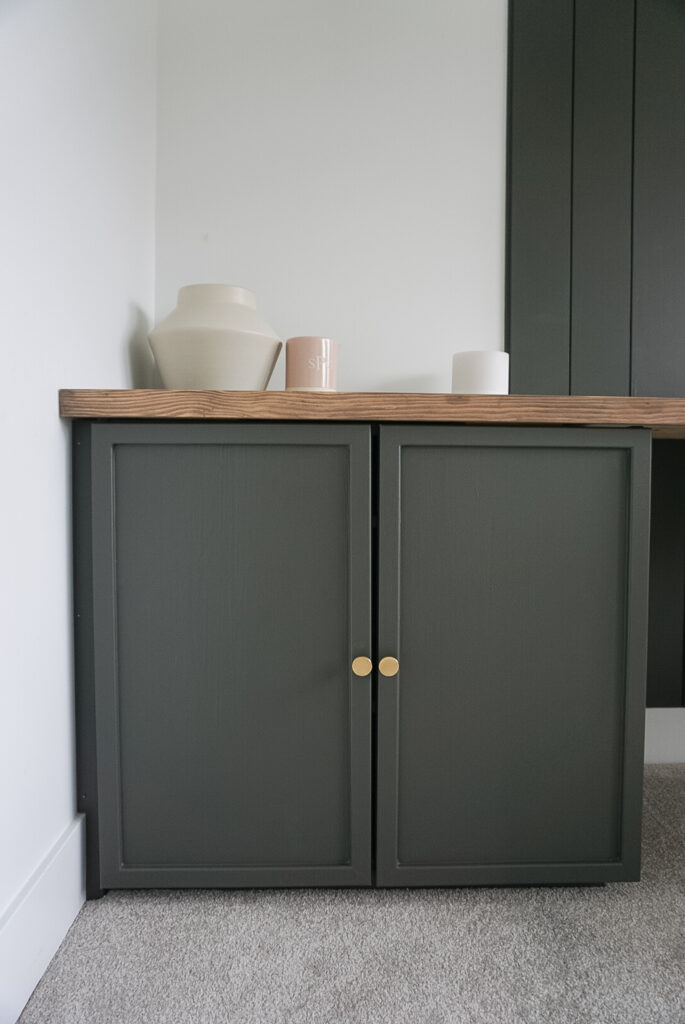
3. Add Knobs or Pulls to Your IKEA IVAR
The IVAR’s plain cabinet doors are part of what makes it so versatile, but adding knobs or pulls can instantly make it look more polished and custom. It’s also one of the quickest and easiest IKEA IVAR hacks on this list.
The hardware you choose can help define the overall style of the cabinet. Slim brass pulls can give it a more elevated, modern look, while wooden knobs work beautifully with Scandinavian or traditional interiors. Black handles create a clean contemporary finish, and leather pulls add warmth and texture.
Before drilling, use painter’s tape to experiment with the placement and make sure the hardware is positioned evenly on both doors.
You can purchase ready-made leather pulls, or make your own using a strip of leather folded into a loop and secured directly to the cabinet door. Check out this tutorial which walks you through the process step by step.

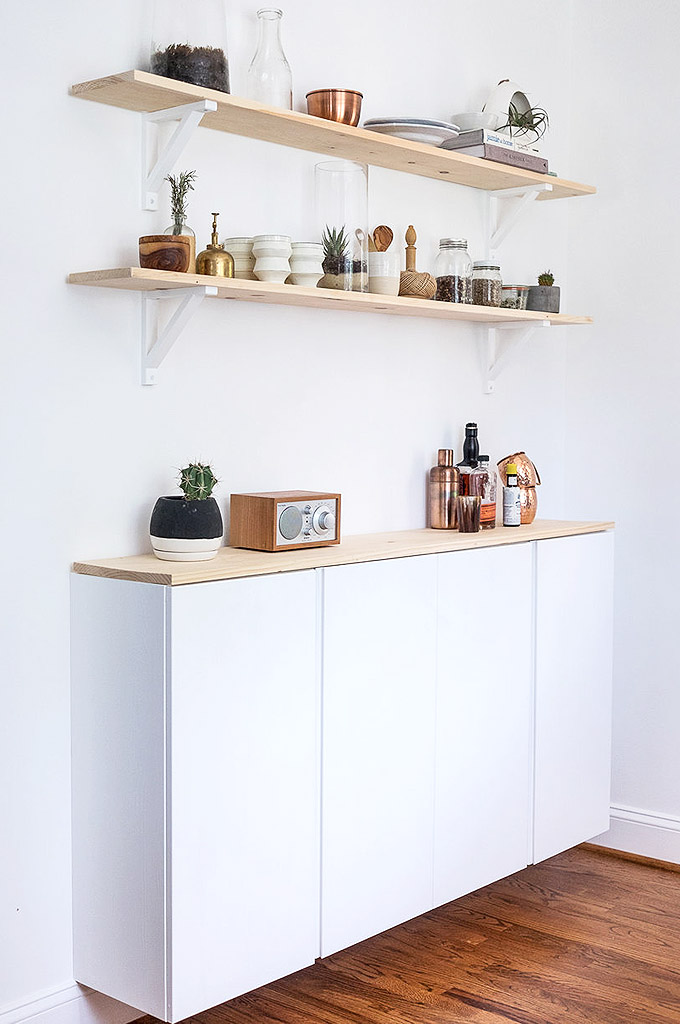
4. Mount IKEA IVAR Cabinets on the Wall
Mounting your IKEA IVAR cabinets on the wall is an easy way to give them a cleaner, more custom appearance. The floating design makes the cabinets feel lighter and more streamlined, while also leaving the floor underneath completely clear (which makes my robot vac very happy).
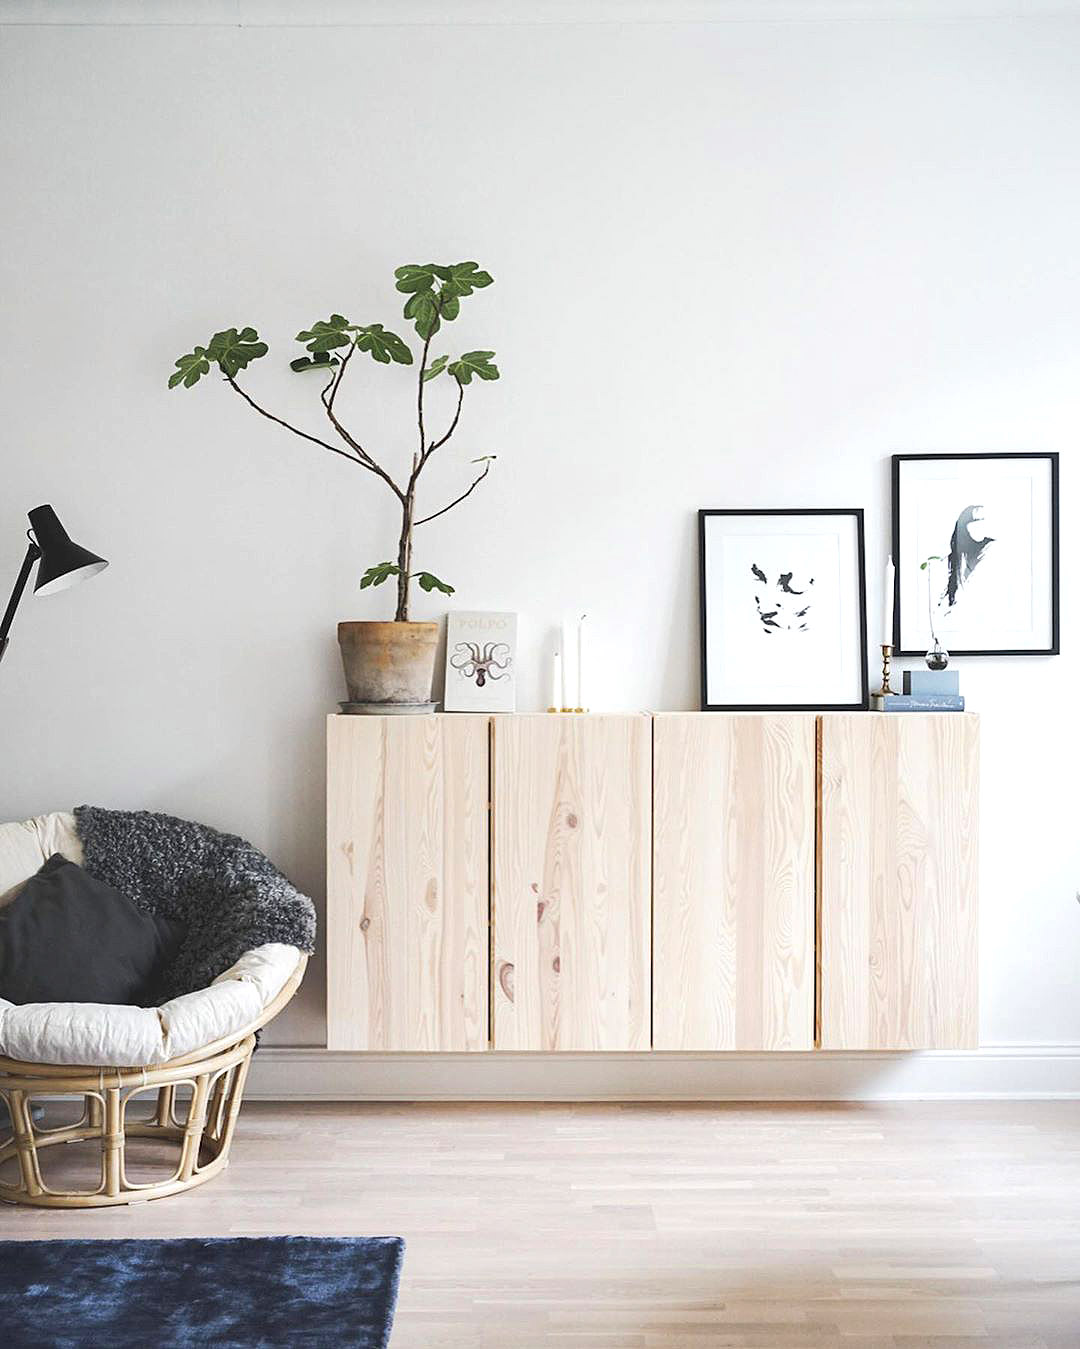
One wall-mounted IVAR cabinet works well as compact storage, but placing two or more side by side can create the look of a long floating sideboard or credenza. This setup works especially well when you want a streamlined storage solution that doesn’t take up valuable floor space.
You can also ‘stack’ your IVARs to create a wall-mounted modular look, like in the pic a little further below.
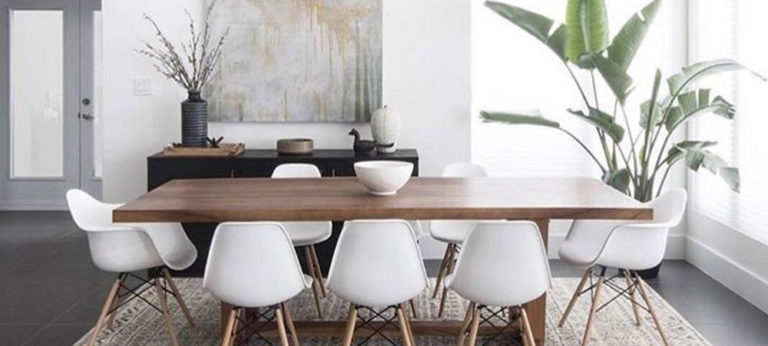
This IKEA IVAR hack can work particularly well in a dining room, living room, entryway, or home office, where the shallow cabinets provide useful storage without taking up too much floor space.
Just make sure the cabinets are mounted securely using hardware that is appropriate for your wall type. Use a level to keep multiple cabinets perfectly aligned, and follow IKEA’s installation instructions carefully. If you’re unsure whether your wall can safely support the cabinets, it’s worth bringing in a professional.
5. Give Your IKEA IVAR Cabinet a Rich Wood Finish
If you like the idea of natural wood but the IVAR’s pale pine feels a bit flat or unfinished, staining it can completely transform the look. Instead of covering the wood, you’re enhancing it – bringing out the grain and giving the cabinet a more intentional, high-end feel.
A light oak stain can keep the look natural and airy, while walnut or mid-tone stains add depth and make the piece feel more substantial. Want something moodier? A darker stain can turn a simple IVAR into a statement piece that feels far more custom than flat-pack.
Staining is also a smart move if you’re trying to tie your IVAR into other wood furniture. It helps everything feel cohesive, especially if you’re lining up multiple cabinets to create a longer sideboard or storage wall.
One thing to know: pine can be a bit unpredictable. It tends to soak up stain unevenly, especially around knots, so don’t skip the prep. Sand thoroughly, test your stain first, and consider using a pre-stain conditioner to avoid blotchy patches. Finish with a clear topcoat, and you’ll have a piece that looks far more expensive than it actually is.

6. Add Trim or Texture to the Cabinet Doors
The IVAR’s completely flat doors make the perfect blank canvas for adding a little more dimension. Thin wood trim, half-round moulding, dowels, decorative cutouts, or even simple wooden strips can completely change the look of the cabinet.
For a subtle, classic update, try framing each door with narrow moulding before painting the entire cabinet one color. If you want something more contemporary, adding rows of half-round dowels or wood strips can create a fluted or reeded effect that makes the IVAR look far more expensive.
You can also use the doors to create a more graphic design, such as a sunburst, arches, or another pattern made from lightweight wood pieces. Just plan the layout carefully before you start gluing anything down. Painter’s tape is helpful for testing the design and making sure it lines up evenly across both doors.
Once everything is attached, fill any obvious gaps, sand where needed, and paint the doors and trim together for a seamless, built-in look.
7. Add a Custom Top to Your IKEA IVAR Cabinets
Placing two or more IKEA IVAR cabinets side by side is an easy way to create a longer storage unit, but adding one continuous surface across the top is what really makes the whole thing feel like a single piece of furniture.

A solid wood or butcher block top can add warmth and turn the cabinets into a polished-looking sideboard or console. You could also use plywood with a finished edge or painted MDF if you want the top to blend seamlessly with the rest of the cabinet.
This hack is especially useful if you’re combining several IVAR cabinets, since the new top disguises the joins between them and gives the entire arrangement a more custom, built-in appearance. You can even leave a space between two cabinets and bridge them with a longer piece of wood to create an IKEA IVAR desk.
Have your chosen material cut to size at the hardware store if you don’t have the tools to do it yourself. Just make sure the top is properly secured and that the cabinets can safely support its weight, particularly if they’re mounted on the wall.
For an even more built-in look, you can also place the cabinets on a simple recessed plinth base. Paired with one continuous top, this helps several IVAR cabinets read as a single custom sideboard.
8. Cover IKEA IVAR Doors With Wallpaper, Decals or Fabric
The IVAR’s flat cabinet doors are perfect for adding wallpaper, peel-and-stick vinyl, decorative decals, or even fabric. It’s an easy way to introduce pattern or color without painting the entire cabinet.
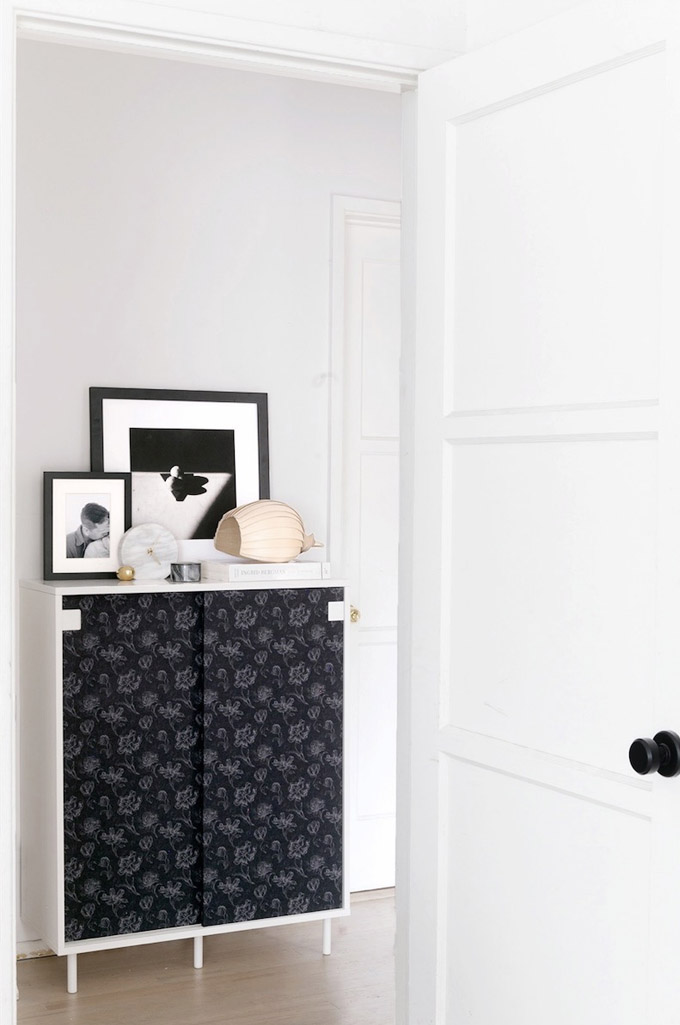
For a subtle update, try a linen-look, grasscloth-style, or softly textured wallpaper. Stripes, checks, florals, and graphic decals can create a bolder look, especially if you keep the rest of the cabinet simple.
You can cover the entire door, apply wallpaper inside a border of painted trim, or use individual decals to create a smaller repeating pattern. Peel-and-stick options are especially useful if you like changing your decor, since they’re generally easier to remove and replace than traditional wallpaper.
Fabric is another great option if you want a softer, more tactile finish. To apply it, cut your fabric slightly larger than the door panel, then use spray adhesive or a thin layer of decoupage glue (like Mod Podge) to attach it smoothly to the surface. Once it’s in place, trim the edges neatly with a sharp blade and seal it with a clear topcoat if needed for durability. You can find many step-by-step tutorials online by searching for “how to cover cabinet doors with fabric.”
For the cleanest finish, apply any material to a smooth, clean surface and take your time lining up the pattern across both doors. Raw pine can be porous and uneven, so you may need to lightly sand and seal the doors first, depending on the product you’re using.
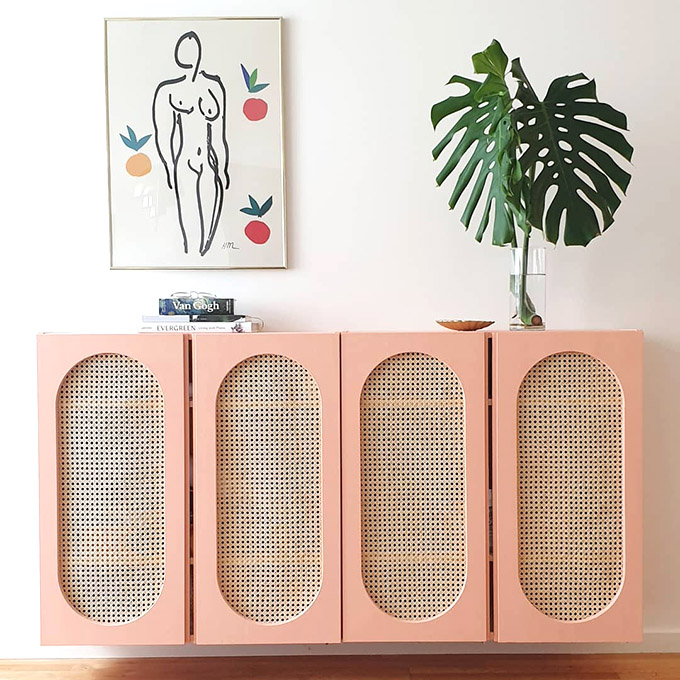
9. Create Cane or Rattan IKEA IVAR Doors
Ahh, one of my absolute favorite IKEA IVAR hacks! This is definitely one of my favorite ways to transform the IVAR. 🤩 Adding cane webbing to the doors is one of the most dramatic IKEA IVAR hacks, and it can make the finished cabinet look almost completely custom.

The woven material adds warmth and texture while breaking up the IVAR’s plain wooden doors. Natural cane works particularly well with Scandinavian, coastal, traditional, and organic modern interiors, but you can also pair it with painted doors for a more colorful look.
This is a more involved DIY than simply painting the cabinet or changing the hardware. Most versions require you to remove the doors, cut openings into the centre panels, and secure cane webbing across the back with staples. You can keep the openings rectangular for a clean, classic look or experiment with arches, circles, and other shapes.
Before attaching the cane, soak it according to the supplier’s instructions and pull it taut as you staple it in place. As the webbing dries, it will tighten further and create a smoother finish.
Because this hack involves cutting into the cabinet doors, measure your design carefully and make sure the cut-out shapes are positioned at the same height and distance from the edges on each door so they look symmetrical when closed before reaching for the power tools. It takes a little more work, but the result can make a basic IKEA IVAR cabinet look like a much more expensive piece of furniture.

ITCHING FOR MORE IKEA HACKS? THEN YOU MUST CHECK OUT THESE LEGENDARY KALLAX HACKS!!

Any tips for the most secure way to mount these on the wall? Most of the back is so flimsy
Wow, just beautiful! Could I ask what colour you painted the first rattan project pictured (with the semi circle doors) please?
So beautiful! Do you mind sharing what brand of paint and finish you are using? Its lovely!
Hi Ingrid, I would recommend a matte finish paint to replicate the look of these painted Ivar projects 🙂
These are absolutely amazing!!!!
so out of the box great ideas.
so glad you liked them!! 🙂