How to Refinish a Wood Dining Table in 3 Simple Steps
This post may contain affiliate links. If you make a purchase through one of my links, I may make a small profit at no expense to you. For further information, please view my policies.
If you are looking to strip back and restore a solid wood dining table to its raw, natural state, then you are in the right place. The great thing is that it’s easy, and the results are amazing!
I posted my dining table makeover to my Instagram stories the other day and got a lot of questions about how I did it.
Because it’s such a simple process, I hadn’t planned on documenting it at all, so unfortunately this means I don’t have any fancy photos to include in this post! But because so many of you are asking how I did it, I’m happy to whip up a quick blog post to share!
Virtually anyone can handle this project, and you don’t need experience refinishing furniture to do it. In fact, it’s a great beginner project!
How to refinish a wood dining table
Pontus and I talked about it and we both just wanted a simple table with clean lines, with a light, raw wood look. No dark or orange wood stains. So I got to work, searching second hand for something that was solid wood, with the kind of style that we wanted.
It’s important to choose a solid wood piece!
At the risk of stating the obvious, you cannot sand back and refinish a laminate piece of furniture. You can only paint laminate, and I explain how to do that here.
Step 1. Choose a table
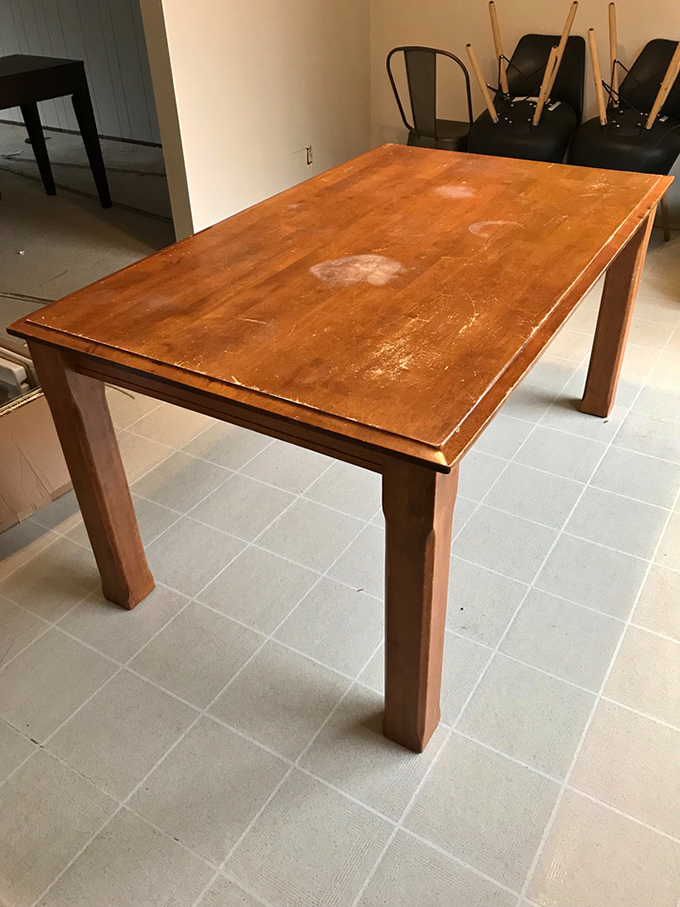
First, you need to choose a table! I found mine on Facebook marketplace for $50. Above is the picture from the original marketplace listing. The dining table measures 3′ x 5′.
Many of you wrote to me saying you had hand-me-down tables or similar – that is great! These are the perfect types of pieces of furniture to experiment making over.
Step 2. Sand your table
⚠️I would NOT recommend sanding back a valuable antique!! You really don’t want to sand back an antique, as the patina that forms on an antique is part of what makes it so prized. If you think your piece is worth money but it’s damaged, it’s worth getting it restored professionally. If it’s not damaged but you just don’t like the finish, consider selling it rather than “ruining” it by stripping it back.⚠️
Now that you’ve picked your solid wood table, you need to sand it back completely to the raw wood.
Unless your table is literally caked in dirt, there really is no need to clean it. When you sand, everything will come off anyways. Don’t create extra steps for yourself – keep it simple.
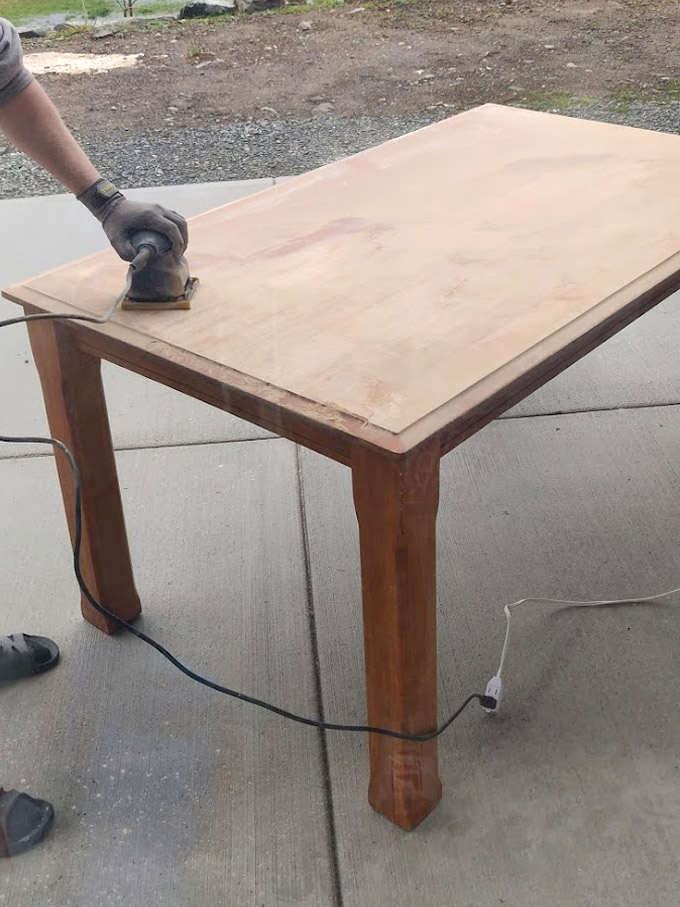
It really, really helps to use an electric sander. You CAN do it by hand, but it will take an insanely long time and your arm will likely fall off. Just kidding, but your arm will hurt the day after.
I have this sander and recommend it!
If your table is very intricate, you’ll want to avoid using the sander too much on those parts, as it will smooth them out and you might lose some nice details that are carved into the wood.
Some people use chemical furniture stripper before sanding. This really is only necessary if you have several layers of paint on your piece that would take a really long time to sand off. The stripper just melts the paint away and saves you the trouble of removing it yourself. If you have layers of very thick finishes or paint on your table, you should use stripper. Otherwise, you don’t need to use it.
In the case of my dining table, it was uncomplicated and only stained with wood stain so I just sanded it down. Well, Pontus did. 🤣
Personally I wouldn’t worry about any scratches or imperfections – it adds to the charm! If there are any imperfections, most of them will all come away when you sand down the table anyways.
Step 3. Protect your table
We were going for a light-colored raw wood dining table, and the wood looked gorgeous once it was all sanded back. It was exactly the look we were going for so we didn’t want to stain or tint the table at all.
Of course you still need to protect the surface of your table, you can’t leave it raw. Otherwise all your hard sanding work will go to waste the second you spill spaghetti sauce on it.
This means it’s really important to choose the correct product. We wanted a product that would go on 100% crystal clear and would not tint, darken or yellow the wood at all, but would still protect it.
I went with this water-based polyurethane wood finish, in a satin finish.
I chose satin because we didn’t want a glossy surface. We actually would have bought matte if they had had it in store, but they didn’t. Satin is good too. It has a very subtle sheen to it that you hardly notice. You can choose whatever finish you want. Just make sure it’s water-based, clear finish polyurethane.
If you choose oil based, it will yellow over time. And the clean up is also a lot more annoying since you need chemicals. With water based poly, you just clean your brush with water.
I applied the poly according to the instructions on the tin, and it turned out great. There were no tricks or hacks or anything I did that was weird that you need to know about. I just used a synthetic paint brush, brushed it on, and waited for it to dry. Then lightly sanded between coats. I repeated this 3 times. Exactly what it says to do on the tin!
For reference, I used an entire 8 oz tin for our table (8 oz is the small size tin).
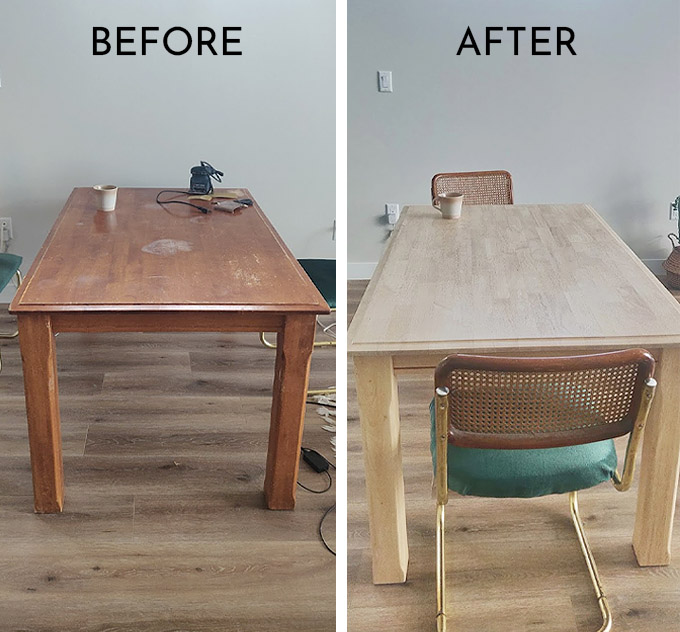
I know, not the most glamorous before and afters but I warned you that I didn’t have any pretty pictures! 😂
Refinishing a dining table in this manner is a really simple project and anyone can do it. A palm sander makes things easier, but it’s not 100% necessary. It’s a great beginner friendly DIY and it’s really rewarding, so I totally recommend going for it! Dining tables can get expensive, and we saved thousands by doing this ourselves!
If you’ve decided that refinishing your dining table is not for you, then be sure to check out this round up of 100+ of my favorite (store bought) dining tables. There is something chic for every budget!
I hope this answers your questions – if not, leave me a comment below or message me on Insta!