How To Paint IKEA Furniture – A Complete Guide
This post may contain affiliate links. If you make a purchase through one of my links, I may make a small profit at no expense to you. For further information, please view my policies.
Have you decided that you want to paint a piece of IKEA furniture? Not sure where to start? No worries!
Let’s take a look together at all the best ways to paint IKEA furniture that will help you achieve a professional-looking and long-lasting finish.
This guide will cover how to paint:
- laminate furniture
- solid wood furniture
- metal furniture
Tired of reading? Watch my videos on how to paint ikea furniture instead 🙂
You can also watch me paint and transform this boring Kallax unit:
How To Paint Ikea Furniture Like a Pro!
IKEA and I have a long history together. Like many other humans out there, I’ve bought countless pieces from IKEA over the years.
I’ve also eaten many meatballs.
Once you’re there, it’s tempting to buy everything because it’s all so dang cheap. And sometimes impulsive decisions are made, and I’m not just talking about eating too many meatballs.
It happens to the best of us: perhaps you bought a lot of black pieces in the past and now you’re more into light color schemes. It may also be that your dresser or bookshelf is just a bit scruffy looking after several years of use. Or your living room is screaming for a bold pop of color.
The aspect I find liberating about IKEA furniture is that usually their items are not so crazy expensive that you feel scared to try your hand at DIY’ing them.
If the project is an epic failure, well, at least you tried and you didn’t lose thousands of dollars ruining an expensive piece in the process.
And say what you will about IKEA furniture, but in general their furniture is pretty robust; it can last you many years.
If you aren’t in a place where you can buy new furniture, then painting your IKEA furniture can be a relatively fast and very cost effective way to upgrade your space and inject new style into your home.
The desire to take an inexpensive, mass-produced IKEA item and put a personal spin on it is nothing new – there are so many IKEA hacks floating around the internet that it inspired the creation of the wildly popular website called IKEA Hackers back in 2006. The site is a fabulous resource if you’re looking for some “hacky” inspiration.
There are endless ways to personalize (or “hack”) your IKEA products and paint is just one of the many.
So, whatever your reasons may be for wanting to paint your IKEA furniture, you’re in the right place.
Let’s dive in!
How to check what material your IKEA piece is made of
The first thing you need to do is check what material your IKEA piece is made of.
The way you paint your piece is going to depend on its material! This is really important.
If you don’t know what your product is called, there is a 99% chance you’ll find a sticker on the product somewhere that says the name of the series (like LACK, MALM, BILLY, etc).
Search in inconspicuous places like underneath or on the back. Literally every product that is big enough is sold with a sticker on it.
Once you know what your furniture piece is called, you need to head over to the IKEA website, look up your product and check the materials.
Here is what to look for.
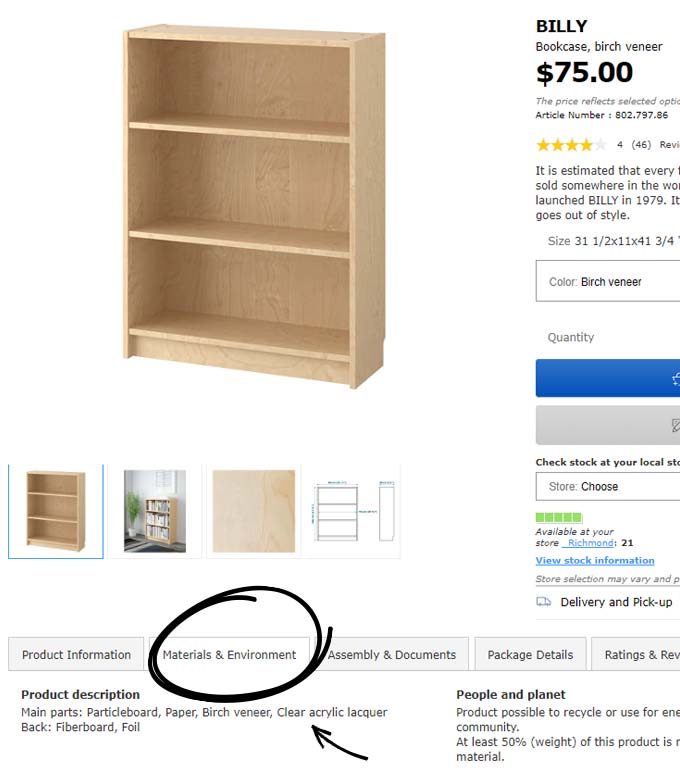
Laminate (aka plastic) looks like this:
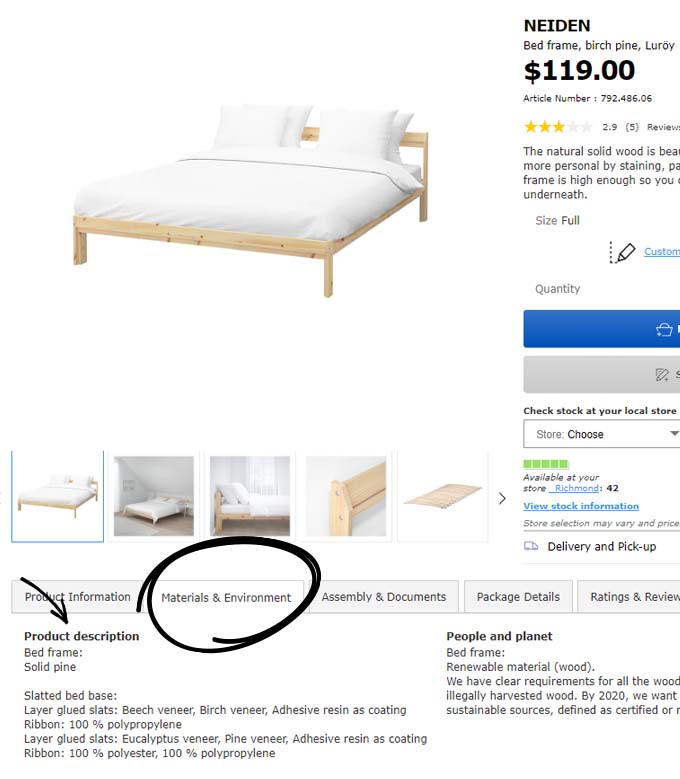
Solid wood looks like this:
Metal looks like this:

What is laminate?
You may be wondering what the heck laminate actually is. You could google it, or you could just read on. I recommend you read on ’cause it’ll be faster.
Remember how in elementary school everything was laminated in plastic? Well it’s the same thing.
Something that is laminated is essentially covered in plastic.
So, if your IKEA piece says it has a “clear acrylic lacquer“, that means it’s covered in plastic. Which means it’s laminated.
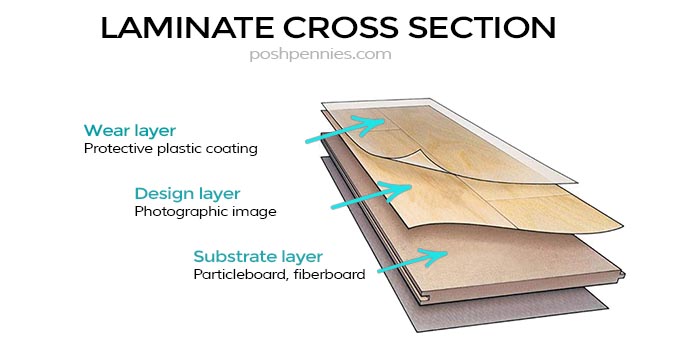
Laminate furniture is essentially a photo of wood, slapped onto a piece of particle board, covered with a clear plastic coating.
Do I paint assembled or disassembled?

You are going to make your life a lot easier if you paint your IKEA furniture when it’s disassembled.
If you already know you are going to paint your piece right off the bat when you buy it, then great. Just don’t assemble it!
On the other hand, maybe you don’t have time to disassemble. Or you’ve had your piece so long that you lost the tools (I actually have about 2 million different IKEA allen keys).
It’s ok. You can still go ahead and paint.
You can cut corners by not disassembling, but be warned that certain steps later are going to take you a bit longer.
Time wise, in the end it kind of evens out.
If you choose to paint with your piece still assembled, you may need to mask off certain areas: you can do this with painter’s tape to get clean lines and minimize the risk of the paint bleeding where you don’t want it to. I linked some good tapes below.
Moral of the story: if your piece is already assembled, I would strongly suggest disassembling it. You will get a more professional looking finish if you take the time to do this.
Do I need to sand my piece first?

It depends. This is a widely debated topic so I will tell you what I know from my own personal experience. I’ve been painting different types of furniture for about 20 years.
- Painting metal does not technically require sanding (unless it’s rusty), although some advise you to do so. If you want to sand your metal piece, start with an 80 grit piece of sandpaper for the rougher bits, and then make your way up to a 120 grit. The idea is that your paint will adhere better to the surface if you roughen up the metal. But primer will also help with that so … you decide!
- If you are painting solid wood, then yes, you should sand it. Sometimes people are a bit lazy (myself included😅) and don’t sand. That’s ok too. It’s up to you. But I would recommend sanding solid wood.
- If you’re painting over laminate, then NO, sanding is not necessary. Contrary to what a lot of tutorials say out there, you don’t HAVE to sand your laminate furniture before painting … provided that you follow the correct steps, which I cover below.
To learn how to correctly paint IKEA laminate furniture without sanding, keep reading!
If you are sanding a solid wood piece, a good orbital sander will get the job done quickly.
Some orbital sanders like this one even come with a little vacuum/microfilter system so that the dust gets sucked up as you go and prevents you from breathing it in. Pretty neat!
What’s a primer and do I need it?!?
Primer is basically a base coat of paint that prepares your surface for receiving the final finishing paint. It helps provide a smooth surface to paint your final color on and helps with paint adhesion.
Some people live life on the edge and skip the primer, and it doesn’t even haunt them late at night.
However, I would suggest you do NOT skip priming your piece.
The best primer in the world for painting laminate (trust me)
This shellac based primer is the one all the professional painters rave about:
- it sticks to ALL surfaces WITHOUT SANDING, so it will work for laminate, solid wood and metal.
- dries really quickly.
- covers all odors, even nasty ones like cat urine and stale smoke.
- seals stains and knots and provides a perfect base for your finish paint.
- works with ANY top coat.

So you really cannot go wrong. I highly recommend you choose to use this primer; if you do, then you can skip the rest of the following information on primers.
NOTE: MAKE SURE YOU GET *SHELLAC BASE PRIMER* !!!!
Did I just burn your retinas with that yellow background? Good. You get my point. It’s important!
If you don’t plan on using the primer mentioned above, then you will need to keep the following things in mind:
- If you’re going to be painting with a water based latex paint, then you must use a water based primer. Technically you can use an oil based primer and then paint on top with latex paint, but just keep your life simple and make sure they match.
- If you are painting with an oil based finish paint, you must use an oil based primer. No exceptions.
I’ve gotten a lot of questions over the years with people asking me why something went wrong with their project and the first question I always ask is “which primer did you use”? The next reason for problems is usually user error. Many of which can be avoided by reading this guide! 😊
Anyyyyways, no matter what, you really need to use a primer. Don’t skip this.
↓ QUICK TIP ↓
If your final paint color is going to be dark, ask the paint mixer to tint your primer. The tint can be a greyish blue color, or you can have it tinted to a similar color to your finish paint. This will help coverage, won’t be as difficult to conceal versus having a pure white primed base, and thus will require fewer coats of your final color. Which ultimately saves you time and money.
What kind of paint should I use? Pros and Cons!
So by now you have learned that if you go with the Zinsser Primer I mentioned above, then you can choose any kind of paint you like.
If you have another kind of primer, check to see what kind it is and make sure to get the appropriate type of paint. You can always ask the people at the paint store – they should know stuff.
Pros and cons for the most popular types of paints for painting furniture.
WATER BASED
Pros:
- Water based paints (latex, aka plastic) are popular because they emit fewer toxic fumes than oil based paints
- They are easy clean up as you only need water
- They dry quickly and are flexible
- Will not yellow over time
Cons:
- The disadvantage to painting furniture with water based latex paints is that you run the risk that sometimes the paint won’t behave as planned, which can result in stains and wood knot bleeding, which is disastrous (this has happened to me – I didn’t prime first). If you use primer, you should be able to avoid this happening, however water based primers are known to have the same issue (staining/bleeding).
- Less durable than oil based paints
OIL BASED
Pros:
- Oil based paints provide excellent durability
- They cover any odors that may be stuck in your furniture much better than water based paints
Cons:
- The clean up is tedious as you need mineral spirits or turpentine to clean your paint brushes as opposed to just water. If you don’t clean your brushes with mineral spirits after painting with oil based paints, you can kiss your brushes goodbye once they dry
- Oil based paint can yellow over time
- Less flexible than latex water based paints, meaning it can crack
- Very strong odor during application
- Longer drying times
CHALK PAINT
Pros:
- Lends itself well to distressing for a “shabby” or vintage look
- Some stunning effects can be achieved by layering chalk paints
Cons:
- Visible brush strokes
- Often requires multiple coats to get an even finish
- Less durable than latex paint
Chalk paint technically does not require a primer ON SOLID WOOD. If you are painting laminate furniture with chalk paint, you will still need to prime first. You must seal furniture painted with chalk paint with wax. All chalk paint is is latex paint with powder mixed in – usually plaster of Paris.
It is incredibly easy to DIY your own chalk paint if you don’t want to buy the ready-made stuff.
Learn more about how to chalk paint IKEA furniture here.
SPRAY PAINT
Pros:
- Easy to apply
- Even coverage, provided that it’s applied properly
- Dries quickly
Cons:
- Can require multiple cans for a large project, which gets pricey
- Difficult to get even coverage on large pieces
- Can drip if not sprayed properly
- Strong odor during application
What are the best tools to apply my paint?
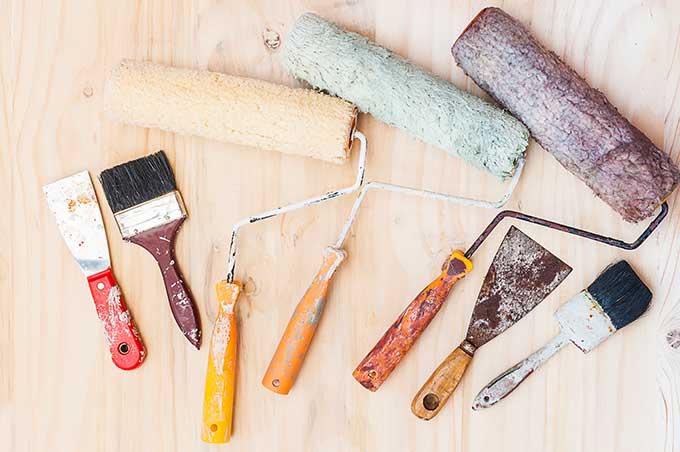
To paint your IKEA furniture you can use any of the following:
- spray gun
- roller
- synthetic or natural bristle brushes
- foam brushes
Spray Guns
Spray guns can be tricky to use because you can’t just dump the paint in the canister and spray – you need to thin your paint first. If you don’t get the paint consistency right, you will have a lot of problems getting your paint to spray properly – it won’t come out at all if it’s too thick, or will come out in fat droplets if it’s too thick or thin. Cleaning your paint spray gun is also a massive pain. But once you get the hang of them they speed up the process significantly.
Rollers
Rollers are handy and allow for lighting-fast paint application. If you use a roller that is wider than the opening of your paint can, you’ll need to remember to get a tray or something to put your paint in.
↓ QUICK TIP ↓
If you use a paint tray, you can line it with plastic for super quick clean up! Or, what if you need to stop painting for the day, but you’re not done with your project and you have a bunch of good paint in the tray? No need for that to go to waste, paint costs good money! Just throw a plastic bag over your tray and pop it in the fridge! It’ll stay fresh until you are able to pick up the project in the next day or two.
Brushes
Foam brushes are good and generally ensure smooth application in terms of brush strokes. They are cheap and pretty much only good for one time use so you’ll have to throw them away once you’re done. You could try to clean them with water if you’re using water based products but it may not be worth the effort.
Bristle brushes are my favorite method of application for painting furniture, but they sometimes can lose a hair or two along the way. Be sure to remove any stray bristles immediately if you see any. Tweezers help, or just pinch with your fingernails then touch up with another stroke of paint. I prefer angled brushes to flat brushes as it allows for a more comfortable wrist position while I’m painting.
Brushes can come in natural bristles or synthetic bristles. Choose whichever you like. Natural bristles can leave more obvious brush strokes whereas synthetic bristles generally provide a smoother application.
↓ QUICK TIP ↓
Don’t make your life difficult and buy brushes that are too small. It will take you forever and will be incredibly frustrating. I recommend using a combination of tools when tackling furniture painting projects: a roller for large surfaces and a couple of different sizes brushes for harder to reach areas or for areas like grooves.
When you’re done, you must make sure to clean your brushes appropriately based on the type of paint you used. Water for water based paint, and turpentine/mineral spirits/paint thinner for oil based and shellac paints.
What should I use to seal my piece? Everything you need to know about topcoats
Sealants, varnishes and top coats can be really confusing. They’re also especially intimidating because they are the very last step after all the work you’ve put in to repaint your piece.
If you get it wrong, you risk messing everything up. I have done this and it sucks.
If you’re not sure what kind of topcoat to use, read on. It’s best to not have any doubts when choosing a topcoat.
One thing is for sure, and that is that you definitely want to use one. It will ensure that your piece and the paint job underneath is protected from wear and tear.
POLYURETHANE
I recommend using water based polyurethane topcoats.
Oil based top coats will yellow over time (similar to oil based paints!). You really don’t want this happening, especially if you’re sealing a very light or white piece.
↓ QUICK TIP ↓
You CAN use a water based top coat over an oil based paint, you just need to make sure the paint has dried completely before sealing.
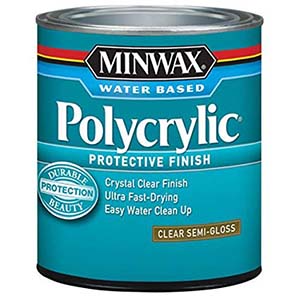
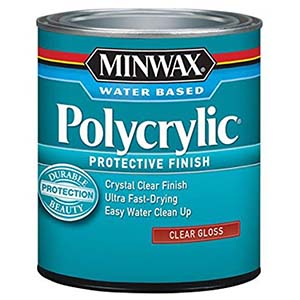
My top recommendation for a water based sealant is Minwax Polycrylic (check links below to purchase).
You can choose either a matte finish, semi gloss finish, a gloss finish or a satin finish.
You can use Minwax Polycrylic over both oil based and water based paints.
To be safe, you can always test a small patch in an inconspicuous area before finishing the whole piece.
WAX
If you painted your IKEA furniture with chalk paint, some say that the best way to go is by sealing with wax.
I would tend to disagree.
Wax sealed pieces give a nice velvety finish but are not as durable as pieces sealed with acrylic varnishes.
Wax is not a permanent finish, meaning that it will need to be reapplied every so often. The other tedious thing about sealing with wax is that if you ever want to repaint your furniture, the wax MUST be removed otherwise your new paint will not adhere to the surface.
Removing the wax topcoat involves wiping everything down with mineral spirits and ain’t nobody got time for that.
If you do want to seal with wax, I recommend Minwax Paste Finishing Wax in Natural.
But I would recommend using the Minwax Polycrylic Matte Poly finish instead.
Now that you know:
- what your furniture is made of
- whather or not you need to sand and prime it
- what type of paint to use
- how to apply the paint
- what kind of final topcoat to use….
You can finally get started! 🙌
I’m not going to go into how to protect yourself from paint fumes, or how to avoid getting paint all over the place. Use common sense and stay safe.
You may also require basic tools like screwdrivers or a drill. Please learn how to use those without hurting yourself.
How to paint IKEA laminate furniture
Alright so this is what you came here for! Painting laminate pieces is the trickiest surface to get right, so we’ll start by talking about that one.
You hear a lot of horror stories about how it all went wrong and the paint started peeling off after 2 days.
I assure you, your paint is not going to peel off if you follow these steps!
Because of the vast number of laminated (acrylic covered) IKEA products, it’s also probably the most common scenario you’ll encounter if you want to paint IKEA furniture.
This method doesn’t require sanding your piece before priming and painting. Some people swear by sanding every single layer in order to get a perfectly pristine and smooth finish. By all means, do this if you want to, it certainly won’t ruin any of your work! Decide if it’s worth the effort and go for it if you feel like it’s necessary 🙂
MATERIALS:
- Shellac-base primer – I recommend this one from Zinsser (if you missed the part about why it’s awesome, then scroll back up!)
- Sanding paper (optional)
- Brushes, rollers or spray gun
- Rag or paper towels
- Paint
- Topcoat
STEPS FOR PAINTING ON LAMINATE:
1. Disassemble if you can. If you can’t disassemble, at least remove any hardware like knobs or pulls.
2. Wipe down your furniture with water and a damp (not sopping wet!) paper towel or cloth. You want to remove any dust, dirt or residue that can be removed so that it doesn’t get trapped underneath the paint. Allow to dry, it doesn’t take long.
3. Prime – usually only one coat is needed. OPTIONAL: You can scuff the primer with sanding paper once it’s dry if you want but it’s not really necessary. If you really want to sand your primer, go ahead and do it! Allow time to dry according to instructions on the product.
4. Paint your piece. You may require multiple coats of paint – make sure you allow time to dry in between coats. OPTIONAL: You can sand between coats of paint if you want to! I recommend doing this if you have visible drips, brush strokes or any small debris caught in your paint. Sanding will smooth all of that out.
5. Once your furniture is completely dry, you can add your topcoat. Allow time to dry according to instructions on the product.
6. Reassemble if needed, and put back all the hardware.
… and another example project painting laminate furniture:
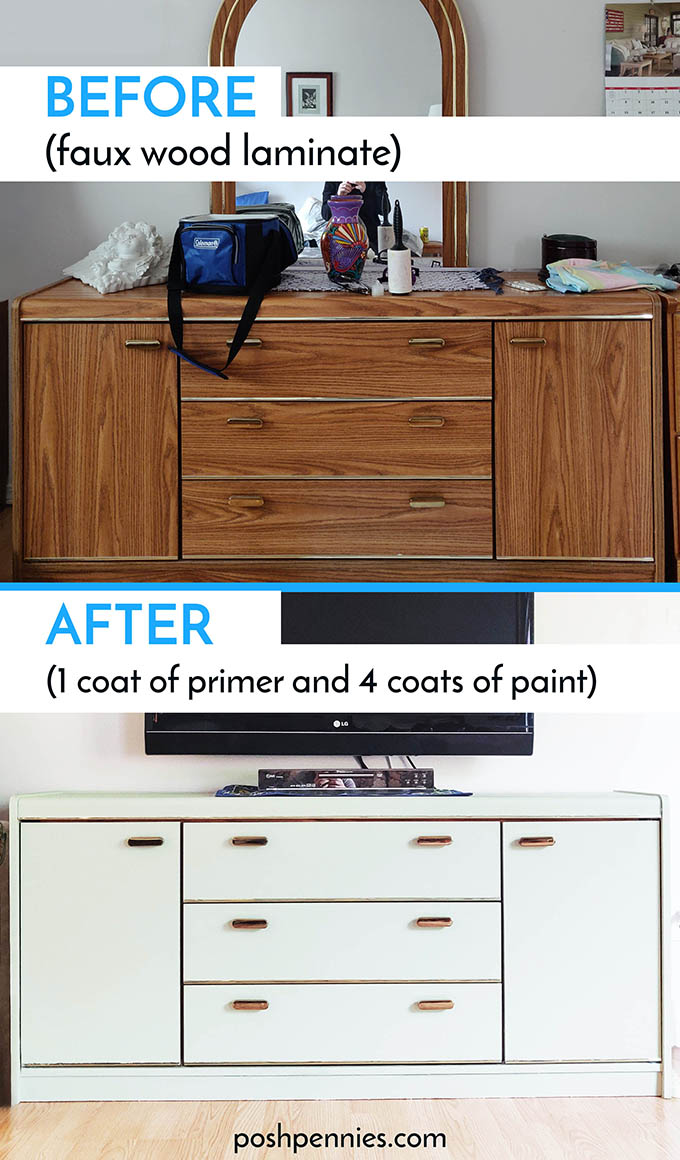
Below is an example of laminate furniture that I painted one summer for my mum. It’s actually not an IKEA piece, it was just an old laminate dresser that my mum wanted to chuck out. Instead, I transformed it into a TV console for her, because she needed one.
Sorry about the messy photo, lol!
It was really a super easy transformation – I just removed the mirror, primed it with one coat of Zinsser (did not sand!!) and gave it 4 coats of a paint color that my mum picked out. It’s like a light sage green but I don’t think you can really tell from the photos? Anyways, the paint used was just your regular, run-of-the-mill indoor water-based latex paint.
The thing I really liked about the original was the brass trim and handles and its postmodern vibe; the piece itself was in great condition – all it needed was an updated color!
Check out my videos above if you missed them, they demonstrate a couple of my IKEA painting projects!! (Scroll back up to the beginning of the article)
How to paint IKEA solid wood furniture
Solid wood is more forgiving and there are many methods out there if you do some research.
I have tried many of these methods and have found the following to work best:
MATERIALS:
- Sanding paper and a sanding block
- Orbital sander (optional)
- Rags or paper towels
- Brushes, rollers or spray gun
- Primer
- Paint
- Top coat
STEPS FOR PAINTING SOLID WOOD:
1. Disassemble if you can. If you can’t disassemble, at least remove any hardware like knobs or pulls.
2. Lightly sand your piece with either sanding paper or an orbital sander. Wipe away the sanding dust with water and a damp rag or paper towel.
3. Prime – usually only one coat is needed. OPTIONAL: You can scuff the primer with sanding paper once it’s dry if you want but it’s not really necessary. If you really want to sand your primer, go ahead and do it! Allow time to dry according to instructions on the product.
4. Paint your piece. You may require multiple coats of paint – make sure you allow time to dry in between coats. OPTIONAL: You can sand between coats of paint if you want to! I recommend doing this if you have visible drips, brush strokes or any small debris caught in your paint. Sanding will smooth all of that out.
5. Once your furniture is completely dry, you can add your top coat. Allow time to dry according to instructions on the product.
6. Reassemble if needed, and put back all the hardware.
How to paint IKEA metal furniture
To be honest, if I am going to spray paint a metal piece that isn’t overly elaborate, I don’t bother disassembling it.
However, I have learned from experience that metal DOES require a primer and ideally a topcoat. Otherwise, the spray paint will just scratch off, even with the tiniest bump!
If your piece has any rust, or flaking or loose paint, you *will* need to sand it.
MATERIALS:
- Scraper
- Wire brush
- 80 grit to 120 grit sanding paper
- Orbital sander (optional)
- Sponge
- Rags or paper towels
- Primer
- Paint
STEPS FOR PAINTING ON METAL FURNITURE:
SCENARIO A – IF YOUR PIECE HAS FLAKING OR PEELING PAINT:
1. If your piece is flaking or peeling you must sand and remove all flaking paint. Use a scraper and a wire brush.
2. Sand the piece starting with 60 or 80 grit sanding paper and progressively make your way up to 120 grit.
3. Wipe down your piece with a sponge and some water to remove all dust and rust particles. Allow to dry completely.
4. Prime
5. Paint, may need several coats. Allow to dry according to instructions on tin.
SCENARIO B – IF YOUR PIECE *DOES NOT* HAVE FLAKING OR PEELING PAINT:
1. Give your piece a quick clean with water and a damp rag or paper towel.
2. Prime
3. Paint it, it may require a few coats. Allow to dry according to instructions on tin.
Taking IKEA customization beyond just paint
There are a few companies out there that have become specialized in selling products specially made for “ikea hacking”. These companies mainly sell luxury looking products that you can add to your IKEA furniture to make them appear more custom and high end.
You can buy legs, pulls, fronts for your cabinets, geometric overlays, decals and even marble tops.
Here are a few to check out:
Superfront
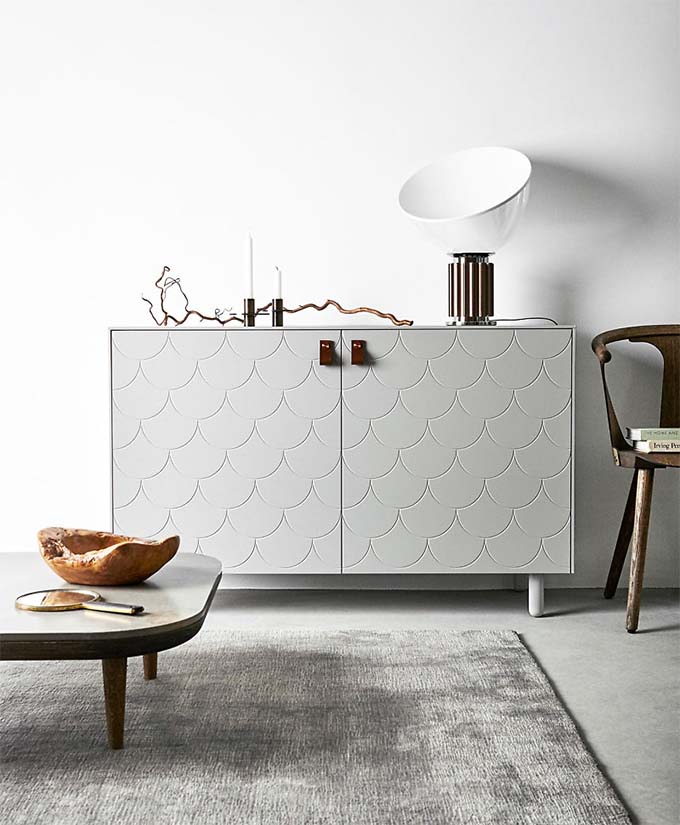
This Swedish company has a stunning range of Carrara marble tops, cabinet fronts, leather pulls, wood, brass and copper accessories and more.
If you live in Europe, you can buy any of their products.
US and Canada can only buy handles and legs at the moment.
Norse Interiors
Norse interiors makes wood tops, cabinet doors, panels, dresser drawer fronts and accessories like knobs, pulls and legs, for the Besta and Malm series.
Overlays
As the name suggests, this company specializes in kits containing overlays for some of the most popular IKEA series, like Besta, Kallax, Malm and Pax and many more.
You can buy overlays to apply on top of your furniture to give them a more glamorous and personalized look. Most of the designs offered at the moment are geometric.
Check out their inspiration gallery for an idea of what you can do with their products.
Pretty Pegs
Pretty pegs ships worldwide and sells legs, pulls and front layers for IKEA furniture. They carry a truly impressive selection!
Behang Fabriek
If you’re into decals, this is the place to buy them. Their website is a little confusing, as they also sell wallpaper and the menu is a little crazy. If you want to see all the decals they sell specifically for IKEA furniture, then just go here directly.
Semihandmade
This company carries a pretty decent selection of cabinet fronts for IKEA kitchen, bathroom and media storage units. Also a small selection of decorative hardware (pulls and knobs).
I hope this article gave you the confidence to tackle your next (or your first!) IKEA furniture painting project! And that you feel a bit more confident about how to paint ikea furniture!
I’d love to hear what you get up to, and I’m always available to answer any questions! Do not hesitate to drop me a comment below!
Now get painting, buddy! 😁
NEED SOME IKEA PAINTING INSPO? THEN YOU MIGHT LOVE THESE ARTICLES:
10 *STUNNING* WAYS TO HACK THE IKEA IVAR
18 HACKS TO COMPLETELY TRANSFORM YOUR KALLAX
12 WAYS TO TAKE YOUR BILLY BOOKCASE FROM DRAB TO FAB
Hey there!
Did this article give you some great ideas or teach you something new? Help me keep the content coming! Simply bookmark my Amazon link and then shop through it! Every purchase you make could earn me a small commission, at zero extra cost to you. Your incredible support keeps this little website alive and thriving. Much love, thanks a bunch! 🌟












Hello! Thanks so much for this guide – easily the most comprehensive one I’ve seen while researching. I’ve got a couple of powder coated steel pieces to repaint, and I’m very clear on the sanding and priming end of things, but less so on the paint end (latex? oil-based? spray paint? enamel?). Can I just use any paint over the Zinsser BIN primer, or is there a recommended type of paint I should use on the primed metal if I want to make sure it really holds up? Should I throw a poly top coat on it too? I’ve got a Gladom side table first up on my DIY list, and it’s likely to get used quite a lot, so durability is important to me. If it goes well, I’ve got some desk legs and a clothes rail that will follow suit.
I’ve seen wildly different advice online from different DIYers, so really keen to get your opinion on the best type of paint for the job!
Yes, you can use any type paint on top of the Zinsser. Personally, I just use regular latex house paint on pretty much anything that I put outside, it has always help up wonderfully. Latex paint is used on house exteriors all the time and does just fine, after all! I almost never top coat because I simply cannot be bothered – that’s not to say you shouldn’t, you can if you want to, it will add an additional layer of durability. If you’re really concerned about durability you can look into using oil-based paint but I honestly don’t think it has that much of an advantage over latex, it’s just more annoying to clean up. You can also ask at your local hardware store what specific metal paint they might suggest using – there are tons of different paints options on the market these days. There is no single correct answer for your case, just different ways of doing it. UNLESS you apply the paint incorrectly, whichever type of paint you choose will hold up just fine!
hello. we followed your guide. and used a dark satin colored paint.
[note we are very amateur DIY-ers]
we’re stuck at the paint step though. it’s frustratingly easy to create haze on the finish. a light rub with a finger or cloth – effectively ruins the work we just did [in spite of the fact we have 3 or 4 coats on the pieces at this point].
a light scratch across the surface with a nail also creates a haze/scratch.
is this par for the course with dark paints? should we have been more careful about not touching the surface before applying the polycrylic top coat? please advise [trying to salvage project. would hate to throw out what we’ve done]
Hi Mark, dark paints are beautiful, but as you guessed, notorious for showing everything unfortunately! Including dust! If you waited the recommended drying time between your coats of paint, and you waited enough time for everything to dry properly before applying the top coat, any marks should wipe right off when you clean. You will just maybe need to clean and dust a bit more frequently 😉
hello
help!!
I used the shellac primer on the laminated ikea kellax and then used a water based paint and primer on top.
I moved the piece into position and popped some items on top. the paint has chipped down to the laminate.
should I try another layer of the zinsser on top? followed by the top coat again?
Sounds like one of the products was applied incorrectly at some point in the process – it’s impossible for me to say where it went wrong, but either the primer, the paint or the top coat was applied incorrectly or didn’t have time to dry. If this process is done correctly the paint won’t chip. After priming, I recommend doing multiple coats of paint – how many coats of latex paint did you apply? Did you make sure the paint was 100% dry between each coat? Lots of variables at play.
Hello Vivien,
Thankyou so much for sharing your tips/experience with melamine!
I was wondering what I would use to paint something that will be outside (undercover) permanently? Would I just follow the steps up to the primer and then apply an exterior paint instead or could I get away with just a topcoat designed for outdoor furniture?
Thanks again,
Chloe
Do you know what white is used on the ikea ingolf chairs?
I’m at a loss. I primed my Billy bookcase with the shellac primer (rolled on 1/4 nap). Next day I painted 2 coats of behr matte paint (rolled on 1/4 nap). Day three I brushed on a coat of clear matte top coat. Waited 24 hours. I can easily chip the paint down to the primer by barely scratching with my nail.
Hi, I’m sorry I have no idea. It sounds like you did everything right but without actually seeing what’s going on I really can’t say what went wrong. There are a lot of variables.
Very informative article, but I’m still not sure what to do. I have a Froset chair,
https://www.ikea.com/us/en/p/froeset-chair-red-stained-oak-veneer-20429604/
which says it’s “Molded layer-glued wood veneer with surface of, Oak veneer, Tinted clear acrylic lacquer”. I really want the true red I see in the photos but the piece I got is more of a dull salmon red, so am thinking of working on it. I do like the “stained” effect, with wood grain showing through. What would you recommend? Thanks in advance–
You’d have to remove the acrylic lacquer on top likely by sanding it off, before attempting to change the color of the oak veneer.
Hi! We have a laminate project that we’re trying to paint, and we’d really like to seal it with something once we get it fully painted. Do you recommend the polycrylic sealant for laminate projects? We’ve messed up projects in the past by either not priming or sealing or using the wrong sealant, and we don’t want to make the same mistake! Thank you for your help!
Great article. I want to paint my old rectangle Bjursta dining table but I don’t want to see a solid color, is there a way to make it look like it has some wood te texture? Thanks
Outstanding blog! Great information and ideas! Brilliant! I found your page while researching how to remove gloss finish. I have the vision to redo my kitchen set. It has a gloss finish but it’s wood.
I used to love the look of darker furniture but now i walk into my bedroom and it’s so depressing. I know it needs an overhaul but i don’t want to go out and buy a whole new set of everything when what i have works just fine. I loved your article that was so well explained from start to finish. I purchased everything you suggested!! Fingers crossed it works hahahha
thank you, good luck, it will be worth the effort 🙂 <3
Just found your site and I love it! Quick question. I’m buying an Ikea bookcase to paint navy blue. Should I buy the black one – I was thinking it would be easier to cover the black with navy blue than the white? Many thanks.
100% yes buy the black! It will be way less work to paint it 🙂
Hi, really find your blog useful! What kind of paint should i use for a Docksta table top? Do you have a blog on this?
Great post! How long did you wait between painting with a latex paint and sealing with poly for the piece? The cure time for the paint I have is 4 weeks, should I want to seal until the 4 weeks? Thanks!
i didnt seal mine but i’d wait and stick to the curing times suggested by the paint you used
Hi Vivien! Thank you for this informative post – makes me feel a lot more confident in trying my hand at repainting our new console table. I’m a little uncertain still on what paint or material i should use when trying to transform this dark brown LACK table (https://www.ikea.com/us/en/p/lack-console-table-black-brown-50228034/) into a shade/texture similar to this (https://www.westelm.com/products/bridge-console-62-h6810/?pkey=cconsole-tables&sku=cm_src=console-tables||NoFacet-_-NoFacet-_–_-&cm_src=reducedClick&isx=0.0). We don’t want it to be completely white or just beige, we’d love to preserve some of the wooden streaks in the LACK table but don’t want it to be chalky. Any recommendations?
that’s a tricky one because the correct way to paint ikea furniture is to apply the shellac primer completely over your base laminate piece – the primer acts as a “adhesive” for your paint so you can’t skip that step. .. .the only thing that comes to mind is to dilute the bin primer with paint thinner, and then paint the diluted primer on, so that the brown base with the grain still shows through. this suggestion is entirely experimental as I’ve never tried this method before so try at your own risk!! i’m not sure if it would work or how the end result would look. but it may be worth a shot if you’re planning on scrapping the piece anyways. worst case scenario you can always just follow my method above and just paint the whole thing if it doesn’t look the way you want.
The IKEA piece I would like to stain says it’s “Light white stained pine”. Will sanding it remove that finish and allow me to stain it the color I prefer, or are other steps necessary?
Yes sounds like it! Once you’ve been sanding for awhile and hit raw wood you will know you’re good to go with restaining.
Great article! Thank you for sharing your knowledge and experience. I’m planning on building a library wall using Havsta (Billy isn’t deep enough for my various books) in my home office. I want to paint the shelves black, so plan to purchase the dark brown. The description on the web site indicates Havsta is made of – Solid pine, Stain, Clear acrylic lacquer – Would this fall under the laminate category, because of the clear lacquer or under solid wood?
Hi, thank you! Laminate is plastic, and acrylic is also another word for plastic. So yes you’d need to treat it was if it was laminate otherwise you’ll have major issues with the paint sticking properly. The only way around it is to sand off the layer of acrylic laquer to get to the solid wood.
Hi. For the LACK series the description in my country reads as follows
Particleboard, Honeycomb structure paper filling (100% recycled), Fibreboard, Plastic edging, Acrylic paint
Do you recommend the same process as laminate ?
Thanks
SR
Hi, yes.
Hi! This is a great read, I can’t wait to start my project. I haven’t decided yet, but how can I get the distressed look while still priming and painting correctly? I have dark brown Hemnes dresser and want to paint it white with slight distressing.
Hi, thanks! You’d proceed in the same way, then distress at the end.
Hi Vivien! How would one distress it at the end? Complete newbie here.
Thanks!
Distress with sanding paper!
I also have a paper foil ikea cupboard. Unfortunately I could not get the B-I-N primer to stick to this, it would just scratch off. The primer stuck to any laminate edges just not the main area of the cupboard. Just wondering if you had any luck in the end?
Hi,
I have run into and issue and was wondering whether you could help. Having read around about being able to paint ikea furniture i went and bought some wall units that i wanted to be the same colour as the wall. I used the suggested B-I-N primer, however it hasn’t adhered to the surface. I am painting Ikea Eket cabinets.
On further inspection, the paint has adhered to the sides but not the top, after further inspection it seems that the thickness of the wood has plastic edging but the main area is covered in paper foil, which this primer doesn’t adhere to. I have painted a section with my paint and was able to peel the primer and paint off in one go.
Is this something you have come across? Do you know of any primers that would adhere to this surface?
How many coats of the top coat do you recommend doing over the laminate type furniture? I purchased the brand/type you recommended and was just wondering how many coats you would do – the can says to use 3 coats, but is that necessary for this type of project?
Thanks!
I’d do what the product recommends 🙂
Thanks for sharing! 10 years back I did a similar project on the kitchen using oil based paints on formica laminate. Still going strong, slight yellowing as I didnt seal it.
Now I have formica laminate wardrobes to reface in bedroom but I cannot get a shellac primer here in Singapore. What is my next best option for primer? I’m not keen to use solvents in the bedroom due to the time needed for the smell to go. I can get the zinsser bulls eye 123 primer but it is water based. Zinsser suggests using it for the same purpose. https://www.rustoleum.com/product-catalog/consumer-brands/zinsser/primer-sealers/bulls-eye-1-2-3-water-base-primer
Would I be making a mistake if I go with zinsser bulls eye 123 water based primer? Anything I can do to harden the surface and make it more durable like choice of top coat paint?
Thanks! Ed.
Yes I think using the water based bulls eye is a mistake! I’d bite the bullet and use oil-based if you want a good finish.
Really useful information on painting over Ikea laminate furniture. I am about to attempt to paint my Ikea laminate kitchen cabinets. They’re 10 years old but still going strong and I cannot afford to replace my whole kitchen right now. So we have decided to give the kitchen a facelift by painting the cupboards dark blue. I will follow your advice about priming first. Any other tips you have for painting kitchen cabinets or shall I just treat it like any other Ikea laminate piece? Would you recommend topcoat on kitchen cabinets? Thanks, Anna
I highly recommend checking out this Emily Henderson article before embarking on painting your kitchen cabinets! It can absolutely be done, but if you want a professional-looking finish there is quite a bit of work involved, so it’s good to be aware! here is the link: https://stylebyemilyhenderson.com/blog/diy-painting-kitchen-cabinets 🙂
Thank you so much for this detailed tutorial! I’m starting my first DIY/IKEA hack so this may be silly, but would I follow the laminate steps or solid wood based off the materials listed for the molger bench. It says: Solid birch, Clear polyurethane/acrylic lacquer. I assumed the clear part was a clear sealer coat on top, but after reading your post I’m beginning to think maybe it’s laminate after all? I planned to use outdoors for my daughter and wanted to seal it with a spar varnish after re-painting or staining. I’m not worried about tossing if it doesn’t hold up after the first year, just wanted to experiment with an idea I had. Any help would be much appreciated. Thank you in advance!
Thank you so much! If I’m trying to match their white stain, would you recommend the matte finish? Here’s their link – https://www.ikea.com/us/en/p/hemnes-8-drawer-dresser-white-stain-00318598/
It’s been awhile since I’ve seen the white stained hemnes in person so I can’t 100% remember what the finish looks like! I would say if you are looking at the original and don’t see any sheen whatsoever, then go with the matte, yes!
This is very helpful! Thank you so much! Quick question… I’m trying to match this IKEA dresser’s finish – https://www.ikea.com/us/en/p/hemnes-8-drawer-dresser-white-80374284/. What type of Minwax Polycrylic top coat/finish would you recommend; Matte, Satin, Semi-Gloss, Gloss?
I’ll be using Behr Marquee interior white paint in eggshell, unless you recommend differently?
Thanks again for all your help!
To match hemnes I think satin is the best finish !
Hi! thank you so much for this article, it was such a good read. I have the BESTÅ BURS desk ( Particleboard, Melamine foil, Plastic foil, Plastic foil) that I have been using as a vanity. Because of the heat from my hair straightener is has started to crack in some places. what would you suggest for this? I was going to sand it and use the Zinsser Cover stain but then discovered the Mohawk repair stick..I don’t need it to look perfect but just wanted to repair the cracked look. what would you recommend Thanks so much!!
Hi Lara, it definitely can be tricky to paint over damaged laminate since there is always a risk that the paint won’t bond properly. That being said, from what you’re describing it does sound like you could try applying a spackling or a putty on the cracks, sanding it down and then priming and painting overtop of all that, and it would very likely fix your situation 🙂 good luck!
Hi Vivien!
I feel dumb for asking this question, but I’m wondering if you know what the Hemnes dresser in white (not white stained) would be considered? It has a glossy finish to it but it is solid wood underneath….I’m wondering what process I should follow. Every DIY I’ve seen is for the white stained one and I don’t want to mess up! I am planning to sand it anyhow, but not sure if I need to do the primer and top coat if I’m planning on using chalk paint. Thank you 🙂
Devin
Hi Devin, you’ll need to treat that as laminate. The non-stained white Hemnes is basically a combo solid wood/particleboard piece of furniture. The structure is solid pine, but it is covered in particleboard and acrylic paint (laminate). So any part of it that is white, is laminate, and should be treated in the way that is described in my post 🙂 TLDR: yes, you need to use the shellac primer. Hope that helps and good luck with your project!!
Hi there- I was wondering do you think you could sand down Havsta and then re-stain it? Like you can with other vintage wood furniture?
Hi, yes the havsta furniture is solid pine so you could sand it down and restain.
Hi Vivien, thank you for this post. Do you know anything about staining an IKEA shelf a darker color?
https://www.ikea.com/us/en/p/lack-wall-shelf-white-stained-oak-effect-60383519/
I would like to stain the shelf to match my existing cabinets in my kitchen. I think it would be hard to do because of the acrylic finish that is on the shelf (and it is a “stained oak effect” that is currently on the shelf), but wanted to see if there is a way to do it.
Hi there, unfortunately you can’t stain laminate. You can only stain solid wood. Wood stain is very thin, with a consistency just like water, and seeps into the grain of solid wood and “stains” it. Laminate furniture is basically plastic so you cannot treat it the same way as wood.
Hi Vivian, This is such a clear description of how to paint IKEA furniture, so thank you! I just had a quick question. The piece I am hoping to paint is laminate, but is starting to peel and warp just a little around some of the corners. I was wondering if there was a way to patch/fix those areas before I start with a primer. Thanks!
Hi Eris, it can be tricky to paint over damaged laminate! The damage can interfere with the way the paints bonds to the laminate surface ie, the paint might not stick properly and you’ll get lifting/peeling paint. You *could* try mending with some spackling or putty (I recommend this kind https://amzn.to/3p6UWKM) and then sand it down and then prime/paint over top of that. But as always it depends on the extent of the damage of your piece/many variables so I’m not sure if this method would work for you! Good luck, & let me know how it goes!
Hi Vivien. Very informative post for sure. I want to paint my monstad mirror and not transform it as so many other posts instruct. Any opinions past the primer suggestion? I would appreciate your thoughts as clearly u r an expert!
Is it black? If so, my preference would be to lighten it so that it doesn’t look so heavy. I would paint it white, off white or a light warm creamy, beige! Depending on your surrounding decor of course 🙂
Hi! I have painted a malm dresser a blue grey color using your steps. The dresser was originally white. I want to do another one but my ikea is out of the white dresser and I’m getting anxious to complete my project. If I get the malm in the black brown color and follow the same steps, will the finished product look different since the base colors were different?
Technically it shouldn’t matter what the base color of the furniture is. If you are priming and getting good coverage with all your paint, i think the difference would be negligible. You may just need to give it more coats of paint to get even coverage. 🙂
Hi there! Thank you for your detailed guide. I am excited for my Winter project but need one more clarification.
As for the interior paint, those come in different finishes:
1. Flat
2. Matte
3. Eggshell
4. Satin
5. Semi-Gloss
6. High-Gloss
I would assume since we are using a Top Coat, #4, 5 and 6 will not be required. Eggshell is typical on walls. That leaves me with Flat or Matt. Which do you recommend?
many thanks!!
It’s completely up to you – personally, I prefer a matte finish for my paint and top coats.
I am getting ready to start my painting project over laminate. I’m wondering what the clean up process is with the Zinser BIN primer you have listed. Thanks!
Hi Abbe, you will need to use paint thinner to clean your brush if you use shellac primer.
Hi! I purchased the Vittsjo shelf in Black and want to spray paint it shiny Gold. Do you still recommend sanding/priming before spray painting it? Or since it is new, can I just spray paint over it? Thank you!!
I love that shelf, it looks so nice! But yes, it doesn’t matter if it’s new or not, the prep is still required 🙂
My Ikea wardrobe has paper foil covering the particleboard. Will this behave the same as laminate? Thanks, this is such an informative post!
I would like information on this as well. Some IKEA bookcases almost have a paper on the backs that doesn’t look like a laminate – is paint or poly too “wet” to apply to this effectively??
I believe it should work with the method I describe but you could test a small inconspicuous area first to be safe!
Thank you so much for taking the time to respond – I will try that.
I believe it should work with the method I describe but you could test a small inconspicuous area first to be safe!
On the dresser you painted for your mom, did you use a topcoat or just the 4 coats of latex paint? Can you recommend a good latex paint and topcoat if you used that? Thank you
Hi Jess, no I didn’t use a topcoat but it’s holding up fine for her 🙂 I would recommend any house latex paint you can buy and tint at the home hardware store – you can go with any brand you like! Or if you have a favorite brand like Dulux etc, you can just go with a brand you are familiar with. For topcoats I would recommend the ones I listed in the article!
Hi! I’m planning on painting my grey Alex desk (the one with two drawers) from IKEA to a white color.
Based on the materials & care of this item, do you recommend that I sand this desk down then use the shellac based primer? I am trying to not have a textured finish, but rather smooth just how it originally was. Or do you have a recommended set instruction list on how to change this specific desk from gray to white? Thank you so much!
Hi there, for the Alex desk I would just use the exact same process i used in my Youtube video where I painted a laminate shelf (the video is embedded in this article if you want to see it!)
Hi I want to paint my malm dresser but I was looking into using milk paint what top coat and primer would you recommend for a satin finish ?
Hi Wesley, you can use the products I recommended in the article. The Zinsser primer will work fine and then you can use a water based poly satin top coat. Everything is mentioned in the article 🙂
Hi,
We were at Ikea and tried to get one of the steel bed frames in white, but it’s only in stock in black. We are time pressed for an apt move in and I thought to get the black and paint it white. It is described as Epoxy/Polyester Powder Coat on Steel. The searches I did before I found you made painting over the powder coat seem very involved, but they were a lot of auto pages. What is your experience/suggestion with painting over the powder coat? It’s new in box so no peeling or aging issues obviously. Thanks so much! How happy I am to come across your page!
Hi Sheridan! I would recommend using the shellac primer I mention in the article – it sticks to metal and will ensure that your topcoat paint sticks!
I have a question I bought the Behr one coat paint that is advanced stain-blocking paint & primer. Do I need primer and finisher on my laminated ikea piece?
Even though your paint has primer mixed in, it might not stick properly – you need a shellac-based primer.
Hey there,
What grit of sandpaper do you recommend for sanding the solid wood furniture?
Hi Jillian! I usually use medium grit like 120 or 150!
Hi there – Thanks for this very helpful article! Do you think I can paint the Glenn Bar Stool? It’s polycarbonate plastic. Any advice would be greatly appreciated. Thanks!
Absolutely! Here is a list of all the best paints used on polycarbonate plastic: https://www.ehow.com/info_8611153_types-paint-used-polycarbonate.html
Failing using any of those, I believe the shellac primer I recommend in the article would do great as a base for any paint you chose to use!
Thank you!
Hello, thanks for this – super informative! Would you by chance know how to weather/waterproof a melamine table for exterior use? I’m interested in transforming the Melltorp table into an outdoor patio table. Maybe melamine isn’t that different from laminate, but without changing the color, do you think a coat of primer and polyurethane would be enough? Don’t know if the legs would need any protective coat, they’re powder-coated steel. But if I wanted to paint it…latex exterior paint after primer? Any other recommendations? Thank you!
Hi Kira! I probably wouldn’t place the Melltorp outside unless you either live in a climate where it doesn’t rain or the table is protected from the elements! The problem is not really the melamine, but the fibreboard underneath the melamine coating. Once the fibreboard gets exposed to water, over time it will absorb the water like a sponge, and will quickly start to swell and warp. I don’t know if it would be enough to seal the melamine – maybe? If you’re really set on it and are up for an experiment (aka OK with throwing it out if it doesn’t work out!), you could try sealing it with shellac first, then coating it with polyurethane … The legs are fine as they are since they are steel, they wouldn’t need any further treatment. Hope this helps somewhat!
Thank you, that does help! I was thinking about spray painting it with a 2 in 1 primer exterior paint, but you’re probably right about the warping and I don’t want to destroy the table if I don’t have to. I think I’ll do a different hack instead and replace the top with wood which I’ll stain and weatherproof, etc etc. Thanks so much for your input! 🙂
Oh yes replacing the tabletop altogether is a fantastic idea!! I hope your project turns out great 🙂
Hi! I’m interested in painting my white Ikea shelf to look like wood. What’s the best way to do that? Thanks!
Hi Alison! I would recommend using a wood finish contact paper. 🙂
What finish of top coat do you recommend to match the finish on the Ikea Hemmes furniture? I am painting a Malm bed to match a Hemmes nightstand and can’t decide between matte or satin…
Hi Izzy! From what I can remember from the Hemnes series, it’s not completely matte – so I would go for the satin finish! xo
Love information- thank you. What kind of paint did you use for your mum’s laminate piece what?
Hi Alicia! After priming with Zinsser, I just used regular water based latex indoor house paint. 🙂
you’re amazing thank you! This solves my problem of my older laminate black bookshelf problem. A great piece that won’t go in my new boho condo living room (thanks to your blog/video) on the boho ideas. Maybe this will be my pop of color…
ps. Your links make me leave your blog, so may be better to have the option of opening another tab
Thank you Jamie! I hope your project turns out awesome! Thanks for mentioning about the links – I’ll check them out!
Great informative post. On the piece you painted for your mum, which type of paint did you end up using? I see you listed the color and that you used the Zinnser primer, but which type of paint (latex, oil based, chalk, etc)? Thank you in advance?
Thanks Edda! Oops I should have mentioned that! After the primer I used a regular latex paint 🙂