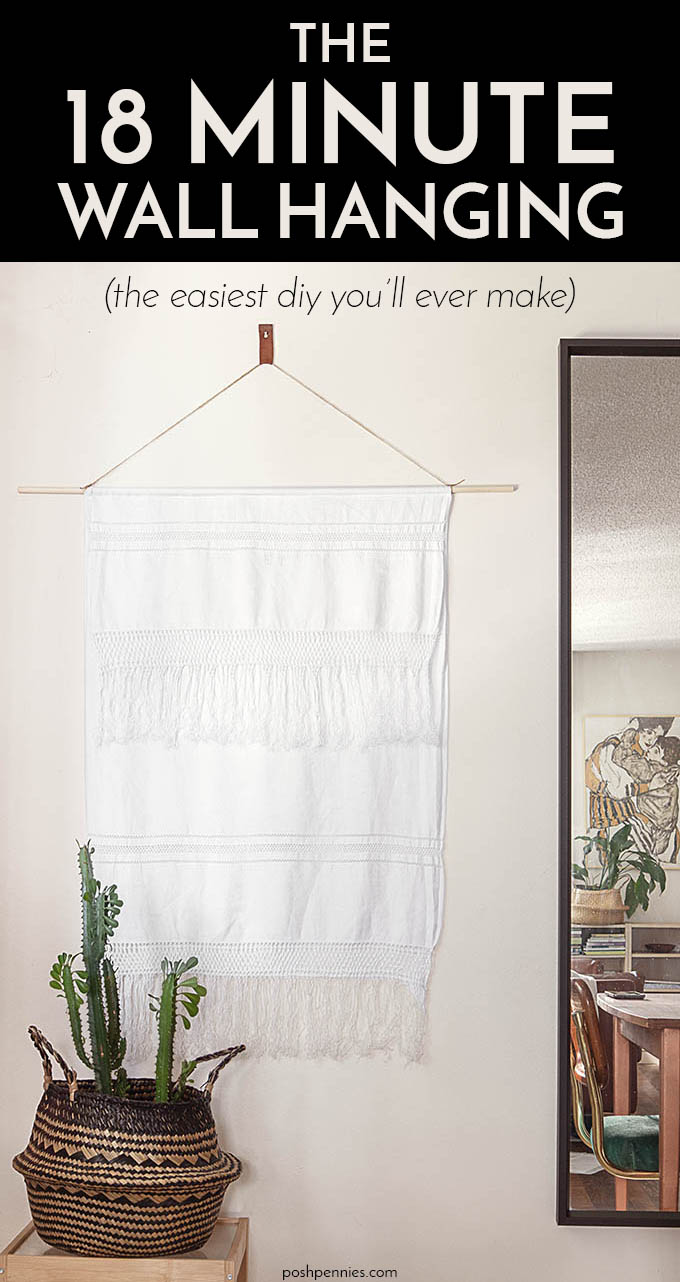
Easiest DIY Wall Hanging You Will EVER Make – No Weaving!
This post may contain affiliate links. If you make a purchase through one of my links, I may make a small profit at no expense to you. For further information, please view my policies.
Seriously, this is the EASIEST diy wall hanging there is. I already checked the whole internet for you.
If you:
- need to decorate a large wall
- don’t have a big budget
- don’t have a lot of time
… then this is 100% going to be your fave DIY ever.
As far as DIY wall decor goes, it truly does not get much easier than this.

If you make this wall hanging and you skip the leather tab part, you can make it in under 20 minutes – it’s that easy!!
I made this boho wall hanging in just 30 minutes. And I’m no master crafter!
Also, you pretty much can’t screw this up. So that’s always reassuring.
Other bonus? It only cost me $2.50 to make this wall hanging. I already had all of the materials that I needed at home except for the wooden dowel rod, which is why it turned out to be so cheap for me.
I realize not everyone will have all the required items (don’t worry, it’s not that many!) so I will give you links below for where you can get some of the stuff for cheap online.
The fabric I used for my diy wall hanging is a handmade towel that is is almost 100 years old. It belonged to my great-grandmother.
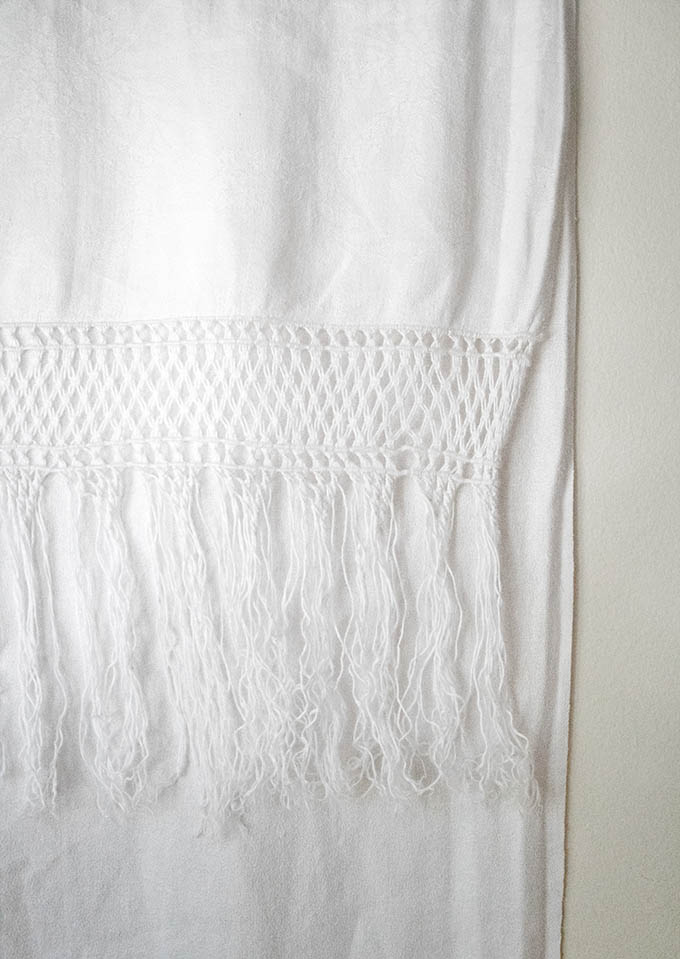
She embroidered her initials on it as you can see in the photo below!

To make this DIY wall hanging, you will need:
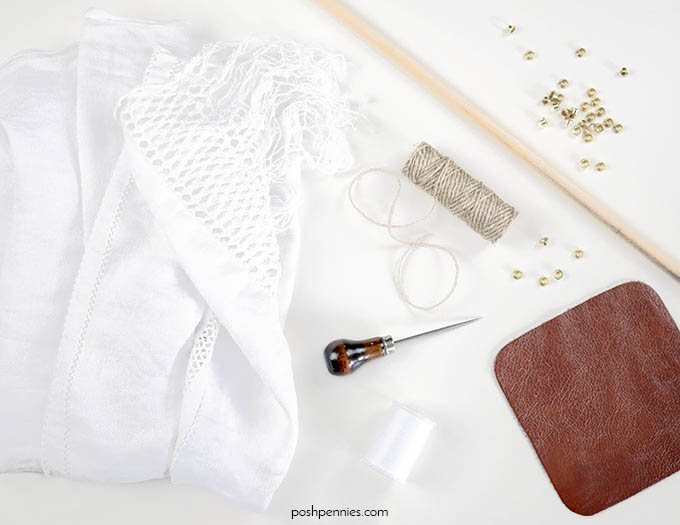
- a cloth table runner or piece of fabric (fabric should be “finished” on front and back since you’ll see both sides)
- wooden dowel rod (or use a branch for a more rustic look)
- hand saw
- sewing machine or no-sew fusible tape
- jute twine
- one strip of leather, 1″ x 5″ (optional)
- super glue (optional)
- one eyelet and an eyelet puncher (optional)
- awl (optional)
*small hint – you can get leather samples for free from certain furniture retailers. I got mine from Wayfair before I ordered my sofa. I held onto the samples because I knew I’d want to use them to make something sooner or later.
Step 1: Iron
Time required: 6 minutes

Iron your fabric if it has creases. If you’re using heavier fabric this step may not be necessary. This is the step that took me the longest this whole project 😂
Remember, your fabric should be “finished” on both sides, since we’ll be folding the fabric across the dowel and we’ll see the back of it. If you want to use a patterned fabric that is only printed on one side, just take two pieces of the fabric and stitch them wrong sides together.
Step 2: Measure
Time required: 2 minutes
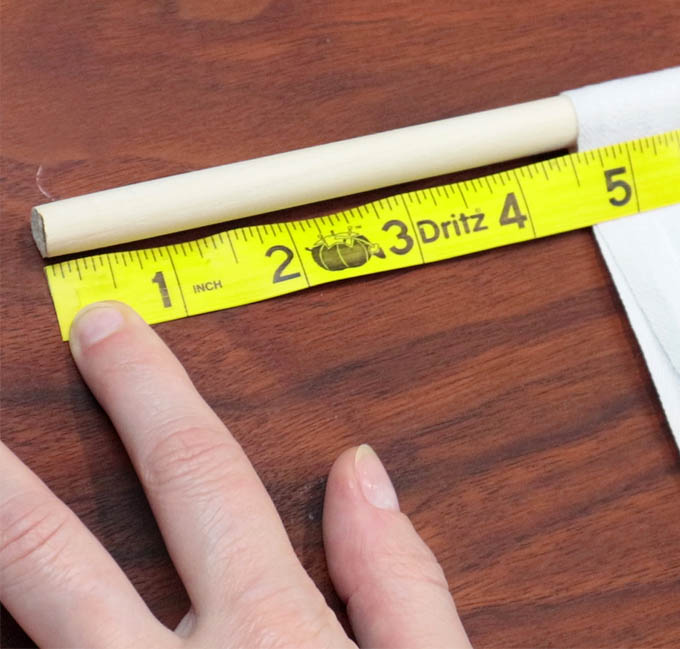
Decide on the length you want your dowel. I wanted my dowel to extend 4.5″ beyond each end of my fabric. Measure and mark it.
Step 3: Saw
Time required: 2 minutes

Saw your wooden dowel rod to the desired length by cutting where you made your mark before. You should only need to make one cut!
Step 4: Fold over and pin
Time required: 2 minutes
Fold your table runner/fabric over your dowel. Keep the front shorter than the back.
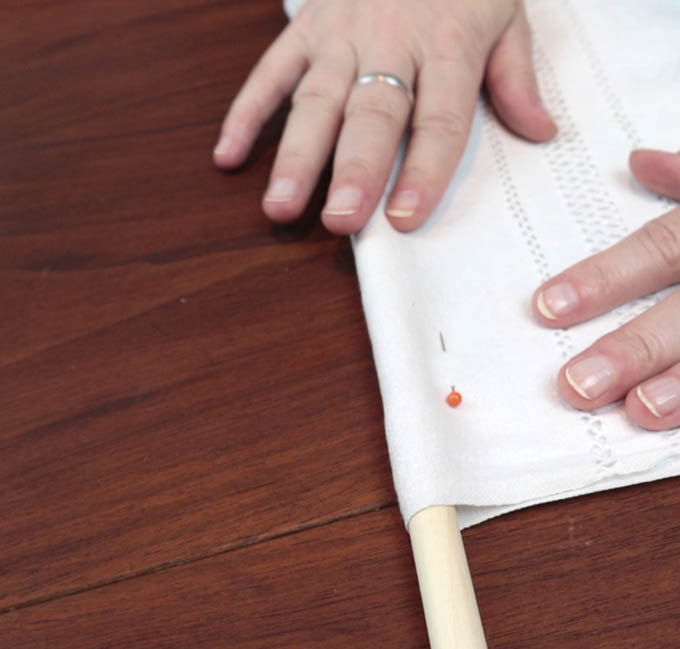
If you are sewing, pin or clip into place.
If you are using no-sew fusible tape, you’ll just need to mark where to put the tape.
Remove the dowel.
Step 5: Sew channel
Time required: 2 minutes

If you are using a fabric that is thick enough, you probably won’t need to sew at all. Test it out, but it should enough to just drape it over the dowel! Sewing is required only for thinner fabrics that will easily slide around.
Go to the sewing machine.
(I use this sewing machine, I love it. It’s awesome for “casual” sewing, but it’s not totally basic either. The perfect midrange sewing machine!)
Now you are going to sew the channel for your dowel. You literally only need to sew ONE line of stitches, it should take you 30 seconds, 1 minute if you stitch at the slowest speed.
You will want to make sure the channel is wide enough to fit the dowel back in! Otherwise you’ll have to spend an extra 5 minutes ripping the seam out to start over (I may or may not have done that 🙄).
TIP: If you DON’T WANT TO SEW, you can simply use no-sew fusible tape in between the two layers instead!
Step 6: Insert dowel
Time required: less than 1 minute
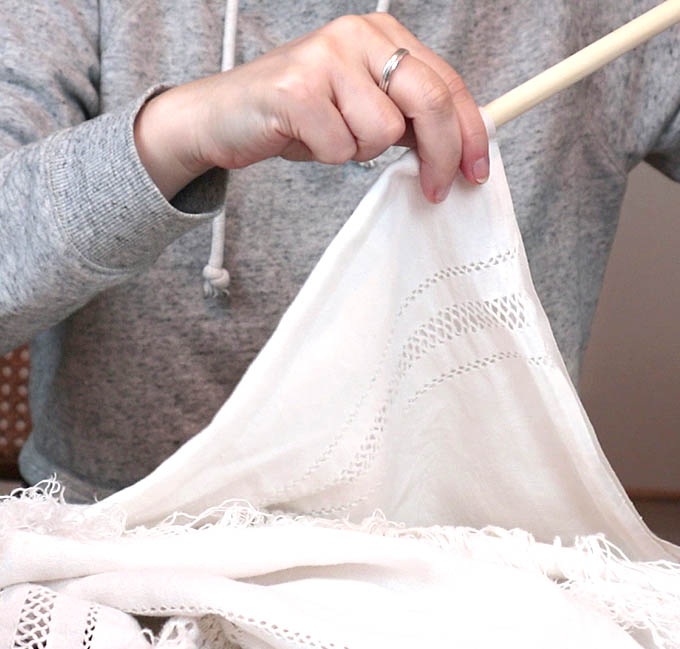
Slide the dowel back into the channel you just sewed. I hope you didn’t make it too tight like I did the first time 🙂
Step 7: Add twine
Time required: 3 minutes
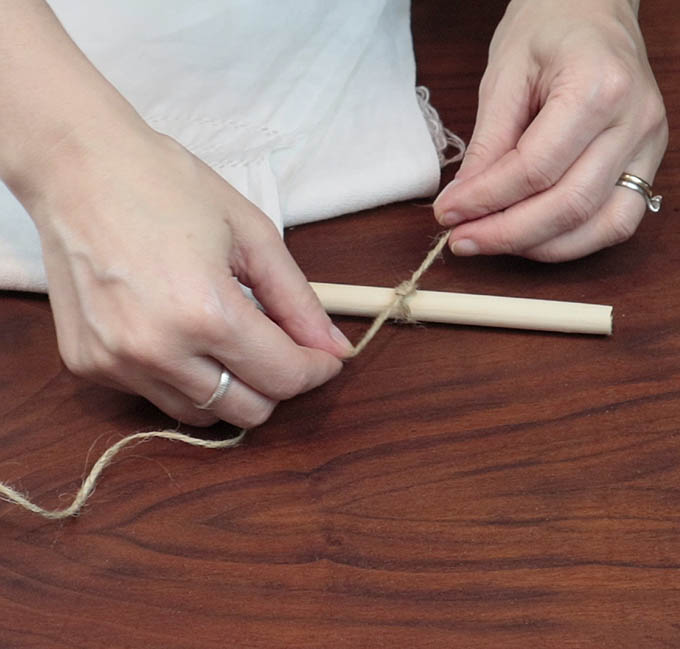
Grab your twine and tie a knot on either side of the dowel. Make sure to allow enough twine to account for how high or low you want your tapestry to hang. You are ready to hang your creation!
Or you can move onto the next steps which are to add a small leather tab embellishment.
How to create the leather tab to hang your wall hanging (optional)
Step 1: Cut a leather strip
Time required: 2 minutes
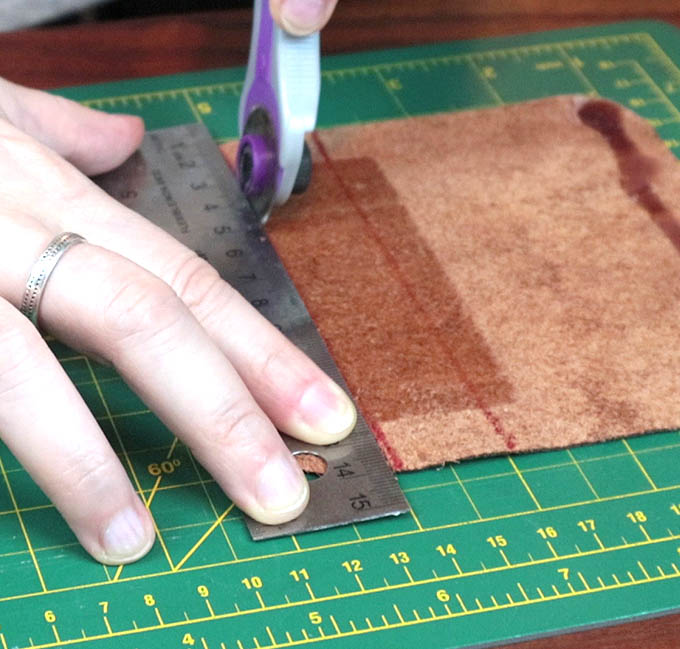
Cut a strip of leather that measures 1″ x 5″. I used a rotary cutter because I have one, but you can just use regular scissors!
Step 2: Fold over
Time required: less than 1 minute
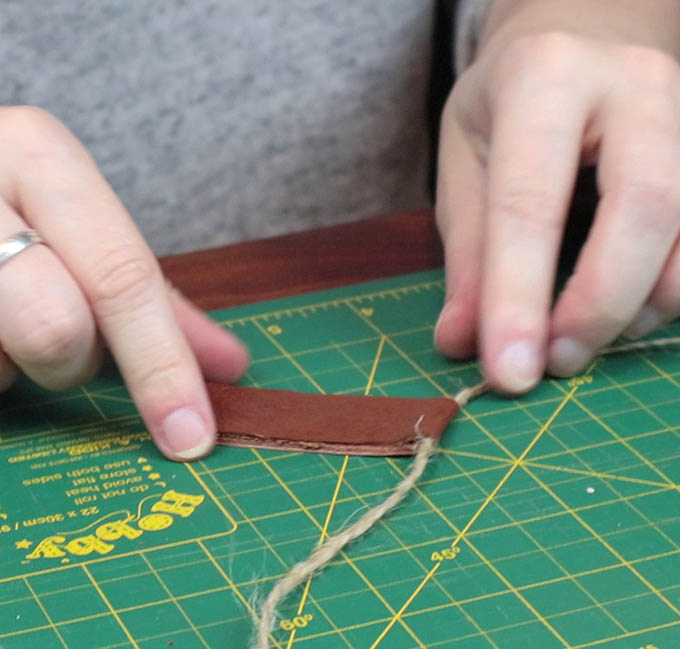
Fold it in half lengthwise over the twine that you tied to your dowel. Once folded, you will end up with a tab that is 1″ x 2.5″.
Step 3: Glue
Time required: less than 1 minute
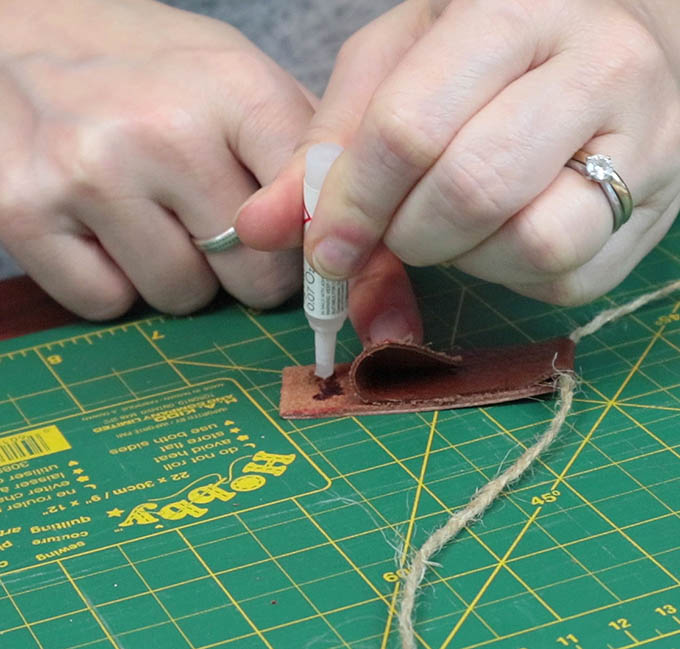
Place a spot of glue where the two ends of the tab meet. Allow to dry. If using superglue, it will take less than 30 seconds. I used nail glue, because that’s what I had on hand 😁
Step 4: Poke a hole
Time required: 4 minutes
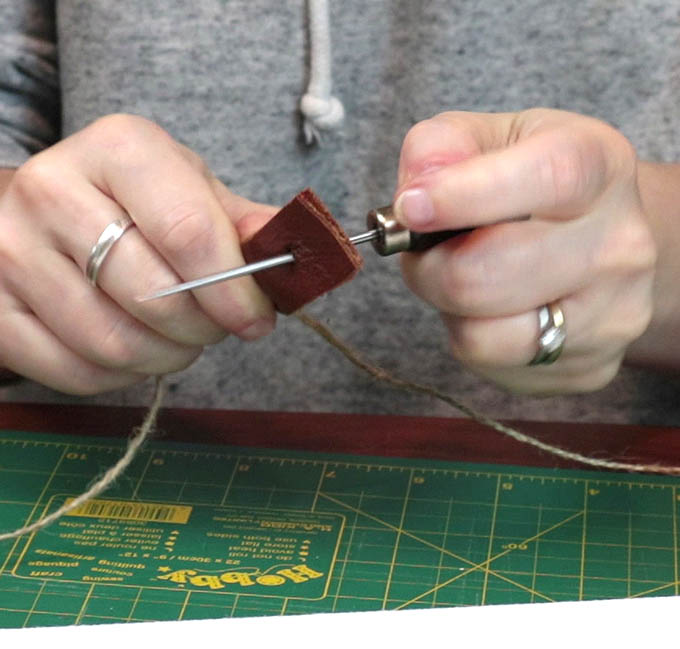
Use an awl to poke a hole through the leather at the end of the tab where the two sides meet and are glued together.
If the hole is too small, use a chopstick to widen it.
Step 5: Add an eyelet
Time required: 3 minutes

Grab your eyelet and stick it in the hole you just made in your leather tab. Use your eyelet puncher to set the eyelet. Aaaaand, DONE!
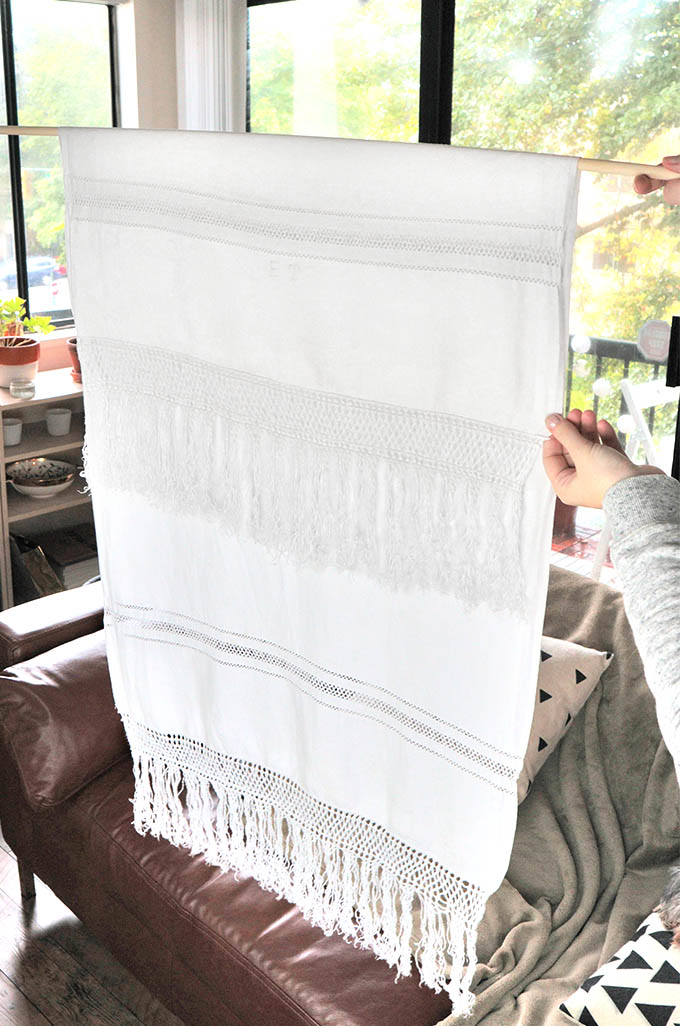
See?? It really was that easy.
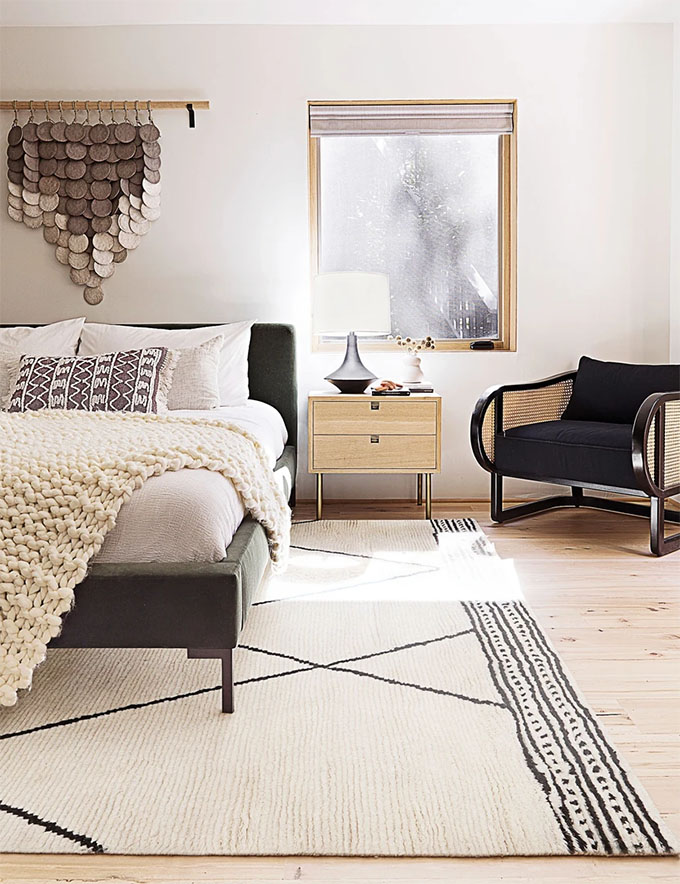
Behold, your beautiful DIY wall hanging, all with NO WEAVING, no complicated macrame knots, and even no sewing if you went the no-sew fusible tape route!
If you liked this super easy, super fast handmade wall hanging idea, please don’t forget to share it with your friends!
Hit that share button or pin it to Pinterest, it really helps me out! ♥ Thank you!
NEXT UP: MORE COOL IDEAS TO FILL BIG SPACES ON YOUR WALLS!
xox


This looks amazing! I think your bisnonna would be proud 🙂
Thank you! ♥ Now I think of her every time I look at the wall hanging!