12 ways to take your Billy bookcase from drab to fab
This post may contain affiliate links. If you make a purchase through one of my links, I may make a small profit at no expense to you. For further information, please view my policies.
The IKEA BILLY Bookcase: An Icon
According to IKEA, it’s estimated that every five seconds one BILLY bookcase is sold somewhere in the world! 🤯 What?!

It should come as no surprise then, that 120 million IKEA BILLY bookcases have been sold worldwide since the popular shelf was introduced in 1979. Are you one of those 120 million?🙂
The thing that makes the BILLY bookcase so hackable is its simplicity and versatility. The unit is clean lined, and comes in a range of widths and heights. You can also retrofit it with elements like cabinet doors and drawers, which are sold by IKEA as well as by third-party retailers. It’s safe to say that, when it comes to BILLY IKEA hacks, you’re really only limited by your creativity.
Best BILLY IKEA Hacks
If you’re wondering how to make your BILLY bookcase look better or more unique, or you’re hoping to fake a built-in look, keep reading, because I’ve rounded up some of my favorite BILLY bookcase hacks that’ll give you more than enough inspiration to get started. If you were to take a look over on Pinterest, it would appear that BILLY IKEA hacks are almost as popular as the bookcase itself. With a little creativity and some basic DIY skills, you can transform your BILLY bookcase into a custom piece that perfectly suits your style and needs.
But before we get to the inspiration, let’s take a moment to appreciate the BILLY bookcase in all its simplicity:
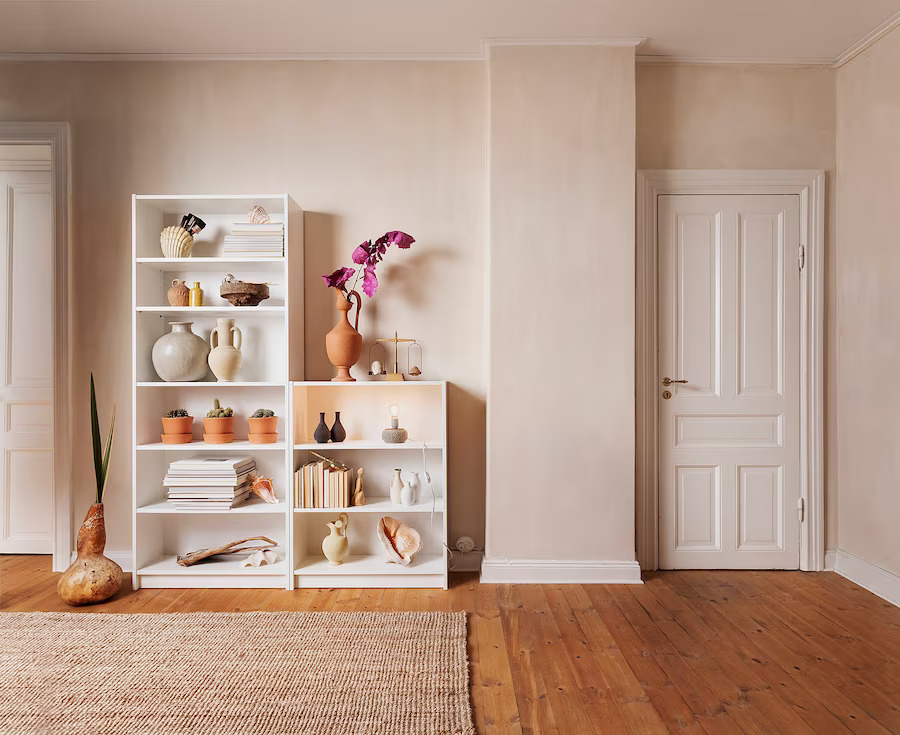
One of the things I love most about this sleek unit is that it comes in 90 different options on the IKEA website. It comes in various widths and heights, as well as corner configurations, with glass cabinets, and so much more, which makes it a great subject for all sorts of customizations.
The other huge selling point with this piece of furniture is that the BILLY bookcase is incredibly affordable. The standard-size bookcase, a 31″ wide x 79.5″ tall unit, costs just $89 (which means you’ll have money left over to make it your own!).
Stacked Billy Bookcase Hack

One way to make the most of your space and create a stunning custom bookcase is to stack Billy bookcases to reach the ceiling (like Vintage Revivals did in the photo above). By stacking multiple Billy bookcases together, you can create a seamless, floor-to-ceiling unit that not only provides ample storage but also adds a striking focal point to any room.
To achieve this look, you’ll need to measure the height of your ceiling and select the appropriate number of Billy bookcases to stack. You can use the Billy bookcase height extension units to add additional height to each unit, giving you even more storage space.
When stacking the bookcases, it’s essential to secure them to the wall to ensure stability and safety. Use the included brackets to attach the bookcases to the wall, ensuring that they don’t tip over or wobble. Vintage Revivals has a great tutorial on how to stack Billy bookcases if you want to try this out.
Create Arched Built-ins
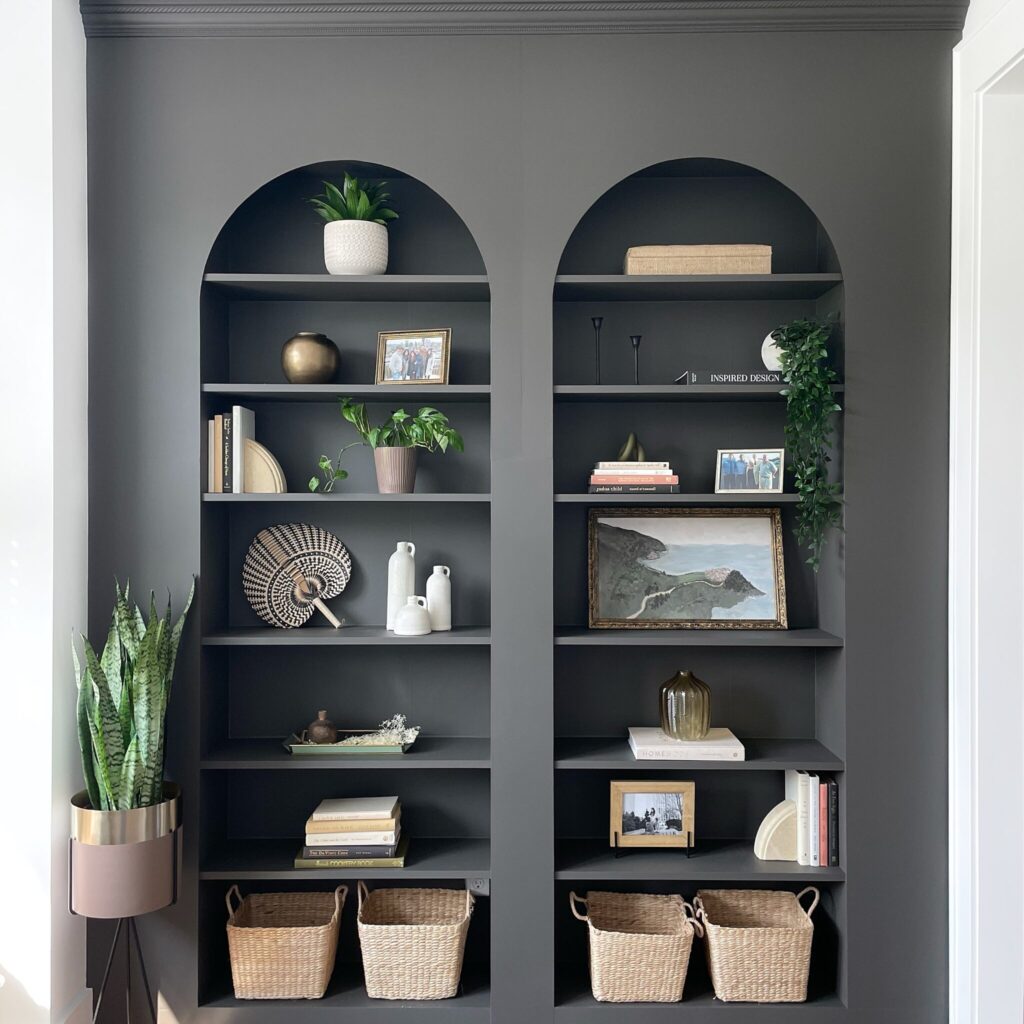
Arches are everywhere in interior design right now, so why not add them to your BILLY bookcase? You can get the effect above by cutting arches into plywood sheets, and affixing the plywood in front of the bookcases. The cabinets look built in to the wall and much more custom!
Add Arches to Billy Cabinet Doors

If you love the idea of having arched built-ins, but want a simpler, more cost-effective option, here’s a trick: transform a BILLY bookcase into an arched, sophisticated-looking masterpiece.
All you need to do is affix plywood cutouts onto the front of the BILLY bookcase, in a manner that creates the desired arched shape, and then paint the entire cabinet in a single color, for a cleaner look. With this easy DIY technique, you’ll be free to bask in the glory of your personalized arched built-ins at a fraction of the cost!
Arched & Fluted Billy Hack
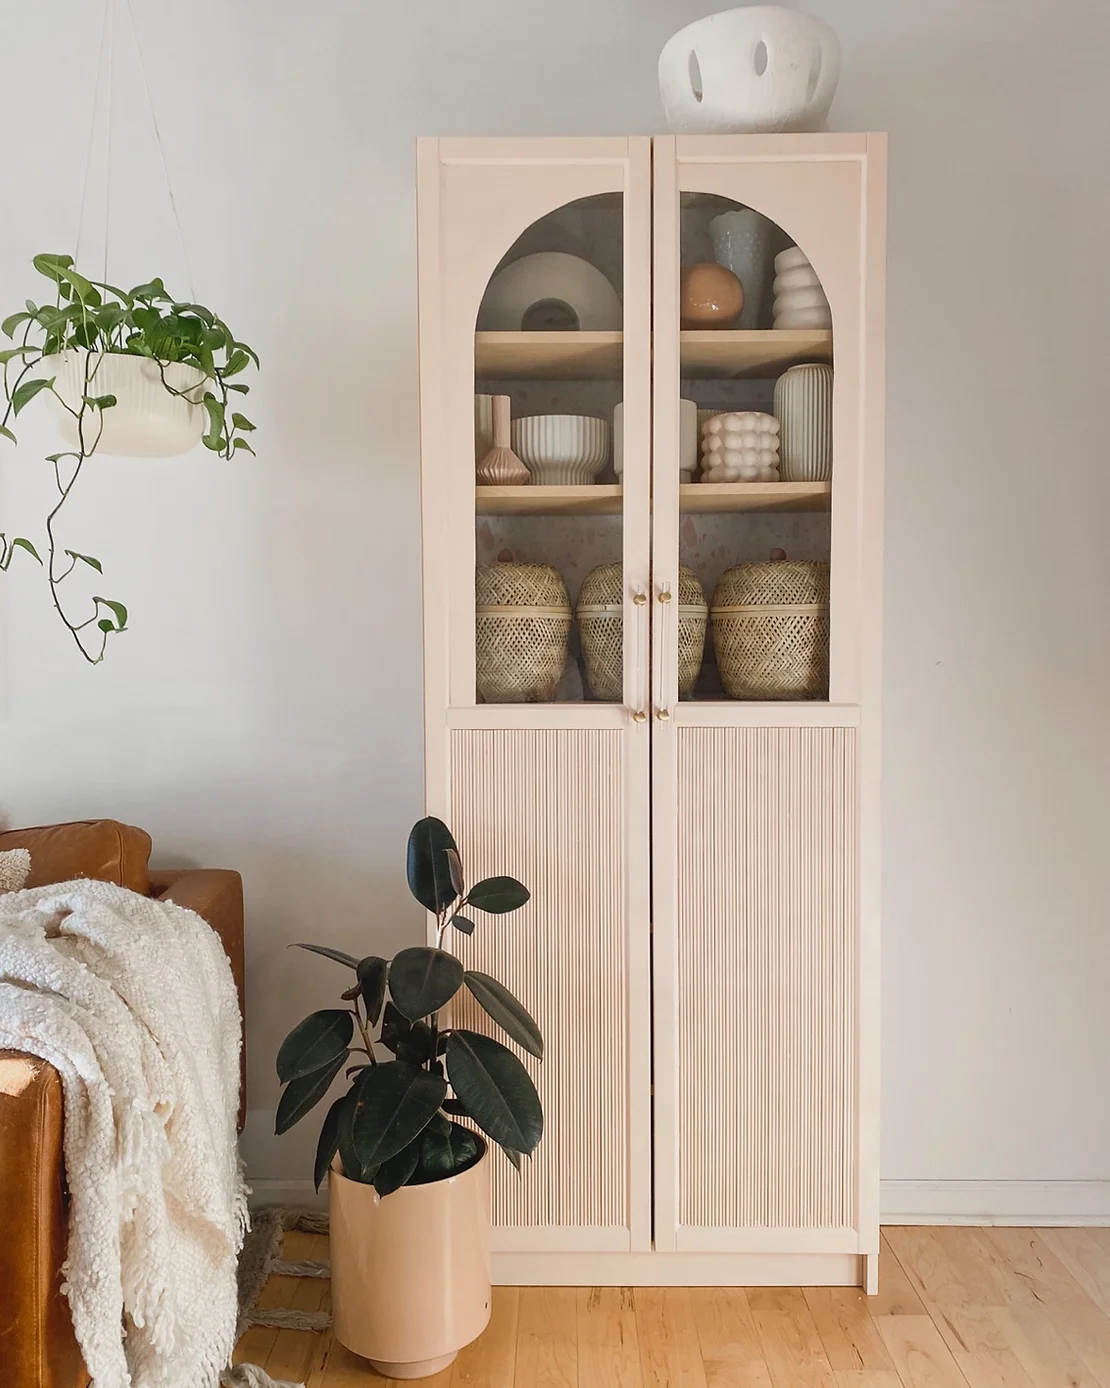
To take the arched cabinet look a step further, this Billy Ikea Hack brings the arches midway down the cabinet, and add some texture by adding a fluted detail to the base panels (a tip on doing that, below!).
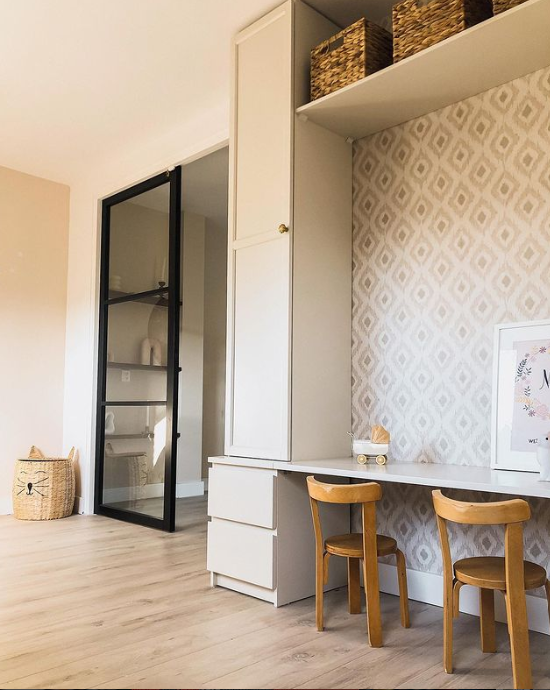
IKEA BILLY Hack with wallpaper

I’ve seen all sorts of BILLY hacks with wallpaper. Most of them involve adding regular or peel-and-stick wallpaper to the back of the bookcase. This is a great chance to bring a new pattern or color into your space.
Built-in BILLY Bookcases
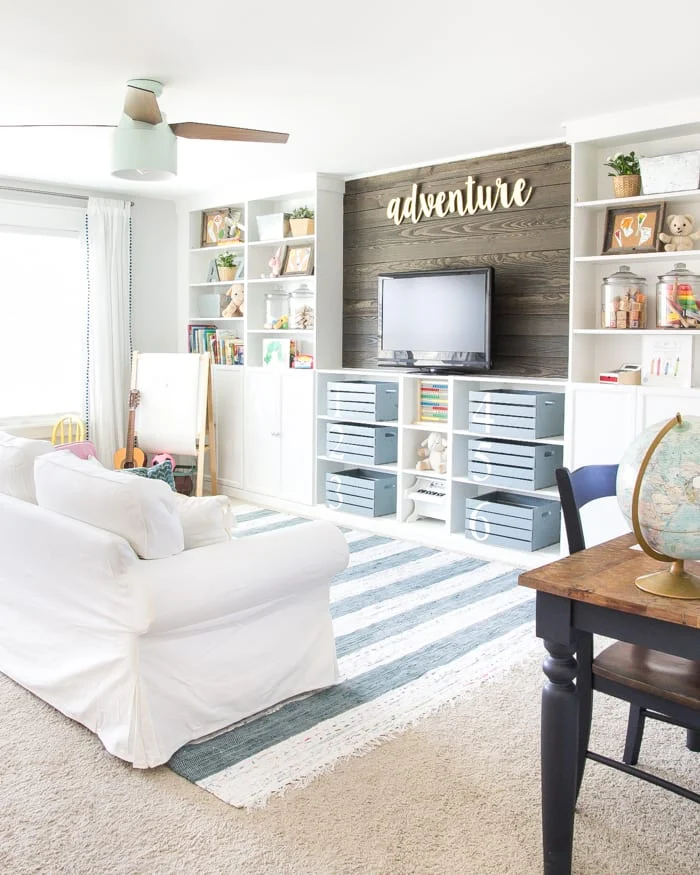
One of the most popular ways to hack the BILLY bookcase is to use the shelves as a framework for faux built-ins. Many DIY enthusiasts have been inspired to hack the Billy, like the bloggers at Bless’er House, who used this technique in their kids’ playroom. Using BILLY bookcases for mock built-ins offers a stylish and affordable way to put your decorative skills to the test, not to mention an opportunity to get creative with color and texture. With the right amount of wood glue, paint, and a few personal touches, you can transform an ordinary bookcase into a stunning and practical addition to any living space.
Billy Bookcase Pantry

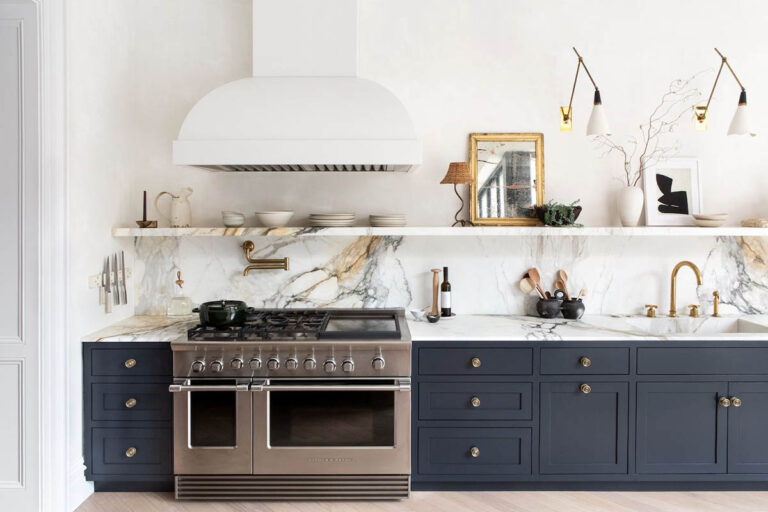
Finding enough storage space in the kitchen can be a challenging task. However, there’s a piece of furniture that can make it much easier: the BILLY bookcase. Interior designer Kellie Berard used a pair of the bookcases as open kitchen storage – the bookcases works like a dream when used as open kitchen storage. Its versatile design and adjustable shelving make it easy to store anything from your daily crockery to your cookbooks. Berard even added crown molding to give it a more high-end look that complements the rest of the decor. So if you’re struggling with storage in your kitchen, why not try this creative solution?
paint Your Billy Green

Am I the only one who thinks most things look better green? It’s such an earthy and versatile color that adds so much character to just about anything. Take these BILLY bookcases, for example. With just a simple coat of green paint and some beadboard paneling, they now look way more expensive than they actually are. It’s amazing how a few simple creative touches can completely transform an ordinary piece of furniture into something truly remarkable!
Check out some beautiful green bedroom inspo right here!
Turn Your BILLY Bookcase into a Stylish Cabinet

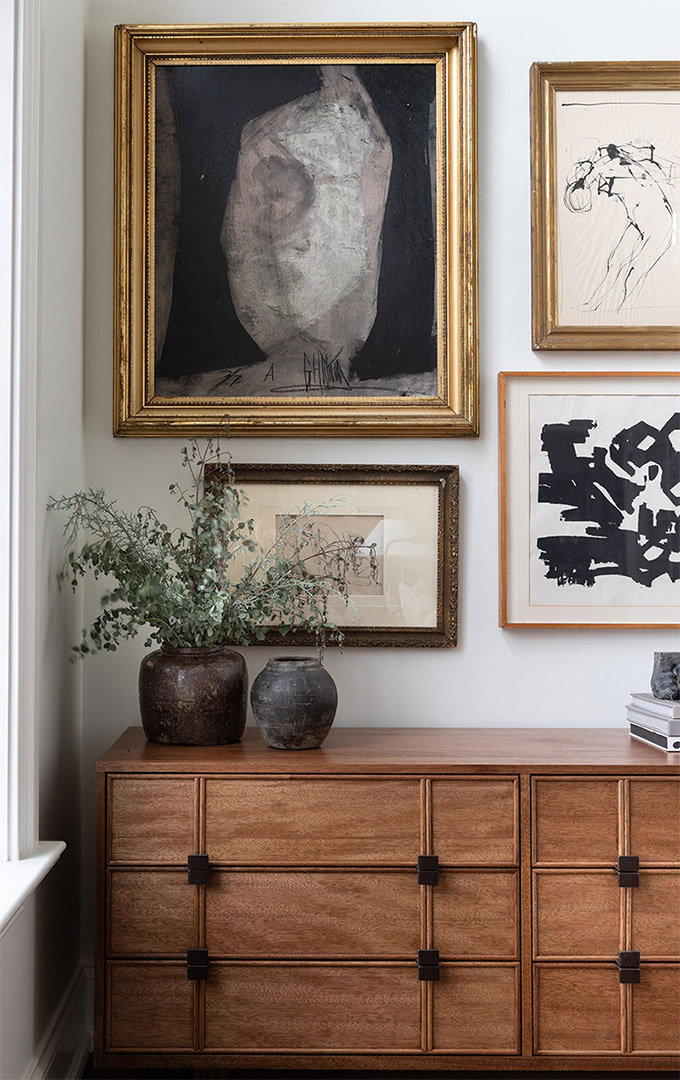
One of the customization options the BILLY bookcase comes with is glass-front doors. While the cabinet is lovely as is, with a little black paint and some extra trim, it’s a great dupe for more expensive versions like the ones from Studio McGee and Crate & Barrel.
BILLY Bookcase Mudroom Storage

Don’t have a dedicated mudroom? You can use the BILLY IKEA bookcase to fake mudroom-style storage in an entryway. To get the look, paint three BILLY bookcases with glass cabinet fronts in the color of your choice (paint the glass, too!), then line them up side-by-side.
Fluted BILLY Bookcase Hack

The secret to getting the reed-like wood detail on the base of this bookcase? Fluted chair rail molding. The wood-stain look at the back of the bookcase is wood-grain contact paper.
Reeded details are all the rage these days. These are shallow, parallel lines that are engraved into a surface to create a sense of texture and depth. The use of reeded details can be traced back to ancient architecture and metalworking, but it has recently made a comeback in contemporary design. With their ability to catch the light in unique ways, reeded details can take even the simplest designs to the next level of style ✨
Cane BILLY Cabinet Hack

Another of the most popular Billy IKEA hacks happening on the internet right now? Adding cane webbing to the doors of your Billy bookcase. Cane furniture is a big trend right now, but it’s also expensive, which makes this hack so appealing.
Create a bILLY library

A great way to add stylish storage to any room is by creating a bookcase that appears as a single unit. One method to achieve this look without committing to a built-in bookcase is by arranging a set of BILLY bookcases in a row and adding some extra wood trim to create a cohesive aesthetic. These bookcases not only provide ample space but also an opportunity to inject your personal style into your living space!
How can I make my BILLY bookcase look better?

As you may have guessed from the examples I’ve chosen for this post, in my opinion, the best way to make a Billy bookcase look better is to make it look like it’s built-in. I always go on about how built-ins are timeless and repurposing Billy bookcases is a much less expensive way to get the built-in look. It’s a fairly simply upgrade that makes the entire unit look custom, and much more expensive than it actually is.
However, if you’re not into the built-in look, you can also try some simple upgrades like painting the bookcase, adding drawers or doors, or attaching decorative molding to the top of the bookcase.
How do you jazz up a BILLY bookcase?
There are a few easy ways to jazz up your simple BILLY Bookcase.
The easiest way to jazz up a BILLY bookcase is with IKEA’s customization options for the shelf. The OXBERG line of doors allow you to turn the bookcase (or part of it) into closed storage or cabinets. From there, you can add your own hardware and/or paint to create a more custom-looking unit.
Or, you can choose to skip the OXBERG additions and update it with paint or wallpaper. Painting your bookcase to match your walls can make the unit look more like a built in, even if you do nothing else. Or, paint it an accent color to add a fun accent. As we saw earlier, wallpapering the back of the bookshelf before you finish building it also a simple way to add style to the shelf. Painting IKEA furniture is easy if you know how – I wrote a super in depth article about that so make sure to bookmark it for later!
Another way to jazz up the BILLY bookcase is by adding texture to balance out the simplicity of the design. Popular DIY upgrades include adding cane webbing or fluted wooded trim to the OXBERG doors that come with the bookcase.
How do i make my bILLY bookcase look built-in?

Achieving a built-in look for your BILLY Bookcase requires attention to detail in three key areas: a proper base, stylish trim, and the right paint. To avoid the finished product looking like several bookcases haphazardly cobbled together, it’s imperative that all traces of a patchwork appearance are disguised. It’s not that hard!
A base is another key component of a built-in bookcase look because, even if you purchase a BILLY bookcase that’s close to the height of your ceiling, there’s a good chance it won’t be perfect. Building a base for the bookcase allows you to customize the height of the bookcase so that it sits close enough to your ceiling. The base also allows for a thicker piece of trim at the bottom of the cabinet. Which brings me to my next point: trimwork.
You’ll definitely want to add trimwork on the top and bottom of the shelves. If your room already has molding, make sure you use the same kind on your bookcases. If you have multiple bookcases side-by-side, you’ll also want to add a piece of trim to cover the gap between the set of shelves, which will again make the unit look like a built in.
Once you have your trim in place, make sure to fill in an nail holes. The final step is to paint the entire bookcase to match your walls.
The IKEA Billy bookcase is a versatile and affordable piece of furniture that can be customized in so many creative ways! From adding wallpaper or molding, to using it as a room divider or even a built-in bookshelf, there are countless hacks and ideas to make the Billy bookcase fit your style and needs. Whether you’re a DIY enthusiast or just looking for inspiration to upgrade your home decor, these hacks offer a fun and budget-friendly way to transform a basic bookcase into a statement piece. So why not give it a try and see what amazing things you can create with the IKEA Billy bookcase! Let me know in the comments if you go for it!
More great IKEA hacks: