How to Make a DIY Christmas Stocking Out of a Pillowcase (in under an hour)
This post may contain affiliate links. If you make a purchase through one of my links, I may make a small profit at no expense to you. For further information, please view my policies.
In this article, you will learn how to make a DIY Christmas stocking out of a pillowcase!
This is a pretty easy beginner’s sewing project and great if you are short on time. This Christmas craft took me under an hour to complete.

Instead of overspending on a store-bought Christmas stocking, I knew I wanted to make my own this year.
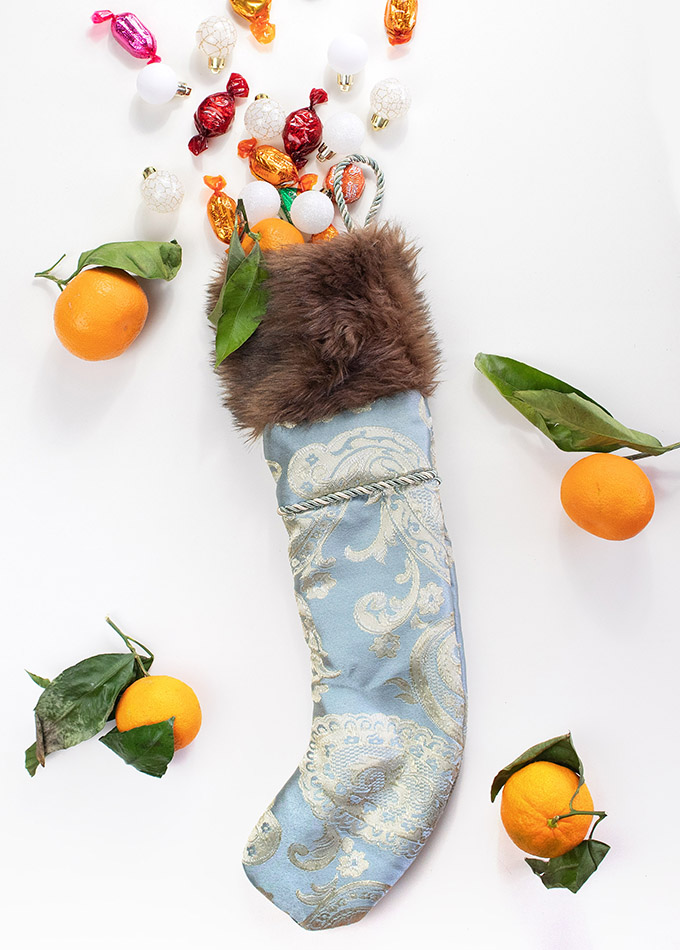
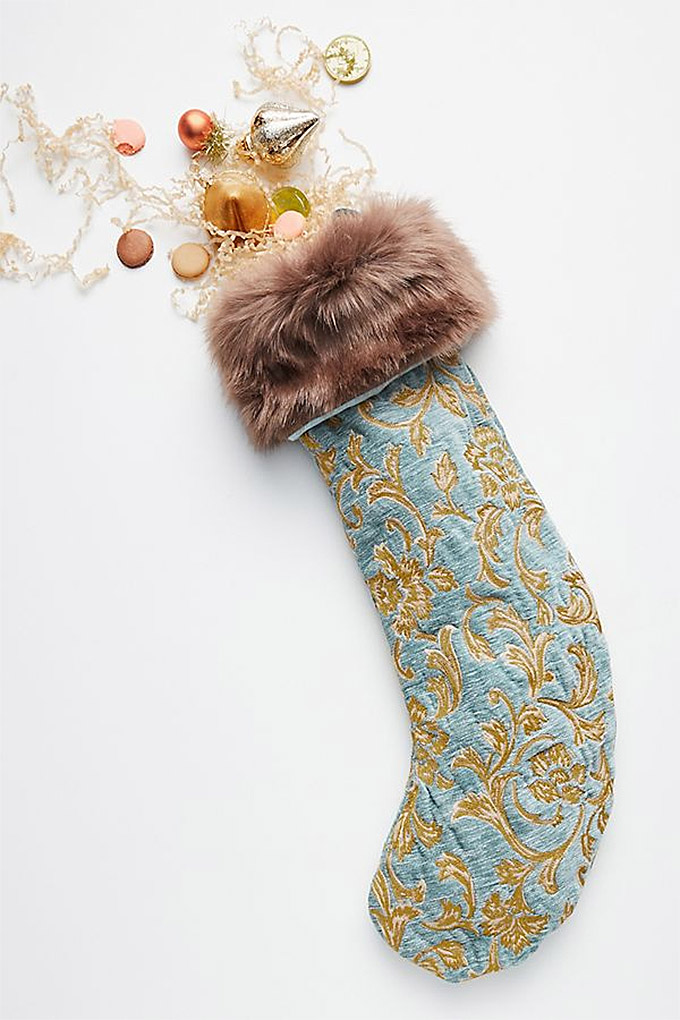
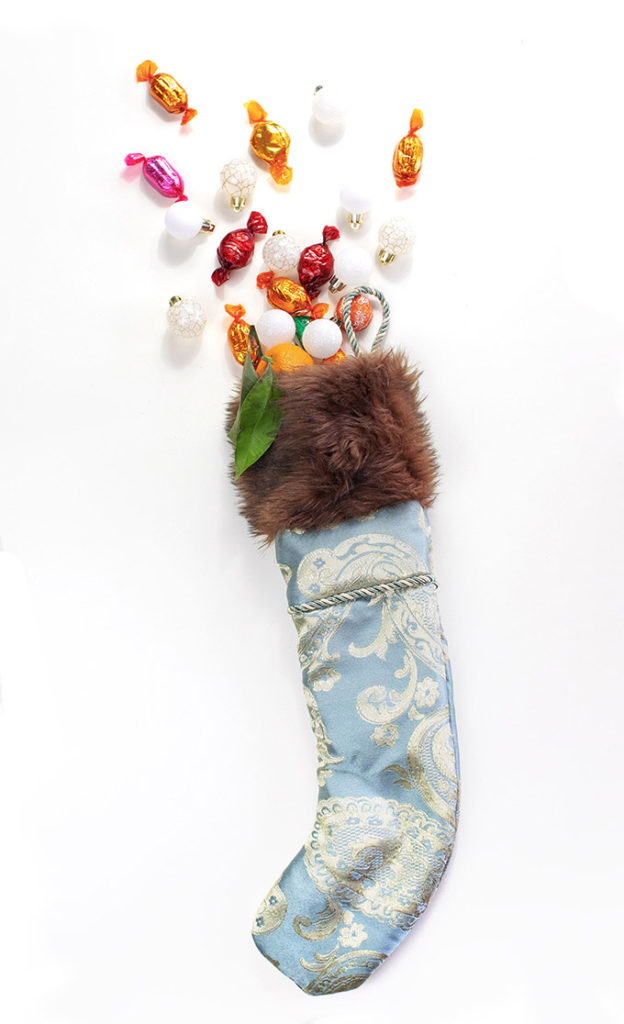
My DIY Christmas stocking was inspired by the beautiful Belle Stocking from Anthropologie, which costs $48! There is a photo further down in the post so you can see what it looks like!
I had been eyeing all the lovely Anthropologie Christmas stockings for awhile, but they were not in a price range that I was able to justify. Pretty sure my husband would think I went crazy if I spent $48 USD on a Christmas stocking that, let’s be real, you can easily make yourself.
I got my fabrics at the thrift store for $7, so I saved $41 by doing it myself.
Make your own affordable version of a $48 Anthropologie Christmas stocking for much less.
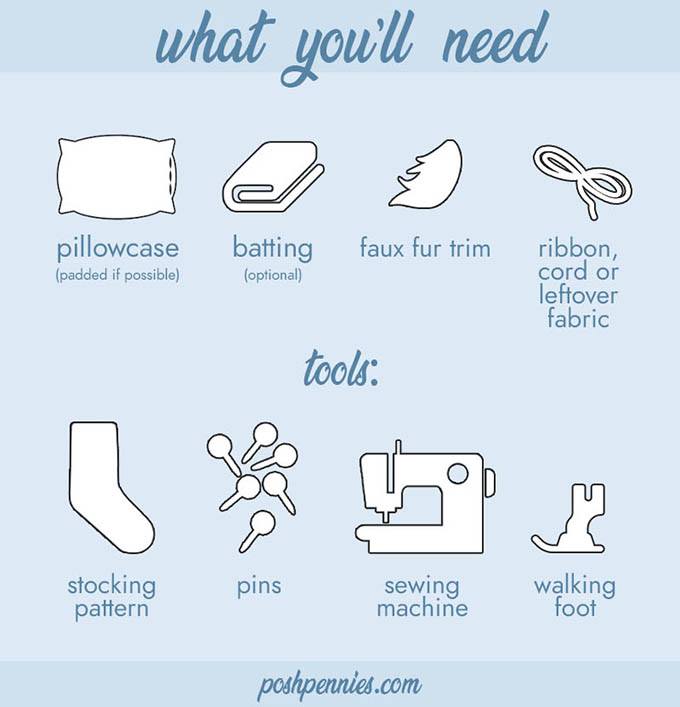
What you will need:
FABRICS:
- 1 old pillowcase with a nice pattern, the padded kind works great
- light batting or interfacing (optional)
- faux fur trim
- ribbon, cord or leftover fabric
TOOLS:
- pattern of a stocking, or use an old stocking to trace around
- pins
- sewing machine (I use this machine from Brother, it’s awesome)
- walking foot (optional but makes things MUCH easier!)
About the Fabrics I Used For This DIY Christmas Stocking Project
I went to the thrift store to search for materials that I could use for this project.
Why didn’t I go directly to the fabric store?
Because initially, my idea was to make a DIY stocking out of an old sweater, so I was searching for a nice cream-colored sweater I could chop up and use.
| THRIFTING TIP → I suggest looking in the bed linen, curtain/tablecloth and fabric remnant sections for pretty, heavier weight fabrics. |
If you’re not in love with the idea of hunting around for second-hand fabrics and you want to make your life easier, then head to your nearest fabric store. I recommend using upholstery fabric (versus quilting fabric) for this project, as it’s got more weight to it.
The Main Fabric
If you are going to attempt this project, I’d suggest looking for a fabric that has the same sort of palette as the Anthro fabric! Any fabrics with a blue base and gold or orange motifs will work great. Embroidered fabric is a plus, but it’s not always easy to find at a thrift store!
Of course if you were feeling ambitious, you could always do the embroidery yourself! Check out this post on how to embroider for beginners.
As I was browsing, I noticed a pillowcase that sort of reminded me of the Anthropologie Belle stocking. The pillowcase was only $4.99!
It was made out of faux silk fabric with a machine embroidered paisley pattern. It also had a nice decorative cord that I wanted to repurpose as the loop to hang the stocking with.
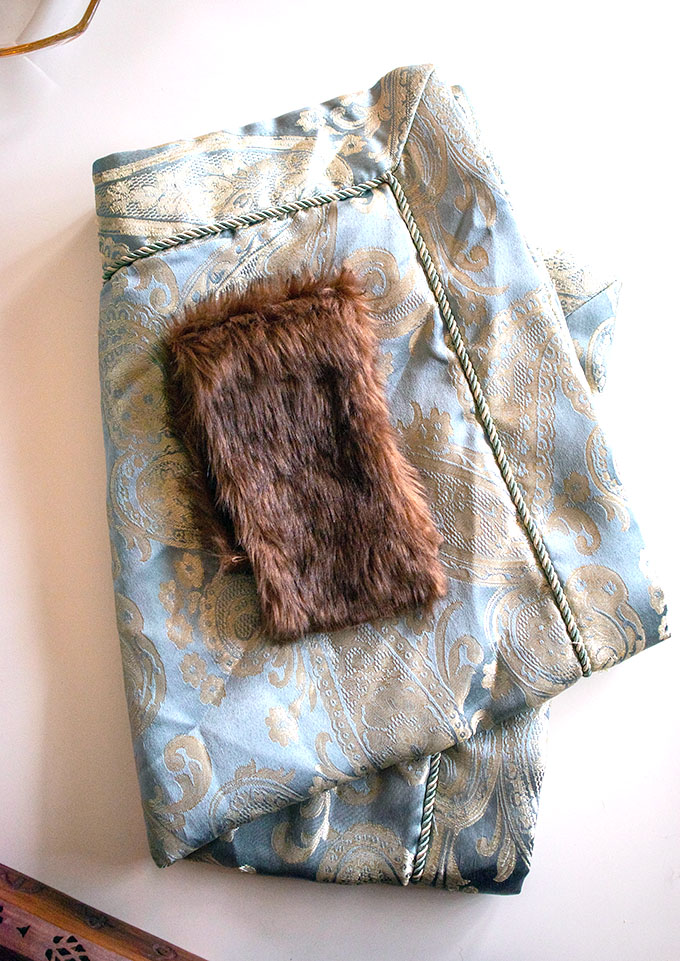
The pillowcase was perfect because it already had batting, so I knew it would make the stocking nice and cushy.
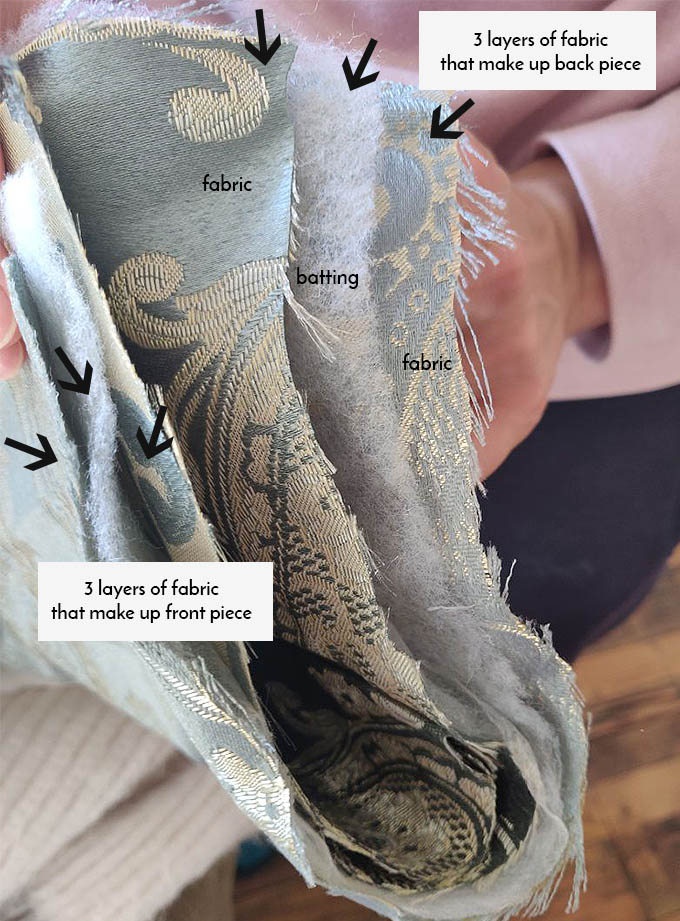
Just some advice: if you find a fabric that is too thin, I would definitely recommend adding some interfacing or batting to give your stocking some weight.
Mine ended up being thick enough that I needed a walking foot in order to sew it up. If your pillowcase doesn’t have padding, you can probably manage this project without a walking foot.
My sewing machine actually comes with a walking foot included and it’s been such a lifesaver for projects like this.
- Cost: Second-hand pillowcase – $4.99
Faux Fur Trim
As for the fur trim, the easiest and cheapest thing to do is just buy Christmas stockings at the dollar store and use the fur from those.
I bought a $2 stocking at the thrift store and repurposed the fur from that.
Or if you have an old stocking at home that has fur, grab it from that! Nothing beats free!
- Cost: Second-hand stocking – $2.99
The Pattern
I like the shape of the Anthro stocking because it’s kind of wonky and looks handmade. I’m not the most precise person I know, so I didn’t exactly trust myself to draw the pattern directly on the fabric. I decided to sketch it out on paper to be safe.
You can download my pattern here if you’d like to use it as well.
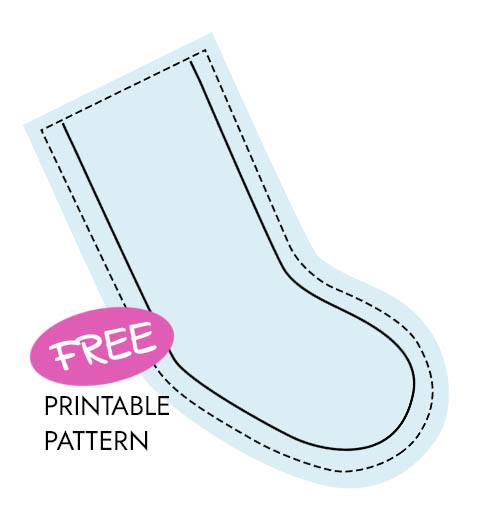
My free printable pattern is a 2 page pdf file – it will print out on 2 separate 8.5″ x 11″ sheets of paper and you’ll need to tape them together. The dashed outer line is the cut line, the solid inner line represents where you’ll sew.
I included a rough 5/8″ seam allowance. Honestly, I’m not really sure if it’s exactly 5/8″ – I just sort of eyeballed it. If you’re looking for engineered precision, this ain’t the right blog 😛
- Cost: free
How To Turn a Pillowcase Into a Christmas Stocking
Step 1. Fold your pillowcase in half width-wise.
Step 2. Place the pattern along the top edge of your pillowcase and pin it in place. Make sure you pin through all the layers. You can download my pattern or trace around a Christmas stocking you already have.
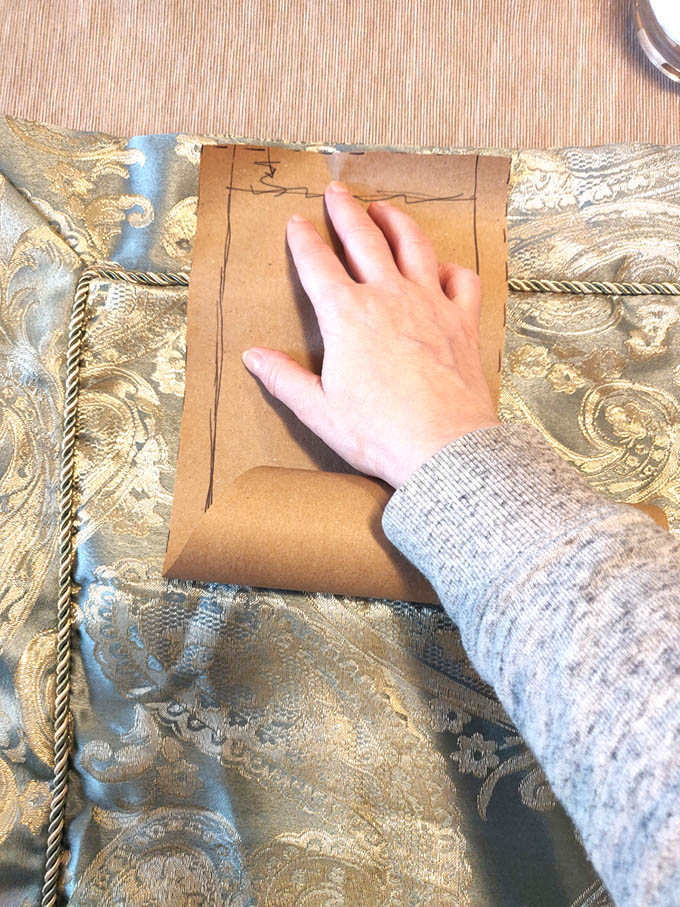
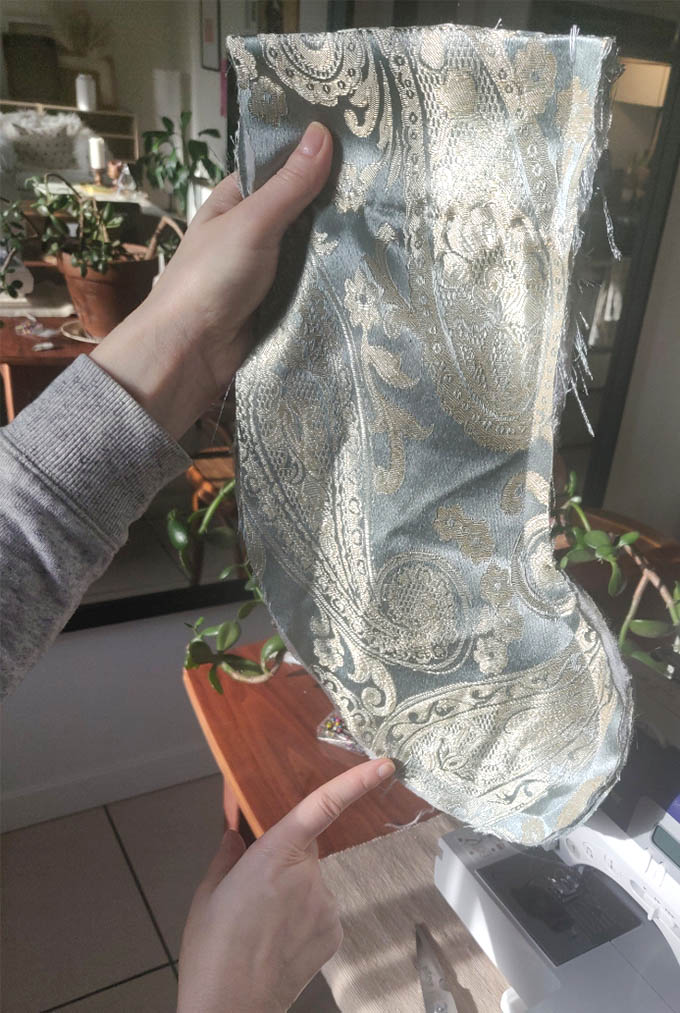
Step 3. Trace pattern onto the fabric then cut it out.
Step 4. Place the cut-out pieces with RIGHT SIDES FACING each other and pin together.
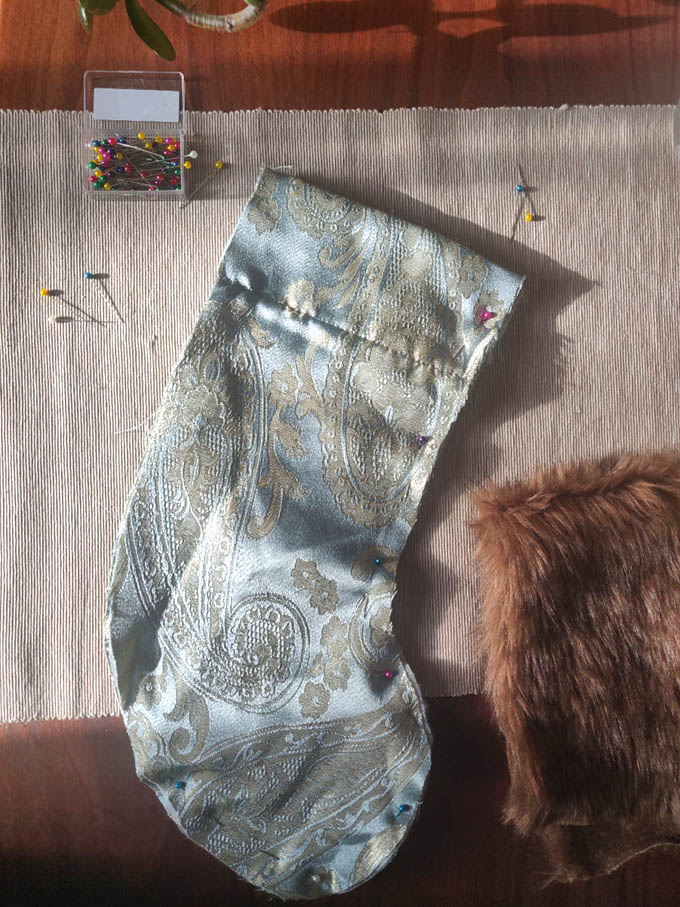
Step 5. Sew the front and back pieces together with a 5/8″ seam allowance, stopping halfway around the stocking. Don’t forget to backstitch here! And obviously don’t sew up the top of the stocking closed 😛
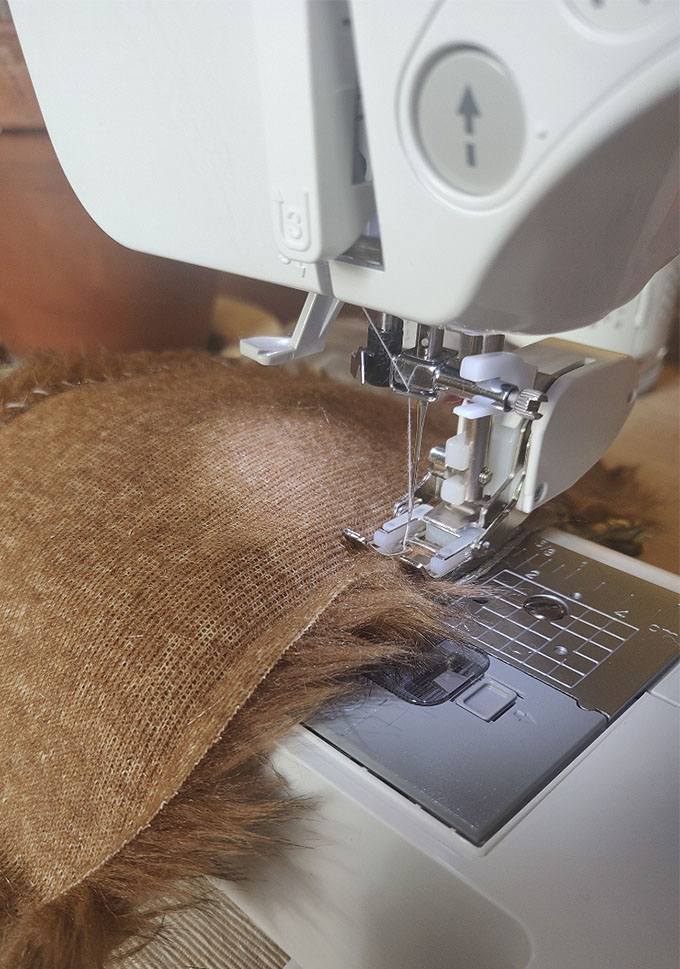
Step 6. Open up the stocking and pin the fur trim onto the top edge of the stocking, RIGHT SIDES TOGETHER.

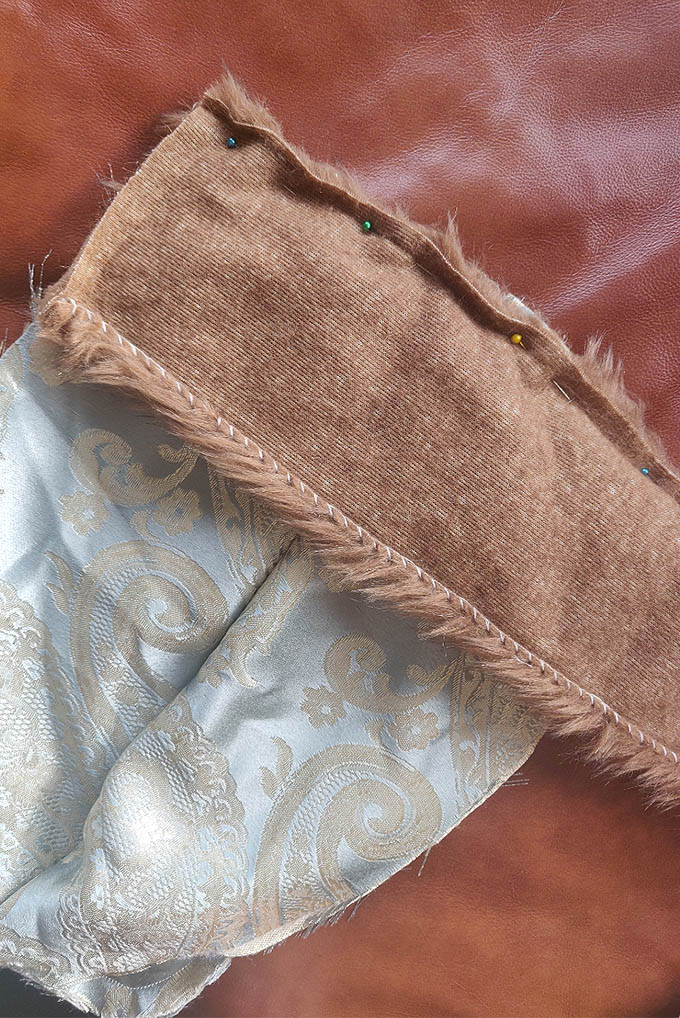
Step 7. Sew the fur trim across the top edge of your stocking, then trim off any excess fur.
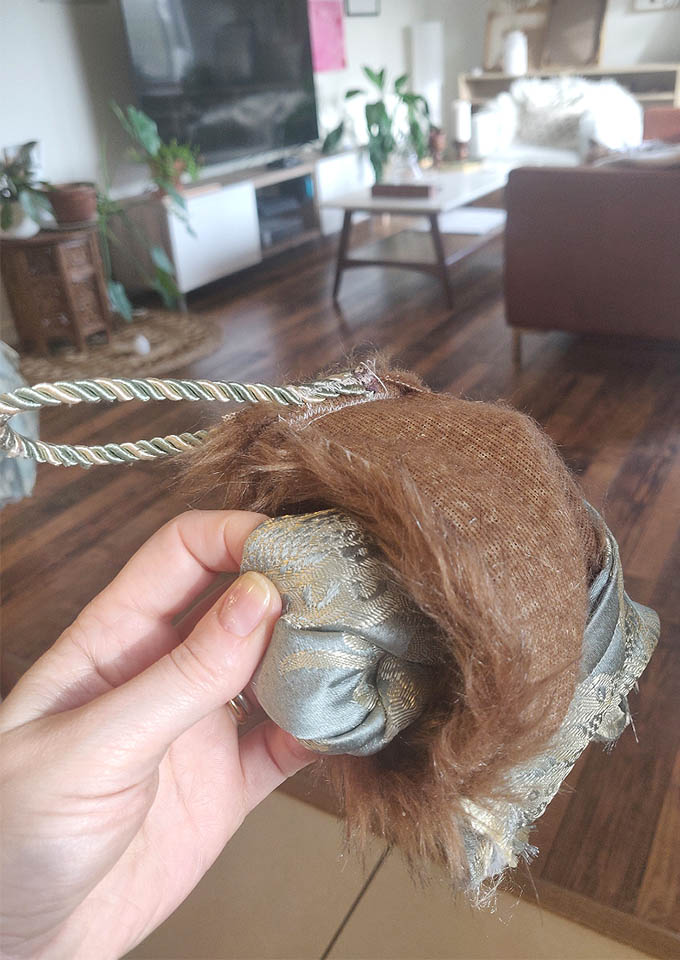
Step 8. Now that the faux fur trim is attached, you can sew the whole stocking closed. With right sides together again, continue sewing up the rest of the stocking, picking up where you left off in step 5.
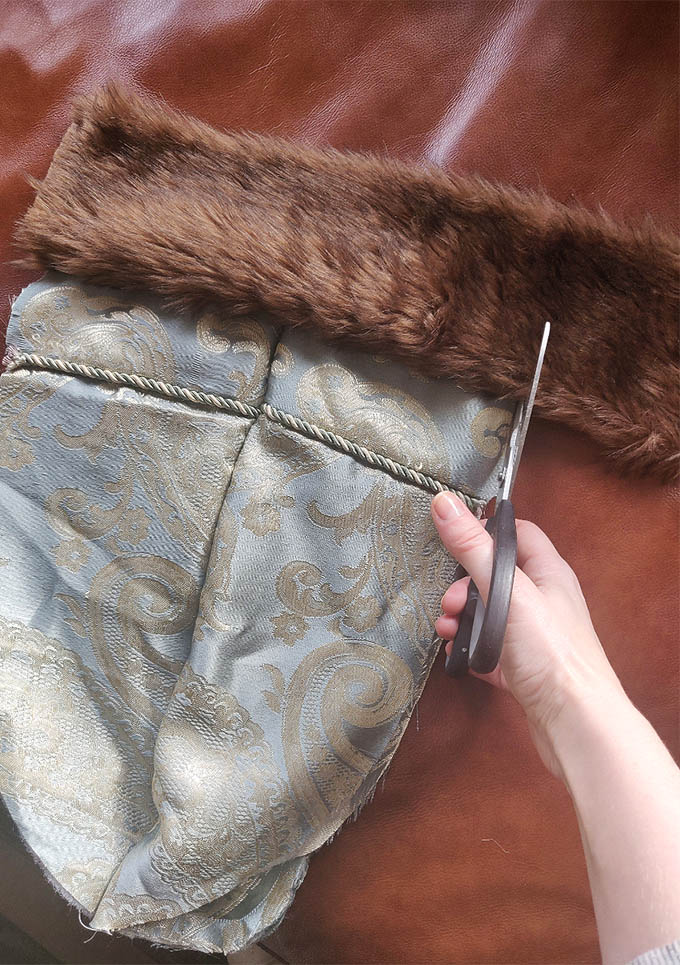
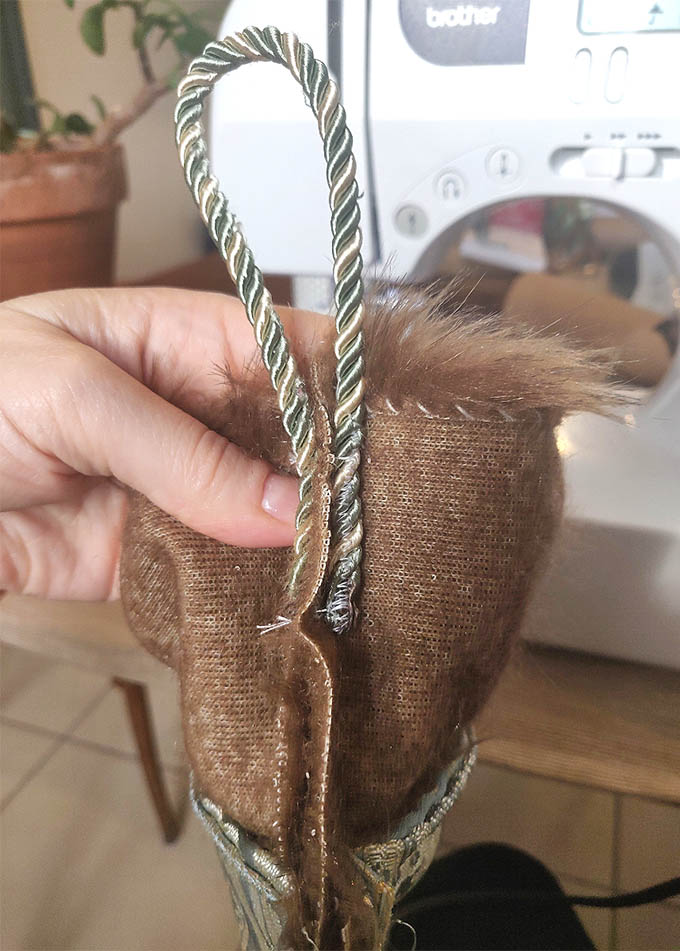
Step 9. Use cord, ribbon or leftover fabric to sew a loop to hang your stocking. Sew the loop into the fur’s vertical seam allowance so that all the stitches are hidden. I used a zig-zag stitch to make sure it was attached really well.
Step 10. If you want, you can trim away any bulky seam allowance. Otherwise, just turn your stocking right side out! And you’re done!
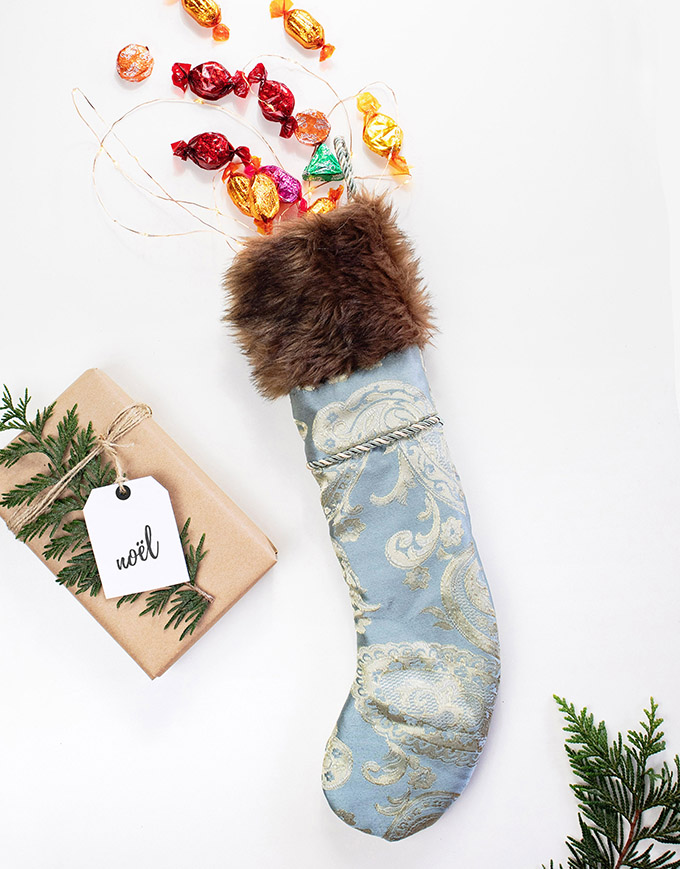
Hooray, you’re done!


My Anthropologie knock-off stocking isn’t an exact replica by any stretch, but it’s close enough that I’m happy with it! I’m also really happy to have a unique, handmade Christmas stocking that only cost me $7 to make 😛
I would love to know if you try making this DIY Christmas stocking – tag me on Insta @poshpennies if you do! ♥
Lastly, don’t forget to hang your shiny new Christmas stocking on a stocking holder!!
Other Christmas posts you might like:
- Genius Storage Ideas For Your Christmas Decorations
- 10 Simply Stunning Scandinavian Christmas DIY Decorations
- How to Decorate a Christmas Tree in 7 Easy Steps
- Get The Look: Black And White Rustic Christmas Mantel
- Everything You Need to Know About Christmas Tree Collars
- Free Minimalist Christmas Gift Tags – Beautiful and Easy To Make!
- Christmas Stocking Holders – Where to Get the Best Ones


This looks amazing! I love it 😍 And I can’t believe the price difference 😱